Why Museum Tote Orders Need a Different Spec
Museum buyers are not ordering a simple promotional bag. The tote has to carry books, catalogues, postcards, and small retail items without twisting at the handles or collapsing at the base. It also has to look credible on a shop shelf. That combination changes the spec: a bag that is visually fine but weak at the seams will still fail in a museum store because the use case is heavier and the presentation standard is higher.
Start the RFQ from the actual use case. A museum shop tote, a membership premium, and an exhibition launch bag may share artwork but not the same load target, folding requirement, or delivery date. If the bag will sit in retail, the folded profile and label placement matter. If the bag will be used for books, handle reinforcement and seam durability matter more than a perfectly cheap decoration method. In procurement terms, the right tote is the one that survives the expected load and still reorders cleanly.
The most efficient way to control that is to define the finished product, not the blank. Ask the factory to quote the bag as a finished retail object: dimensions, construction, decoration, packing, and destination. That prevents the common problem where every supplier quotes a different interpretation of the same museum tote and the buyer ends up comparing incomplete numbers.
Size, Load, and Fabric Weight Set the Baseline
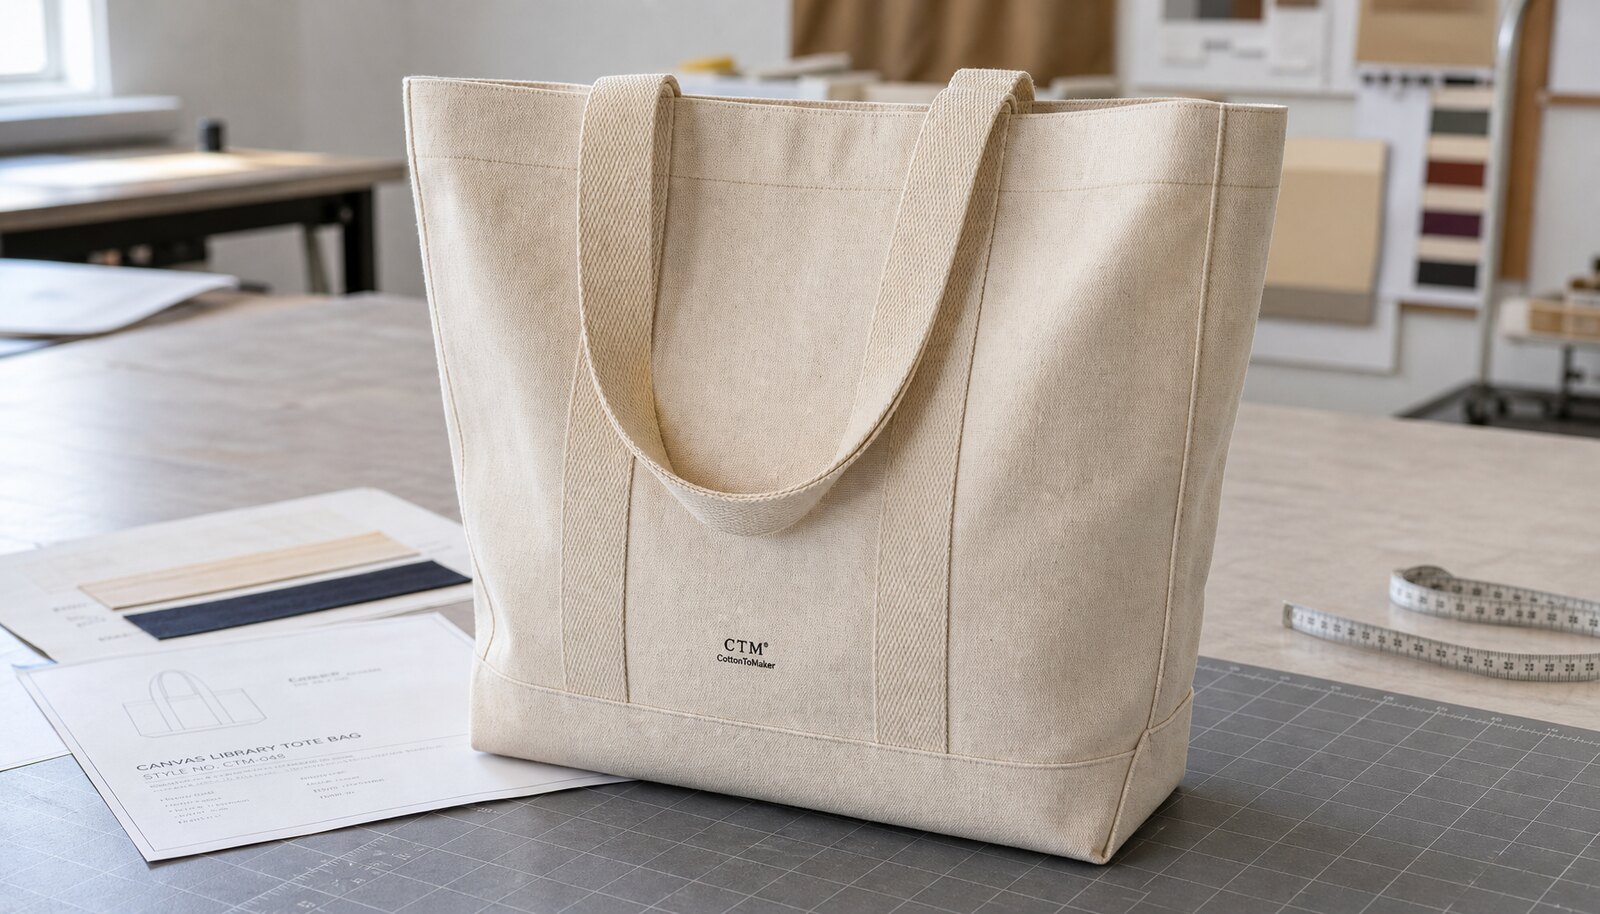
The first decision is not the logo. It is the capacity. A tote sized for a folded leaflet is not the same as a tote that must hold a hardback catalogue and a water bottle. For a museum library tote, the safest starting point is a medium to large body with enough gusset to stand upright and enough depth to keep the contents from prying open the seams. If the tote will regularly carry books, specify the expected contents or weight range in the RFQ so the factory can judge seam reinforcement and bottom construction.
Canvas weight affects both durability and perceived value. A light canvas can be acceptable for low-load giveaways, but it usually looks thin next to premium museum merchandise. For standard museum retail use, many buyers start around 10 to 12 oz, roughly 340 to 410 GSM. Heavier book-carrying or premium retail versions often move to 14 oz or above, depending on weave density and finishing. The useful question is not which weight sounds premium. It is which weight gives enough structure without pushing the tote into an overly stiff or expensive build.
The weight decision is tied to sourceability. Stock natural canvas is easier to buy quickly and usually has a lower MOQ. Custom dyed or custom woven fabric makes the order slower and less flexible because the fabric mill becomes part of the schedule. If repeat orders matter, lock the canvas weight and finish early. Changing GSM later often changes hand feel, print appearance, and folding behavior, which means the new run is not a true reorder even if the artwork is the same.
- Standard museum retail tote: around 10 to 12 oz or 340 to 410 GSM.
- Heavier book tote: often 14 oz plus when the load and shelf life justify it.
- If the bag is unlined, use denser weave or stronger bottom reinforcement to preserve shape.
- State whether the canvas should be natural, bleached, washed, or dyed after weaving.
Fabric Sourcing Is Where MOQ Starts to Move
MOQ is driven as much by fabric sourcing as by sewing. A factory can often keep the quantity low if it uses stock canvas, standard color, standard handle material, and one simple artwork location. MOQ rises quickly when the buyer asks for custom dye, custom weaving, special wash effects, or a fabric finish that must be run only for that order. This is the first hard threshold in museum tote procurement: stock fabric and standard trim are negotiable; custom fabric is structurally more fixed.
Ask the supplier where the fabric comes from and what it is in the factory’s control. If the mill is supplying greige canvas and the factory is cutting and printing in house, the lead-time risk is mainly around mill availability and decoration approval. If the fabric must be dyed or prewashed before production, the schedule has an extra gate that cannot be compressed by a faster sewing line. That distinction matters because buyers often try to shorten a project by pushing the factory harder when the real bottleneck sits upstream.
Repeat orders introduce another risk: shade drift. Even when the spec is unchanged, the same natural canvas can land slightly different from roll to roll. That is usually acceptable if the buyer set a shade band in the sample approval, but it can be a problem if the museum expects all replenishment stock to match the first drop exactly. For reorders, lock the approved fabric swatch, the shrinkage range, and the handle material reference so the second run is not “close enough” in a way that hurts shelf consistency.
- Stock canvas and standard handles support the lowest MOQ.
- Custom dyeing, special washing, and custom weaving increase the MOQ quickly.
- For repeat orders, keep the approved fabric swatch and shade tolerance on file.
- Ask whether the factory buys canvas from stock rolls or reserves mill production for your order.
Decoration Constraints Change Both Cost and Lead Time
Decoration is where a tote becomes a procurement puzzle. Screen print is usually the best fit for a simple museum logo, a one-color exhibit mark, or a repeat program with stable artwork. It has setup cost, but once that setup is paid, unit economics are strong. Digital print is the better fit for detailed art, gradients, or short runs with low setup tolerance. Embroidery and woven labels have a premium feel, but they also add labor, shape distortion, or positioning risk if used too broadly on the front panel.
The practical threshold is not just the method. It is the combination of color count, print size, and placement. A one-color chest logo on a light canvas bag is easy. A large, multi-color graphic crossing seam lines is slower, more expensive, and more sensitive to alignment. Dark canvas adds another layer because the ink may need an underbase to hold color. That underbase can increase setup time, cure time, and the risk of a stiff hand feel if the artwork is large.
Buyers should also ask where decoration is applied in the production sequence. Printing before sewing can improve flat-panel alignment, while printing after sewing can be better for some finished-bag graphics. Each path has tradeoffs. Pre-sew printing is usually cleaner for large front-panel graphics, but it can be limited by cutting waste or panel orientation. Post-sew printing can be more flexible, but it increases the chance of print position drift. The right answer depends on the artwork and the factory’s actual process, not just the quote sheet.
- Use screen print for simple logos and stable repeat volume.
- Use digital print for artwork-heavy pilots or low quantities.
- Treat embroidery and woven labels as accent methods, not default front-panel treatments.
- Ask whether the print is applied pre-sew or post-sew, and whether dark canvas needs an underbase.
What Is Negotiable, and What Is Fixed
The clearest procurement mistake is to negotiate the wrong variables. Some parts of the order are flexible, while others are fixed by the production process. Handle length, carton format, and minor label placement are often negotiable if the factory has room in the pattern or packing line. Fabric type, seam construction, and print method are much less flexible because they define the entire production route. If the buyer wants a lower MOQ or shorter lead time, the right lever is usually simplification, not pressure.
There are three hard thresholds that matter. First, custom fabric or custom dye turns a standard tote into a sourced item, which usually raises MOQ and adds lead time. Second, additional decoration complexity, such as multiple screens or large artwork coverage, increases setup time and can create a new minimum quantity. Third, retail-ready packing is a labor step, not a cosmetic choice. Once the buyer asks for tissue, inserts, barcode stickers, or folded retail presentation, the factory needs more time and often more carton control.
A useful way to think about this is: what can be changed without changing the manufacturing route? If the answer is yes, it is probably negotiable. If the answer requires new fabric, new print tooling, or new packing labor, it is a structural change. Buyers get better quotes when they separate those two buckets in the RFQ, because the factory can see which requirements are fixed and which ones are being optimized for cost or schedule.
- Negotiable: handle length, minor label placement, carton format, some folding details.
- Fixed or near-fixed: fabric sourcing, dye method, seam construction, and print tooling.
- Retail-ready packing is a labor step and should be priced separately, not buried in the tote price.
- Ask the factory which items change the production route and which ones only change labor.
Lead Time Is a Chain of Gates, Not One Promise
A believable lead time starts with the sample stage, not with bulk production. For a straightforward museum tote, a first sample can often be ready in about 5 to 10 days if fabric and artwork are clear. If the factory needs to source a specific canvas lot, make a custom dye, or revise artwork placement, the sample clock expands immediately. A quote that ignores sample time is incomplete, because bulk production normally cannot start until the buyer has approved the physical sample, not just the PDF.
After sample approval, the production clock is made up of separate steps: fabric receipt, cutting, printing, sewing, finishing, packing, and carton release. Stock-material orders with simple decoration often move through bulk in roughly 20 to 35 days after approval, depending on the factory’s workload and seasonality. If the order uses custom fabric, special washing, or more complex packing, it is more realistic to assume an extra one to two weeks before the first saleable carton is ready. Those are not vague delays. They are the normal result of adding process steps.
The buyer should ask one direct question: what part of the timeline can your factory actually compress? In many cases, printing and sewing can be overlapped only after the fabric and art are frozen. Freight can be accelerated with air shipment, but it cannot recover time lost to a late sample revision. That is why procurement should separate factory lead time from shipping lead time in every quote review. If the supplier cannot do that cleanly, the schedule is not yet defined well enough to order.
- Treat sample approval as a hard gate, not a courtesy step.
- Separate factory lead time from freight time in the quote.
- Expect longer schedules when fabric is custom, artwork is complex, or packing is retail-ready.
- Ask the factory which steps are serial and which steps can run in parallel.
Compare Sourcing Routes on Cost, Time, and Risk
The lowest ex-works price is not the best sourcing route if it hides schedule or QC risk. A direct factory with in-house sewing and print control is usually the best option when the museum wants repeatability. It keeps sample control, shade control, and print control in one place. A factory-plus-printer split can work when the artwork is complex or the sewing plant is strong but the decoration line is weak, but the buyer inherits two approval calendars and more chance of delay. A trading company or consolidator can help when the buyer needs multiple categories on one PO, yet the real factory and its QC capability are less visible.
Local decoration on imported blanks is often the fastest option for urgent museum events or replenishment orders. The tradeoff is that the blank tote is fixed before decoration begins, so the buyer has less control over body construction, handle reinforcement, and fabric consistency. Regional stock programs are similar: they reduce lead time because the blank already exists, but the buyer must accept fixed sizes, fixed colors, and whatever stock trim the supplier has on hand. For reorders, those fixed choices can be a feature if speed matters more than exact spec continuity.
For larger museum chains or multi-site rollouts, a dual-source split order can be sensible, but only if the master sample and carton spec are tightly controlled. The buyer should use it to reduce supply risk, not to chase two unrelated quotes. If the two factories are not matching the same canvas shade, print plate, stitch count, and packing standard, then the savings on paper will disappear in receiving complaints and inconsistency at the store level.
- Direct factory: best control and best repeat-order path.
- Factory plus printer: workable, but approval coordination matters.
- Local decoration on blanks: fast, but base quality is fixed before the buyer sees it.
- Regional stock: fastest route when the buyer can accept standard size and color.
- Dual-source: useful for volume resilience, but only with a tight master spec.
Use Sample Approval to Prevent Reorder Drift
Most tote disputes start with a sample that was approved too loosely. A museum buyer should treat the sample as a binding reference, not as a visual example. That means dimension checks, seam checks, handle checks, and print checks should all be written down before approval. If the tote will be sold alongside books or art objects, load it with the actual item weight and inspect the bag under that condition. A bag that looks neat when empty can still pull poorly at the handle stitch or bottom seam once loaded.
The sample also needs to prove branding details. Label placement, hangtag position, side tab location, barcode space, and fold direction should all match the intended retail presentation. If the buyer wants a natural canvas tote, some shade variation is normal, but the acceptance band should still be stated. If the buyer wants a premium finish, reject rough cut edges, asymmetric handles, loose threads, and crooked topstitching even when the bag technically meets size. Those defects are not cosmetic noise in a museum store; they are the product.
For repeat orders, keep the approved sample, measured spec sheet, and artwork version in one record. Reorders fail when a buyer references only the artwork file and forgets the sewing details or packing details that were informally agreed on in the first run. The safer approach is to lock the approved sample number, the fabric swatch, and the carton format before the first PO closes. That reduces re-approval time and makes future quotations comparable.
- Approve the sample as a physical standard, not just a look.
- Load-test the bag with the real books or merchandise it will carry.
- Lock the sample number, fabric swatch, and artwork version for reorders.
- Reject defects that affect shelf presentation, not just obvious damage.
Packing and Cartonization Affect Retail Readiness
Packing is a production step, not a warehouse detail. If the tote is for direct retail, the buyer may want it folded a specific way, with tissue, insert board, barcode sticker, and a shelf-ready finish. That adds labor and can extend the lead time, but it reduces receiving friction at the destination. If the tote is for bulk distribution or event handout, a simpler fold-and-carton approach is cheaper and faster. The right answer depends on where the bag will be opened and who will handle it next.
Carton planning should be part of the quote review. Overstuffed cartons can crush handles, flatten the gusset, and create print transfer from one folded bag to another. Underfilled cartons increase freight waste and make the carton less stable. The quote should state units per inner pack, inner packs per master carton, carton dimensions, gross weight, and whether the cartons are export-ready. If the buyer is shipping to multiple museum locations, carton marks and packing lists need to be standardised so the receiving team can identify the right route without opening every carton.
A good procurement note is to ask where the packing operation happens. Sometimes the bag is sewn in one plant, decorated in another, and packed in a third. That may be fine if the schedule is generous, but it adds handoffs and makes damage attribution harder. For time-sensitive museum launches, the simplest path is usually the strongest path: fewer handoffs, fewer cartons to rework, and fewer ways for a finished tote to become a partial order during transit.
- Define whether the tote ships bulk packed or shelf ready.
- Confirm carton count, carton size, and gross weight before freight booking.
- Use one carton label format across all delivery sites.
- Ask whether packing happens in the same facility as sewing and print.
Land the Cost Before You Approve the Order
A museum tote quote can look inexpensive until freight, duty, packing, and domestic handling are included. Procurement should compare landed cost, not just the factory number. A direct factory may win on the tote body price but lose if the buyer has to add last-mile packing or rush freight. A local decorator may have a higher unit price on paper but still win on total project cost if the order must land before an exhibition opening or store launch. The decision should be based on the full path from raw bag to shelf-ready unit.
The cleanest quote breaks the order into separate lines: body price, decoration cost, packing labor, carton cost, sample charge, and any screen or plate fees. Once those numbers are visible, the buyer can see where the real leverage sits. Moving from one color to two colors may barely change the fabric cost but can materially change setup cost. Switching from bulk packing to retail-ready packing may do the same. If those costs are bundled together, procurement cannot tell whether a price increase is a true manufacturing change or just a packing change.
For a repeat program, ask for the same quote in multiple volumes. That exposes the quantity break and shows whether the supplier is pricing to the real production curve or simply padding the small order. It also helps the museum decide whether to buy a pilot run now and a replenishment later, or to lock a bigger run upfront and reduce rework risk. If the supplier resists transparent line items, the quote is not ready for procurement approval yet.
- Compare ex-works and landed cost on the same quantity.
- Separate setup fees from recurring unit cost.
- Quote at multiple quantity breaks to reveal the actual cost curve.
- Use the line-item view to distinguish production cost from packing cost.
Specification comparison for buyers
| Spec decision | Recommended option | Typical cost impact | Timing and QC impact |
|---|---|---|---|
| Direct factory with in-house sewing and print | Use one cut-and-sew supplier that owns the decoration line | Usually lowest total cost once setup is amortized; best for repeat runs | Often saves 3-7 days versus splitting vendors; lowest risk of shade or print mismatch if the sample is locked |
| Factory plus separate printer | Split the bag body and decoration between specialists | Can be neutral or slightly higher cost; may add two setup fees | Adds coordination risk and can add 5-10 days if artwork approval slips between vendors |
| Trading company or consolidator | Buy through one contact that manages multiple plants | Often 5-15% higher ex-works pricing, offset only if consolidation matters | Schedule can be stable, but factory visibility is weaker and root-cause follow-up is slower |
| Local decorator on imported blanks | Decorate stock blanks near the destination market | Higher unit cost than factory-direct, but low freight and fast domestic turns | Can save 1-2 weeks on urgent reorders; QC risk shifts to blank quality, shrinkage, and seam strength |
| Digital short-run print specialist | Use digital print for detailed artwork or low quantities | Higher per-piece print cost, lower setup burden for small runs | Fast for pilots, but color control and curing checks become more important |
| Screen-print factory | Use screen printing for simple logos and steady volume | Lowest print cost at scale; setup cost hurts tiny orders | Best when quantity is stable; extra colors or locations add both cost and lead time |
| Regional stock program | Start from stock blanks and add decoration locally or regionally | Moderate cost; can be cheaper than custom fabric if the spec is simple | Often the fastest route, but shade, weave, and handle options are fixed by available stock |
| Dual-source split order | Place the same spec with two factories and divide the volume | May add qualification cost and duplicate sampling | Useful for large rollouts, but QC must control shade, carton labels, and print placement tightly |
Buyer checklist before sampling
- Lock the finished size, gusset depth, and internal load target before asking for price.
- State the canvas weight in GSM or oz, plus whether the fabric is natural, bleached, dyed, or prewashed.
- Choose one decoration method and one artwork version so the factory quotes one production path, not three.
- Specify handle length, handle width, reinforcement method, and whether the bag needs a lining, pocket, or base board.
- Define the packing format: bulk folded, tissue wrapped, polybagged, barcode stickered, or retail sleeved.
- Set the quantity by color and size, then say whether split shipments or partial deliveries are allowed.
- Request sample timing, approval milestones, and the exact point where bulk lead time starts.
- Ask for separate quote lines for body cost, print cost, packing cost, cartonization, and any screen or plate fees.
Factory quote questions to send
- What is your MOQ for this exact size, canvas weight, and decoration method, and does it change if we split colors or handle lengths?
- Is the canvas stock, greige, pre-shrunk, washed, or dyed after weaving, and can you state the expected shrinkage range?
- Which decoration method gives the most stable result for our artwork, and what setup charges apply for screens, plates, or digital files?
- Can you quote the same tote at 300, 500, 1,000, and 3,000 pieces so we can see the real quantity break?
- What is the first sample stage you provide, and how many days do you need after artwork approval to submit a PPS or golden sample?
- What is the bulk lead time after sample approval, and which parts depend on your factory versus mills, dyeing, or third-party packing?
- How do you pack each tote for retail or warehouse handling, and how many units fit per master carton without crushing the handles?
- Can you share recent QC photos, stitch or print test records, and a production checklist for a comparable museum or bookstore tote order?
- What is the cost impact if we ask for a rush order, split delivery, or export packing to our destination warehouse or port?
Quality-control points to confirm
- Measure finished size, gusset depth, handle length, and handle drop against the signed sample using the same method the factory will use at final inspection.
- Verify canvas weight, weave density, and shade consistency before cutting starts; reject lots with visible shade banding between rolls beyond the agreed tolerance.
- Load-test the tote with the actual museum use case, such as catalogues, hardback books, or gift items, and inspect handle stretch and bottom sag after loading.
- Check stitch count, backtack quality, and reinforcement at handle join points, bottom corners, and side seams; look for skipped stitches or loose thread tails.
- Inspect print registration, ink coverage, edge sharpness, and color match under daylight and indoor light; approve or reject underbase opacity on dark canvas.
- Set a shrinkage tolerance if the tote will be washed or heat-set after printing, and confirm the sample has already gone through the same finishing process as bulk.
- Verify barcode placement, hangtag position, woven label alignment, and folding direction so shelf presentation stays consistent across cartons.
- Require carton counts, carton markings, inner pack counts, and carton dimensions to match the packing list line by line before shipment release.
- Reject crushed corners, collapsed gussets, print smearing, seam puckering, and carton overfill before goods leave the factory.