Start with the craft fair use case
A canvas grocery tote for a craft fair is not only a blank surface for a logo. It may be sold as merchandise, used as vendor checkout packaging, included with admission, or supplied to multiple booths as a reusable carry bag. The right material depends on what shoppers will actually put inside it: candles, jars, folded apparel, stationery, yarn, ceramics, packaged foods, or several small purchases from different makers.
Before asking suppliers for price, define the channel requirement in plain terms. A giveaway tote can be lighter and simpler. A resale tote should feel durable on a booth table and survive repeat use. A premium grocery-style tote may need a wider base, stronger handles, and better print control. Without that context, suppliers will quote different products under the same phrase, such as “natural canvas tote with logo.”
For first orders, avoid building too much complexity into the specification. Multiple fabric colors, several sizes, custom labels, hangtags, barcode stickers, individual polybags, and many artwork versions can be useful, but together they raise MOQ, sample time, inspection complexity, and leftover inventory risk. A stronger launch strategy is often one reliable base tote with limited artwork variation.
- Classify the program as giveaway, resale merchandise, checkout packaging, premium grocery tote, or mixed-use event inventory.
- Match construction to realistic goods, not only to a target unit price.
- Decide whether the tote must stand upright on a table, hang neatly, or ship flat in tight cartons.
- Use the first PO to validate material, construction, defects, and sell-through before adding variations.
Choose canvas weight using both oz and GSM
Canvas weight is important, but the number can be misread. Tote suppliers often quote ounces, while mills and QC teams may use GSM. If the value is ounces per square yard, the conversion is direct: 12 oz/yd² is about 407 GSM. Confusion appears when suppliers use local shorthand, quote greige fabric before finishing, or apply a finished weight range after bleaching, dyeing, washing, or coating. Ask for both units and the measurement basis.
For many craft fair grocery tote programs, 12 oz canvas is the balanced starting point. It usually feels reusable, gives better structure than lightweight promotional cloth, and can still work within wholesale resale or event budgets. However, a tight-weave 12 oz canvas may feel more substantial than a loosely woven heavier fabric, so the label alone is not a specification.
A 10 oz canvas can work for light products, entry-price totes, lower carton weight, and compact storage. A 14 oz canvas gives a firmer hand and more premium booth presence, but it increases material cost, cutting effort, sewing difficulty, carton thickness, and freight weight. Do not assume heavier fabric automatically means a stronger bag. Failures often occur at handles, top hems, side seams, and gusset corners.
- 10 oz: cost-controlled and foldable for light contents.
- 12 oz: balanced for most reusable craft fair grocery totes.
- 14 oz: premium hand feel and structure, with higher cost and freight impact.
- Always request oz/yd², GSM, finished-fabric status, swatches, and weight tolerance.
- Approve the final sewn tote, not just the fabric weight line in the quote.
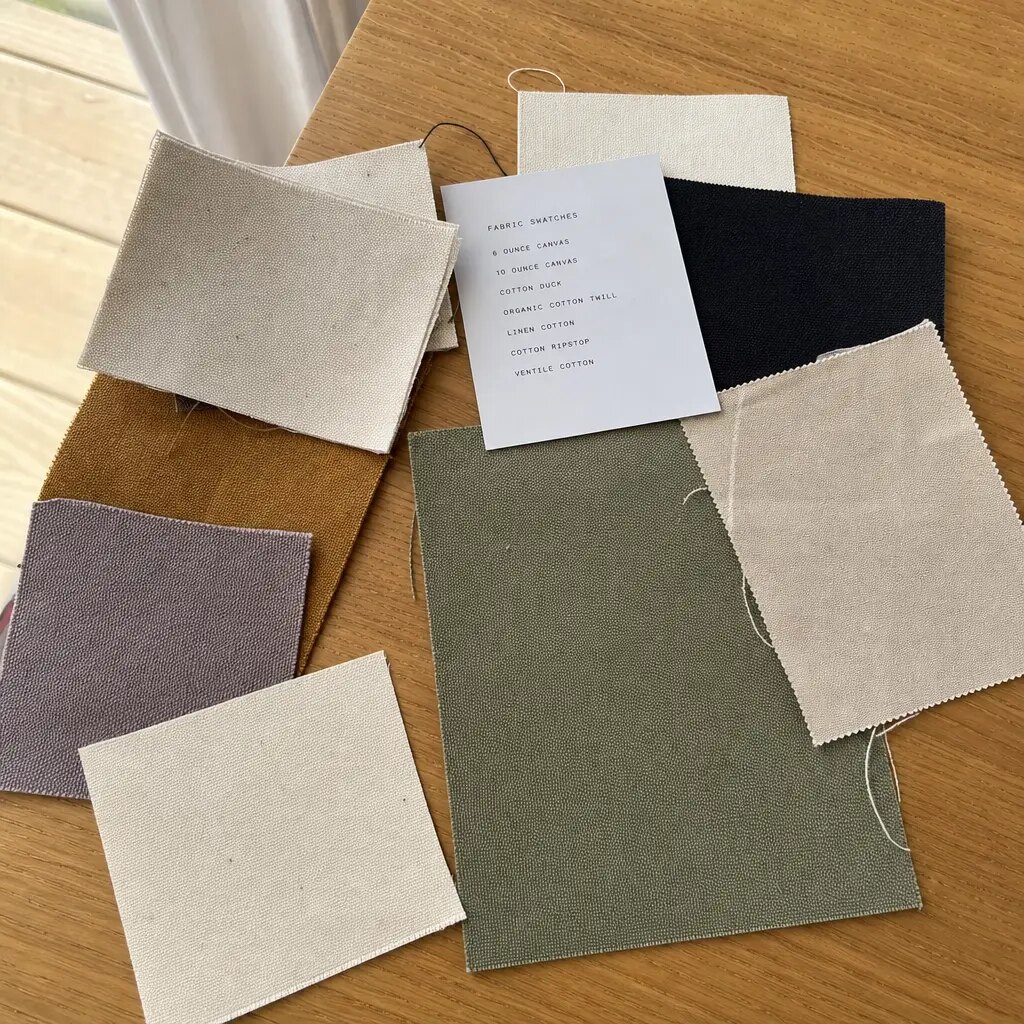
Evaluate weave, finish, shade, and shrinkage
Canvas is not one uniform material. Two suppliers may quote the same nominal weight and deliver different hand feel, print quality, and structure because yarn size, weave tightness, and finishing vary. For most craft fair totes, stable plain-weave cotton canvas is a safe choice because it supports screen printing and keeps the front panel more controlled. A loose weave can look rustic but may absorb ink unevenly or make a bag feel cheaper than its weight suggests.
Natural unbleached canvas is popular for craft fairs because it supports an artisan, reusable aesthetic. Buyers should still define what is acceptable. Cottonseed flecks, cream-to-beige shade variation, small slubs, and minor yarn irregularities may be normal, but they should match an approved swatch. If the program needs a cleaner retail look or stronger contrast for small text, bleached canvas may be better.
Dyed canvas should be treated as a higher-control material decision. It can support private-label color programs, but it may add MOQ, lab dip approval, shade-lot variation, and longer lead time. If the tote could rub against light clothing or be handled frequently, discuss colorfastness expectations. Do not approve dyed canvas from a phone photo; approve a physical swatch or lab dip under consistent light.
- Natural canvas: best for rustic positioning, with approved fleck and shade standards.
- Bleached canvas: better for cleaner contrast and retail graphics.
- Dyed canvas: useful for brand color, but confirm MOQ, lead time, and shade tolerance.
- Washed canvas: softer hand, often less crisp structure.
- Coated or laminated canvas: changes feel and may require different decoration testing.
Specify size, gusset, and usable capacity
A grocery tote needs usable volume, not just a large front panel. Flat totes are economical, easy to print, and efficient to pack, but they are poor for bulky goods. Bottom-gusset or side-and-bottom-gusset totes hold jars, boxed candles, folded textiles, packaged foods, and mixed purchases more effectively.
A common craft fair grocery format is roughly 14-16 in wide by 15-17 in high with a 4-6 in gusset. Treat this as a starting point. A pottery program may need a wider base and stronger corners. A print seller may prefer a taller, flatter bag. A distributor buying for many vendors should select a balanced size rather than overfitting one product category.
Measurement method matters. Body width may be measured flat from side seam to side seam. Height may be measured from top edge to bottom seam. Gusset depth may be measured flat or expanded. Handle drop should be defined from the top edge of the bag to the inside top of the handle loop unless your diagram states otherwise. A simple measurement diagram prevents many disputes.
- Specify finished width, height, gusset depth, handle width, handle drop, and print position.
- Clarify bottom gusset, side-and-bottom gusset, boxed bottom, or flat construction.
- Use the same diagram for RFQ, sample approval, PO, and inspection.
- Set practical tolerances before production; many standard totes use about ±0.5 in for body dimensions.
- Test the sample with real goods, not only empty on a desk.
Engineer handles and seams for grocery-style loads
Handle construction is one of the biggest durability decisions. Buyers often focus on fabric weight, but tote failures usually occur at stress points: handle attachments, top hems, side seams, bottom corners, and gusset transitions. A well-reinforced 12 oz tote can outperform a heavier tote with weak handle stitching.
Cotton webbing handles are common because they offer consistent width and a comfortable grip. For reusable grocery-style totes, 1-1.5 in handle width is often practical. Narrow handles can twist or cut into the hand when loaded. Self-fabric handles can look integrated, but they must be folded, stitched, and attached consistently to avoid curling or stretching.
Handle drop should match how shoppers carry the bag. Short handles are tidy for hand carry. Longer handles allow shoulder carry, which is useful at crowded events. Too much length can make the bag drag when carried by hand and look messy when displayed. Avoid vague terms like “long handles”; specify the drop and inspect it.
- Define handle material, width, length, drop, attachment position, and reinforcement.
- Require box-X stitching, bartacks, reinforced top hem, patch reinforcement, or an approved equivalent.
- Ask whether reinforcement is included in the quoted price.
- Inspect skipped stitches, broken thread, loose bartacks, twisted webbing, and unsecured handle ends.
- Agree a realistic load check based on the intended contents.
Select print method from artwork and fabric surface
Screen printing is often the most dependable choice for canvas grocery totes used at craft fairs. It suits one- or two-color logos, event names, slogans, and repeatable wholesale orders. Once screens are prepared, unit cost is predictable and reorders are straightforward.
Canvas is not coated paper, so artwork needs to be designed for texture. Thin strokes, tiny text, fine halftones, and large solid areas can be difficult, especially on natural canvas with flecks and slubs. Provide artwork at final size and ask the supplier to confirm minimum line thickness, smallest readable text, registration limits, and ink opacity expectations.
Heat transfer can make sense for short runs, complex multi-color designs, or seasonal graphics where screen setup costs do not spread well. Test edge lift, fold marks, hand feel, and durability after normal handling. Embroidery can create a premium look for small logos, but it may pucker lighter canvas and add backing or cost. The right method is the one that meets appearance, durability, lead time, and total cost for the actual order.
- Use screen print for simple repeat artwork and predictable unit cost.
- Request a strike-off for small text, fine lines, light ink, or tight registration.
- Use transfer printing carefully for multi-color or short-run graphics; check fold and edge durability.
- Use embroidery for small premium marks after checking puckering and backing.
- Include print tolerances in the PO, not only in design comments.
Control MOQ, SKU splits, and customization
MOQ is shaped by fabric purchasing, cutting efficiency, sewing-line planning, print setup, labels, packing, and inspection. When a buyer asks for several canvas weights, several sizes, multiple handle colors, and many artwork versions, production is split into smaller batches. That raises cost and increases the risk of mixed SKUs or delayed approvals.
For a first craft fair tote order, one base tote is usually the cleanest procurement structure: one fabric, one finish, one size, one gusset, one handle spec, one print position, and one carton format. If multiple designs are needed, keep the sewn tote identical and split only the artwork if the supplier can manage that cleanly.
Ask suppliers to separate MOQ drivers. The MOQ for natural canvas may be much lower than custom dyed fabric. The MOQ for base sewing may differ from woven labels, hangtags, barcode stickers, or individual polybags. When these are separated, procurement can decide which customization is worth adding now and which should wait for reorder volume.
- Launch with one controlled base tote before adding multiple sizes or colors.
- Request MOQ separately for fabric, sewing, printing, labels, hangtags, barcodes, and packing.
- Keep the sewn tote identical when splitting artwork versions.
- Ask for cost scenarios: one-color print, two-color print, label added, retail packing added.
- Use a platform spec for seasonal or regional craft fair reorders.
Normalize supplier quotes before comparison
A low headline unit price can hide missing costs. One supplier may include screen setup, sample credit, export cartons, carton marks, and basic QC. Another may exclude those items and appear cheaper until the PO is nearly ready. Compare quotes only after the same specification and commercial terms are applied.
Collect unit price, setup fees, sample charges, print charges, label and packing charges, Incoterm, inland freight if applicable, carton dimensions, gross weight, net weight, and CBM. For landed cost, add freight, duty, destination handling, warehousing, repacking, and inspection where relevant.
Also confirm which steps are in-house and which are outsourced. Dyeing, washing, printing, embroidery, and labeling may be subcontracted. Outsourcing is not automatically a problem, but the buyer needs to know who approves first pieces, who controls quality, and who pays for rework if bulk production does not match the approved sample.
- Compare the same fabric, size, gusset, handle, print, packing, and inspection standard.
- Require quotes to reference the spec sheet, artwork version, sample number, and packing instruction.
- Ask for carton dimensions, weights, and CBM before supplier selection.
- Check whether screens, strike-offs, labels, cartons, and barcode work are included.
- Treat unusually low prices as a reason to verify fabric weight and construction.
Use sampling to lock material and construction
A useful sample should represent the real production plan: selected canvas weight and finish, final body size, final gusset, final handle construction, final stitching, final print method, final label placement, and final packing fold. If the sample is approximate, the quote and approval should remain provisional.
A staged process reduces mistakes. First, approve fabric swatches when weight, shade, finish, or hand feel is undecided. Second, approve a print strike-off when the artwork has small text, light ink, tight registration, or large solid areas. Third, approve a full pre-production sample that combines material, construction, decoration, labels, and packing.
Review the sample like a shopper and an inspector. Fill it with realistic goods, hang it by the handles, fold and unfold it, stand it on a table, and check whether seams pull or the print cracks. Measure the tote and record width, height, gusset, handle drop, handle width, print size, print position, label location, and packing fold. Keep the approved sample available for final inspection.
- Approve swatches before choosing fabric weight and finish.
- Request a print strike-off for artwork that may be difficult on canvas.
- Approve one full pre-production sample before bulk production when risk is material.
- Record all changes on a dated spec sheet.
- Use the signed sample as the visual and construction standard.
Set QC rules before production starts
Quality control should be agreed before fabric is cut. Common issues include stained panels, shade-lot mixing, off-center prints, poor ink opacity, skewed panels, uneven handle drops, skipped stitches, loose bartacks, open seams, wrong artwork, incorrect carton marks, and missing barcode labels. These should be classified as minor, major, or critical before production.
A practical inspection plan has three checkpoints. Inspect fabric before cutting for weight, shade, moisture, stains, holes, weaving faults, and unacceptable slubs. Inspect first production pieces after printing and sewing to confirm placement, stitch pattern, handle attachment, and workmanship. Inspect packed cartons before shipment release to verify quantity, SKU separation, carton marks, labels, and packing method.
Print QC should be measurable. Define placement tolerance from top edge, side seam, or centerline; maximum skew; registration tolerance for multi-color prints; ink opacity standard; and unacceptable defects such as smearing, ghosting, pinholes, cracking, tackiness, or transfer lifting. For grocery-style positioning, add a realistic load check based on intended contents rather than an exaggerated marketing claim.
- Define minor, major, and critical defects in the purchase documentation.
- Set tolerances for fabric weight, size, handle drop, print placement, and registration.
- Inspect fabric, first production pieces, and packed cartons.
- Use approved swatches and signed samples as inspection standards.
- Treat wrong labels, mixed SKUs, and bad carton marks as shipment defects.
Specification comparison for buyers
| Material or supplier option | Best-fit craft fair use | Specs to request | Buyer risk to control |
|---|---|---|---|
| 10 oz canvas, natural or bleached | Entry-price resale totes, light vendor checkout bags, paper goods, apparel, stationery, brochures, and lower freight-weight programs | Finished GSM, fiber content, weave, shrinkage expectation, handle reinforcement, finished dimensions, and print test on actual fabric | May collapse on booth tables, feel promotional rather than retail, and fail at handles if reinforcement is weak |
| 12 oz canvas, natural unbleached | Balanced craft fair grocery tote for candles, packaged foods, yarn, folded apparel, small giftware, and general maker-market resale | Confirm oz/yd² and GSM. A true 12 oz/yd² fabric converts to about 407 GSM, but supplier quotes may vary by market convention, finish, or whether weight is greige vs finished fabric | Do not accept the label “12 oz” alone; approve swatch, tolerance, weave tightness, and final sewn sample |
| 14 oz canvas, firm hand | Premium-feel tote for boutique fairs, museum shops, heavier mixed purchases, jars, boxed goods, and programs where booth presence matters | Finished GSM, needle/thread plan, seam type, carton weight, CBM, handle width, bartack or box-X reinforcement, and load-check criteria | Higher material, sewing, and freight cost; heavier fabric does not fix poor handle attachment or weak seams |
| Natural unbleached finish | Rustic craft positioning, handmade-market branding, reusable grocery style, and simple dark screen prints | Signed shade swatch, accepted flecks/slubs, print opacity standard, and lot variation tolerance | Cottonseed flecks and cream-tone variation are normal only if they match the approved standard |
| Bleached canvas | Cleaner retail look, higher contrast graphics, small text, or designs needing a brighter base | Whiteness/shade target, stain tolerance, print strike-off, and whether bleaching changes hand feel or shrinkage | Can look less rustic; dirt marks, yellowing, and shade inconsistency are more visible |
| Dyed canvas | Private-label programs where brand color is central and buyers can plan longer lead time | Lab dip or swatch approval, dye-lot tolerance, MOQ, colorfastness expectation, and reorder plan | Higher MOQ, shade-lot variation, possible rubbing or bleeding issues, and slower sampling |
| Screen print supplier | Repeatable one- or two-color logos, event graphics, and reorder programs | Setup charges, per-color pricing, minimum line size, print placement tolerance, ink opacity, and strike-off timing | Fine text, light ink on natural canvas, and rough weave can reduce clarity |
| Transfer or digital print supplier | Short runs, multi-color artwork, seasonal graphics, or many small design splits | Transfer type, edge-lift test, fold test, hand feel, wash/rub expectation, and packing fold position | May lift, crack, feel plasticky, or show stress after carton compression if not tested |
| Domestic stock tote supplier | Urgent events, low MOQ tests, or simple logo programs where speed matters more than exact material control | Actual stock weight, size, handle drop, available colors, print limits, packing, and reorder availability | Less control over fabric, construction, and long-term consistency; stock may change between orders |
Buyer checklist before sampling
- Define the tote role: craft fair resale merchandise, vendor checkout packaging, event giveaway, premium grocery tote, or mixed-use inventory.
- List realistic contents such as candles, jars, ceramics, folded apparel, yarn, stationery, packaged foods, or lightweight brochures.
- Request fabric weight in both oz/yd² and GSM; confirm whether the number refers to finished fabric or greige/raw fabric.
- Approve physical swatches for practical options such as 10 oz, 12 oz, and 14 oz canvas before selecting bulk material.
- Specify fiber content, weave, finish, shade standard, accepted flecks/slubs, and any shrinkage or colorfastness expectation.
- Define finished tote width, height, gusset depth, handle width, handle drop, seam construction, and measurement method.
- Choose gusset style: flat, bottom gusset, side-and-bottom gusset, boxed bottom, or another agreed construction.
- Require handle construction details: cotton webbing or self-fabric, width, attachment position, box-X or bartack reinforcement, and stitch density.
- Provide production-size artwork with color references, print size, print position, smallest text size, and minimum line thickness.
- Normalize quotes by Incoterm, packing, carton data, setup charges, sample charges, labels, barcode requirements, and inspection responsibility.
Factory quote questions to send
- What exact fabric weight are you quoting in oz/yd² and GSM, and is it finished fabric weight after processing or greige fabric weight before finishing?
- What is the fiber content, weave type, finish, and normal weight tolerance for this canvas?
- Can you send physical swatches for your closest 10 oz, 12 oz, and 14 oz finished canvas options before we approve material?
- If you quote 12 oz canvas, what GSM should we expect in bulk, and can you hold a tolerance such as ±5% against the approved swatch?
- What finished tote dimensions, gusset style, seam construction, handle width, handle drop, and reinforcement are included in this price?
- Are handles cotton webbing or self-fabric, and are box-X stitches, bartacks, reinforcement patches, or top-hem reinforcements included?
- What thread type, stitch density, seam allowance, and edge finish will be used for this canvas weight?
- Which print method do you recommend for our artwork on the selected canvas, and what are the limits for small text, thin lines, and solid ink coverage?
- Can you provide a print strike-off on the selected canvas before the pre-production sample if our artwork has light ink, tight registration, or fine detail?
- What are the separate MOQs for base tote sewing, custom size, dyed fabric, logo printing, labels, hangtags, barcode stickers, individual polybags, and special cartons?
Quality-control points to confirm
- Set fabric weight tolerance before production. A practical target is ±5% against the approved GSM or oz/yd² specification unless a wider tolerance is accepted in writing.
- Use signed swatches as the visual standard for natural flecks, slubs, shade, hand feel, and acceptable surface irregularities.
- Define finished size tolerances by measurement point. For many standard totes, body width and height tolerance around ±0.5 in is practical; handle drop should be controlled separately.
- Measure handle drop from the top edge of the tote to the inside top of the handle loop, unless another method is shown on the approved diagram.
- Inspect fabric under normal white light for major oil stains, dirty marks, holes, broken yarn clusters, large weaving bars, unacceptable dye spots, and shade-lot mixing.
- Measure print placement from fixed references such as top edge, side seam, centerline, or gusset edge; define allowable offset and skew before printing.
- For simple front logos, placement tolerance around ±0.25-0.5 in may be practical; premium retail programs may require tighter control.
- For multi-color prints, agree registration tolerance, often around 2-3 mm for straightforward graphics, with no obvious bleeding, smearing, ghosting, pinholes, or poor opacity.
- Check printed panels for fold performance, dry rub, cracking, tackiness, transfer edge lift, ink flaking, and color transfer after normal handling.
- Inspect handles and seams for skipped stitches, broken thread, loose bartacks, open box-X stitching, twisted webbing, unsecured ends, open seams, and weak gusset corners.