Why logo placement is a procurement issue, not just a design choice
Canvas grocery totes for liquor retailers look simple until the bag is sewn, filled with bottles, and carried by a customer. A logo that looks centered on a PDF can be partly hidden by handles, distorted by gusset expansion, or visually pulled downward by the weight of glass bottles. For procurement buyers, logo placement is therefore a product specification, not a late-stage artwork note.
The challenge is that a tote is not a flat print surface. The top hem removes usable height, side seams reduce the clean front field, gussets open under load, and handle reinforcement stitch boxes can intrude into the upper panel. When those details are not defined in the RFQ, each supplier makes its own assumption about the printable area. Quotes may appear comparable while the actual bags are built to different standards.
Liquor retail use increases the risk because bottles are dense and rigid. One or two 750 ml bottles can push against the lower panel and side gussets in a way that soft groceries do not. If the logo sits too low, it may wrinkle around the bottle profile. If it sits too high, it may compete with the hand grip or stitch box. If it sits too close to the side seam, the artwork can roll visually into the gusset when the bag is full.
The practical solution is to treat placement as measurable. Define the logo’s position from finished-bag reference points, confirm the print-safe zone on the sewn sample, and approve the tote under the intended bottle load. This gives the buyer, factory, and inspection team the same standard for bulk production.
- Approve branding on a sewn sample, not only a flat mockup.
- Tie logo placement to finished dimensions, handle position, and gusset depth.
- Review the bag empty and filled because bottles change the visible front panel.
- Use fixed measurements instead of subjective notes such as “center logo.”
Start with the bottle-carry scenario and target filled weight
Before discussing artwork size, define what the tote must carry. A checkout tote intended for one 750 ml bottle has a different stress profile from a bag expected to carry two bottles, a 1.5 L bottle, or a mixed load of liquor plus grocery items. The same front logo may look clean in one scenario and distorted in another.
For many procurement teams, the clearest RFQ language is a simple use statement: “Designed for routine carry of two standard 750 ml bottles plus light retail items,” or “Designed for one bottle checkout and general reuse.” Add a target filled weight for sample review. The weight does not need to become a universal industry standard; it should reflect the retailer’s actual product mix and risk tolerance.
A useful sample review includes loading the bag with the agreed bottle count or equivalent weight, lifting it by both handles, setting it down several times, and checking whether the front panel remains presentable. Look for seam strain at the side gussets, handle stitch stress, bottom sag, and whether the logo stays readable when the bag hangs from the customer’s hand.
If the retailer wants the tote to stand upright for gift counters, wine club pickup, or tasting events, the carry scenario should also include presentation. A bag that is acceptable for checkout may not stand neatly with two bottles on a counter. That difference can affect fabric weight, gusset depth, and whether a base board is worth the extra cost.
- State the target bottle count in the RFQ.
- Add a target filled weight for sample and QC reference.
- Check lift, set-down, bottom sag, handle stress, and logo readability under load.
- Separate checkout reuse requirements from premium gift-presentation requirements.
Build the print-safe zone from the finished sewn tote
The front panel is usually the strongest logo position for liquor retail canvas totes, but only when the printable area is defined after sewing. A cut-panel template does not show the final loss from top hem, side seams, bottom fold, handle attachment, and gusset formation.
As a starting point, some buyers place the top of the logo around 60–90 mm below the finished top hem. This can keep the artwork below the hand area and above the lower bottle-bulge zone. It should not be treated as a universal standard. Long handles, deep stitch boxes, narrow bag widths, and tall artwork can all require a different position.
Side clearance is equally important. A logo may be mathematically centered but still look too wide once the gussets open. Define the distance from the left side seam to the left edge of the artwork and from the right side seam to the right edge. Keep large logos away from active fold zones unless the sample proves that the artwork remains readable when filled.
Lower placement should be used carefully on bottle-carry totes. The bottom third of the front panel is more likely to wrinkle, bulge, or tilt under bottle weight. A moderate mid-front logo often performs better than an oversized mark pushed toward the bottom fold.
The approval sheet should show finished bag width, height, gusset, logo width, logo height, top hem to top of print, side seam to artwork edge, and any label or patch placement. This document becomes the inspection reference for bulk production.
- Use finished-bag measurements for the printable field.
- Treat 60–90 mm top clearance as a starting point, not a fixed rule.
- Define side clearances in millimeters.
- Avoid placing critical artwork in the lower stress zone unless tested.
- Attach the dimensioned placement sheet to the PO or tech pack.
Choose the branding zone: front print, back print, gusset, label, or patch
Most liquor retailers do not need decoration everywhere. A single front print is often the cleanest and most economical choice for checkout bags because it is visible, easy to inspect, and efficient to repeat. Adding more branding zones can be useful, but only when each zone has a purpose.
A back print works when the retailer needs a campaign message, care instruction, recycling note, or secondary brand statement. It also doubles the number of print-position checks. If the back artwork varies by region, banner, or store group, it can change MOQ and setup assumptions.
Gusset decoration is more specialized. It can be effective for bags displayed side-on or stacked at a gift counter, but it is less forgiving than a front print. On narrow gussets, letters can crop at folds or roll into seams. As a practical starting point, a simple vertical icon or short mark is safer than long text, and gussets around 100 mm or wider usually offer more workable space. The exact feasibility should be confirmed on the sewn sample.
Woven labels and patches are useful when the buyer wants a premium detail or secondary branding without crowding the front panel. Labels can sit near a side seam or upper side area, while patches suit heavier, higher-value totes. Both add placement and sewing checks, so they should be specified with the same precision as printed artwork.
- Use one front print for the simplest first bulk order.
- Add back printing only when the message justifies extra cost and inspection.
- Keep gusset artwork simple and validate it on a filled sample.
- Use woven labels or patches for subtle premium branding.
- Control label and patch position with measured reference points.
Fabric weight, composition, and structure affect logo readability
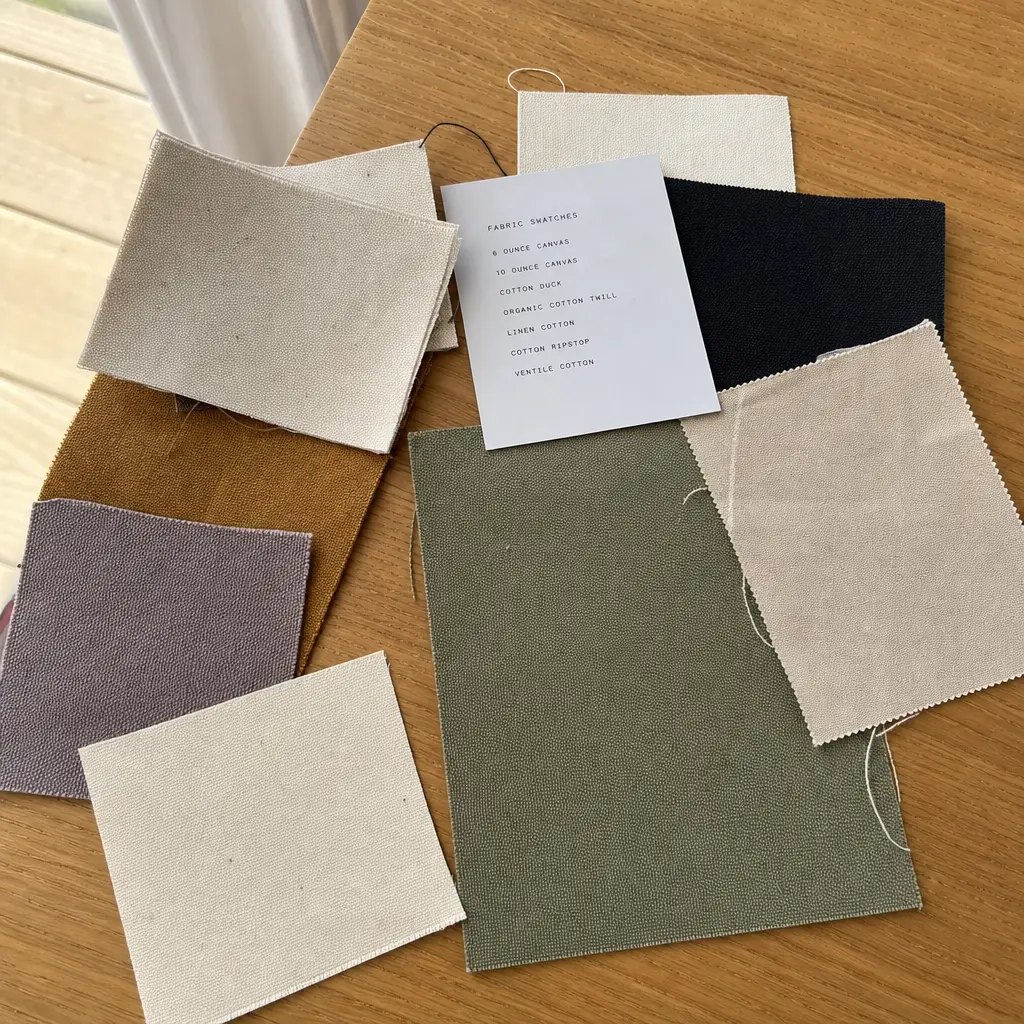
Fabric selection is not only a strength decision. It changes how the logo prints, how flat the front panel stays, how the tote folds into cartons, and how the bag feels when carrying bottles. A low-cost fabric can look acceptable when empty but show bottle contours clearly under load.
For many reusable liquor retail totes, finished canvas in the approximate 280–340 GSM range is a useful starting point. The lower part of that range may work for standard checkout reuse where cost and packability matter. The upper part may provide a firmer hand feel and a more stable logo field for heavier bottle use. This is guidance for specification development, not a universal requirement; the correct GSM depends on bag size, gusset, handle design, and expected filled weight.
Composition also matters. A 100% cotton canvas may absorb ink differently from a recycled cotton blend or cotton-poly blend. Recycled content can support sustainability goals, but flecks, shade variation, and surface texture may affect edge sharpness and perceived print color. Buyers should approve actual fabric, not a similar substitute.
Heavier fabric is not automatically better. It raises material cost, increases carton weight, can reduce units per carton, and may create bulkier folds. Procurement should compare fabric choices against freight, warehouse handling, and retailer display requirements, not just the unit price.
- Specify finished GSM and composition, not only “10 oz” or “12 oz.”
- Use 280–340 GSM as a practical starting range for many reusable programs.
- Sample recycled or blended canvas with actual artwork.
- Balance structure against freight, carton cube, and folding method.
- Check whether the approved sample and bulk fabric feel and print the same.
Match decoration method to artwork, cost drivers, and inspection risk
Silkscreen is usually the lowest-risk decoration method for bold liquor retailer logos on canvas. It works well for solid wordmarks, icons, and one- or two-color artwork. The buyer should still confirm artwork size, color count, Pantone expectations, underbase needs on dyed fabric, setup charges, and whether screens can be reused for repeat orders.
Heat transfer or digital transfer can help with gradients, photo-style graphics, short pilots, and multi-color designs. The risk is that transfers may show an edge, crack on folds, or adhere poorly to a textured surface if the process is not suited to the fabric. Request rub, fold, and adhesion checks on the actual canvas before approval.
Embroidery is best for small premium marks, not large front-panel grocery tote logos. High stitch density can pucker lighter canvas and increase cost quickly. For premium branding, a woven label or sewn patch may provide a cleaner result with more predictable placement.
Decoration choice also affects MOQ. A simple one-color front print on one natural canvas body is usually easier to quote and repeat than multiple colorways with different artwork versions. If the program includes store-specific logos, seasonal slogans, or multiple body colors, ask the supplier to price by design and by colorway so the cost impact is visible.
The safest approval path is a strike-off on actual production fabric followed by a sewn pre-production sample. A digital mockup is useful for communication but cannot show ink spread, transfer feel, embroidery puckering, or canvas shade interaction.
- Use silkscreen for simple high-volume logos when possible.
- Use transfers only after checking edge feel, folds, and adhesion.
- Reserve embroidery for small premium marks.
- Ask how colorways and artwork versions affect MOQ.
- Approve decoration on actual fabric, not only a digital proof.
Handles, gussets, seams, and base boards: construction decisions that change the logo
Many logo-placement problems begin with construction. Handle stitch boxes may sit lower than expected, side gussets may open wider under load, and an uneven bottom seam can make a straight logo look tilted. Buyers should review the tote as a sewn carrying product, not a print panel with handles attached later.
The RFQ should specify handle material, width, drop, and reinforcement type. Box stitch and box-X stitch are common reinforcement options, but the important point for branding is how far the reinforcement extends into the front panel. The logo should stay clear of the stitch box and the area where the customer’s hand naturally compresses the bag.
Handle drop affects both function and display. Longer drops may allow shoulder carry, but they can let the bag hang lower and change how the logo is seen in motion. Shorter drops suit hand carry but may crowd the upper panel. There is no single correct answer; the handle spec must match the bottle load, retailer preference, and logo field.
Gusset depth changes both capacity and visual width. A deeper gusset can help bottles sit more securely, but when filled it can pull the front face inward. This is why large logos that nearly span the front panel may fail once bottles are inside.
Base boards should be considered only when they solve a real presentation or stability need. A removable base board can help a premium tote stand flatter with two bottles, but it adds material, assembly, packing bulk, and another inspection item. For many general liquor-grocery totes, the better value is an appropriate GSM, balanced gusset, and strong seams.
- Keep handle stitch boxes outside the print-safe zone.
- Specify handle width, drop, material, and reinforcement pattern.
- Review logo position with the intended handle drop.
- Test deeper gussets filled, not only empty.
- Use base boards for premium presentation needs, not by default.
Sampling plan: approve the tote the way customers will use it
A good sample plan prevents most avoidable bulk-order disputes. Request a sewn pre-production sample made with the actual fabric, actual handle construction, actual decoration method, actual artwork size, and actual packing elements if known. Temporary substitutes can hide the exact risks procurement needs to evaluate.
Start with empty-bag measurements. Record finished width, height, gusset depth, handle drop, handle pair matching, logo width and height, and the reference distances from top hem and side seam to artwork. Photograph the sample flat and standing if the bag is expected to stand at checkout or gift counters.
Then review the sample under the agreed bottle load. Load one or two 750 ml bottles, a 1.5 L bottle, or the agreed equivalent weight. Lift the bag repeatedly by the handles, set it down, and check the handle stitch boxes, side seams, bottom corners, and gusset folds. Confirm that the logo remains visible and does not fall into the hand grip, seam rollover, or lower wrinkle zone.
If the sample includes a base board, test with and without it. Confirm whether the board improves presentation enough to justify cost and carton cube. If it slides, bends, smells, or complicates packing, the buyer may be better served by improving body fabric or gusset construction instead.
Finally, approve the packed sample. Check fold direction, whether printed faces touch, units per carton, carton dimensions, gross weight, barcode or hangtag position, and carton marks. Packing issues can damage otherwise acceptable decoration.
- Use actual materials and methods for the pre-production sample.
- Measure and photograph the approved sample.
- Perform bottle-load review before signing off.
- Check seam and handle stress after lifting and set-down cycles.
- Approve the packing method before bulk cartons are closed.
Packing, labeling, and distribution-center details buyers should not leave until the end
Packing is often treated as an afterthought, but it affects cost, transit condition, and warehouse receiving. Canvas totes may be folded flat, folded in half, stacked face to face, bundled, polybagged, or packed loose in master cartons. Each choice changes labor, carton cube, and the risk of print offset or crease marks.
For liquor retailers, ask whether individual polybags are required or discouraged. Some sustainability programs avoid polybags, while some distribution centers require protection or barcode scannability. If barcode stickers, hangtags, or retail labels are needed, specify their position and whether they must face outward after folding.
Printed bags should not be packed too soon if the ink or transfer needs curing time. Ask the factory how long goods rest after printing and how they prevent blocking, offset, or scuffing. This is especially important for dark ink on natural canvas and for transfer decoration with a film surface.
Carton specifications should be agreed before PO release. Include units per carton, carton dimensions, gross weight limit, carton mark format, PO number, item number, destination label, and palletization instructions if applicable. A perfect tote can still create receiving problems if carton marks or barcode placement do not match the retailer routing guide.
The packed sample should be reviewed with the same seriousness as the sewn sample. It confirms that the approved logo is not being creased through the center, the hangtag does not cover the brand mark, and the carton count supports the buyer’s warehouse plan.
- Define fold method and units per carton early.
- Clarify polybag, hangtag, and barcode requirements.
- Ask about post-print curing or rest time before packing.
- Match carton labels to the retailer routing guide.
- Approve a packed sample before mass packing.
QC plan before PO release: measurable checks for liquor retail totes
The QC plan should combine branding checks, construction checks, load checks, and packing checks. For logo placement, inspection should measure from fixed finished-bag points. A tolerance such as ±5 mm can be a practical starting point for standard screen print, but it should be agreed with the factory based on artwork sensitivity and production capability.
Finished dimensions must be checked alongside print placement. If the bag height or width drifts, a logo measured correctly from one point may still look unbalanced. Inspectors should record finished width, height, gusset, handle drop, logo location, and artwork size against the approved sample or tech pack.
Construction inspection is critical for bottle loads. Check handle stitch completeness, handle pair matching, box or box-X reinforcement, skipped stitches, broken threads, side seam capture, bottom seam alignment, raw edge exposure, and gusset symmetry. For sample validation or shipment inspection, use the agreed bottle count or filled weight to look for seam strain, excessive bottom sag, and logo distortion.
Print defects should be judged by method. For silkscreen, look for pinholes, smudging, ghosting, ink spread, weak edges, and poor opacity. For transfers, check film lifting, cracking on folds, edge feel, and adhesion. For labels and patches, check skew, loose stitches, incorrect position, and material mismatch.
Fabric inspection should include GSM spot checks, canvas shade comparison, odor review if relevant, and confirmation that the production fabric matches the approved sample. Natural canvas variation is normal to a degree, but buyers should define what level is commercially acceptable.
Final inspection should also verify packing: carton count, fold direction, barcode position, hangtag location, carton marks, gross weight, and destination labels. These checks keep the program commercially usable after it leaves the factory.
- Measure logo placement from finished-bag reference points.
- Check dimensions and placement together.
- Validate handle and seam strength against the agreed bottle load.
- Use decoration-specific print defect criteria.
- Include carton and barcode checks in final inspection.
Specification comparison for buyers
| Branding option | Best use case | Main cost drivers | MOQ or lead-time impact | Inspection risks to control |
|---|---|---|---|---|
| One-color front silkscreen | Most liquor checkout totes with bold store logo or wordmark | Screen setup, artwork size, ink color count, underbase on dyed fabric | Usually efficient for bulk runs; repeat orders may reuse screens if retained | Placement drift, pinholes, ink spread on rough canvas, print too close to handle stitch box |
| Two-side silkscreen | Programs needing front logo plus back message, campaign line, or compliance note | Second screen setup, extra print pass, longer drying/handling time | Can raise MOQ by design if front/back artwork varies by banner or store group | Front/back mix-ups, inconsistent vertical alignment, offset marks from stacking too early |
| Heat or digital transfer | Short pilots, gradients, photos, multi-color artwork, small seasonal drops | Transfer film, print size, artwork complexity, heat-press labor | Can suit lower quantities but may cost more per unit at scale | Film edge visibility, cracking on folds, poor adhesion to textured canvas, color shift |
| Woven side label | Subtle secondary branding where front panel stays clean | Label weaving MOQ, sewing labor, label placement operation | Label suppliers may impose separate MOQ; lead time can be longer than print only | Crooked labels, labels caught in seam, inconsistent distance from top or side seam |
| Sewn patch | Premium liquor gifting tote or higher-value club/member bag | Patch material, embossing/printing, stitching, extra handling | Adds approval step and may extend sampling; not ideal for very low-cost checkout totes | Patch skew, stitch damage, edge lifting, patch too heavy for lighter canvas |
| Gusset print | Side-display bags, gift counters, or totes stacked side-on | Extra setup, difficult positioning, simpler artwork preferred | Often less efficient than front print; more sampling needed on narrow gussets | Cropping at fold, distortion when gusset opens, letters rolling into seam |
| Embroidery | Small premium mark, initials, or boutique branding | Stitch count, thread colors, backing, slower machine time | Usually higher cost and slower than print; not suited to large front logos | Panel puckering, thread color mismatch, rough reverse side, weakened thin fabric |
Buyer checklist before sampling
- Define the intended carry use: one 750 ml bottle, two 750 ml bottles, one 1.5 L bottle, or mixed groceries plus bottles.
- Set a target filled weight for sample review, including realistic bottle and product weight rather than only empty-bag appearance.
- Specify finished bag size after sewing as width x height x gusset, with agreed dimensional tolerance suitable for the bag size.
- Specify finished fabric GSM and composition, such as 100% cotton canvas, recycled cotton blend, or cotton-poly blend, plus allowed lot tolerance.
- Request a measured print-safe zone after top hem, side seams, bottom fold, gusset formation, and handle reinforcement are included.
- Approve logo placement from fixed reference points: finished top hem to top of artwork, side seam to artwork edge, and artwork width x height.
- Define handle width, handle drop, handle material, stitch pattern, and whether stitch boxes must remain outside the print-safe zone.
- Choose decoration method by artwork and order size: silkscreen, transfer, woven label, patch, embroidery, or combined branding.
- Request a strike-off on actual production fabric and a sewn pre-production sample using actual handle construction and actual artwork scale.
- Validate the filled sample by lifting, setting down, and checking logo visibility, seam stress, handle comfort, and bottom shape under load.
Factory quote questions to send
- What finished bag size after sewing are you quoting, and what dimensional tolerance can you hold in bulk production?
- What fabric composition and finished GSM are included, and what lot-to-lot GSM tolerance do you normally control?
- Is the canvas plain cotton, recycled cotton blend, cotton-poly blend, or another construction, and how does it affect print sharpness?
- What is the usable print-safe zone on the sewn bag after hem, seam allowance, gusset, and handle reinforcement are included?
- What handle width, handle drop, and attachment method are included: box stitch, box-X stitch, or another reinforcement?
- What target bottle count and filled weight did you assume when quoting the construction?
- Can you provide a strike-off on actual fabric and a sewn pre-production sample with measured logo placement?
- Which decoration method is included, how many colors, what artwork size, and what setup charges apply on first and repeat orders?
- What internal load, lift, seam, or drop checks do you perform for bottle-carry tote orders?
- Will the bulk order include individual polybags, master carton liner, hangtag, barcode sticker, carton labels, or retailer routing marks?
Quality-control points to confirm
- Logo position should be measured from fixed points on the finished sewn bag, not judged visually from a flat cut panel.
- Placement tolerance such as ±5 mm can be a useful starting point for standard screen print, but the agreed tolerance should reflect artwork size and factory capability.
- Finished width, height, and gusset should be measured after sewing because dimension drift changes perceived logo centering.
- Fabric GSM should be spot-checked against the approved standard, with a stated lot tolerance such as ±5% if the buyer and supplier agree.
- Print must remain clear of handle stitch boxes, seam rollover zones, and the visible bottle-bulge area when the bag is filled.
- Handle pair length should match within agreed tolerance so the tote hangs evenly and the front logo does not tilt in use.
- Handle reinforcement stitches should be complete, secure, and free from skipped stitches, broken threads, or open corners.
- Side and bottom seams should be checked for seam slippage, raw edge exposure, twisting, skipped stitches, and stress whitening after load handling.
- Bottle-load validation should include the agreed bottle count or filled weight, repeated lifting, set-down checks, and review of seam strain and logo readability.
- Print quality should be checked for pinholes, ghosting, smudging, excessive ink spread, weak edges, transfer lifting, cracking, or embroidery puckering depending on method.