What durability means for farmers market use
Farmers market durability is not the same as conference giveaway durability. A shopper may carry the tote from the stall to the car, leave it in a hot trunk, bring it into a kitchen, fold it flat, and reuse it the next week with damp produce or bottles inside. That creates repeated flexing, abrasion at the base corners, point loads at the handle roots, and enough handling to expose weak sewing quickly. If the tote only feels sturdy in a sample room, it is not ready for procurement approval.
For buyers, the real question is not whether the bag looks substantial. It is whether the construction survives the load path. Groceries sit in the base, the base pushes outward on the side seams, and the side seams transfer stress into the handles. Failures usually show up in the same places: handle attachment points, bottom corners, seam intersections, and graphics that sit across a hard fold. A useful checklist starts from those failure modes, not from generic language like premium or eco-friendly.
A practical buying target is a reusable tote that can handle weekly shopping without obvious deformation after repeated use. For lighter market programs, a 10 oz canvas tote can work if the load is modest and the construction is disciplined. For produce, bottles, and mixed dry goods, many buyers move to 12 oz to 14 oz canvas and reinforce the load-bearing points. The right answer depends on weight, reuse frequency, and whether the tote is a branded retail item or a lower-cost promotional bag.
- Treat the market tote as a reusable load carrier, not a simple giveaway bag.
- Expect repeated folding, abrasion, and mixed item weights rather than one-time use.
- Set the test around the heaviest real shopping basket your vendors sell.
- Define whether the bag must look retail-ready after repeat use or only survive first delivery.
Turn the use case into a written spec
A durability checklist works only if the source spec is specific enough to compare across suppliers. Before you ask for pricing, define the end use, the carry weight, the finished bag size, the handle drop, and whether the tote must stand upright or collapse flat. A tote for bread and herbs can be built differently from one that needs to hold root vegetables, jars, and dairy. If that difference is not written down, the first quote round will produce apples-to-oranges pricing.
Use a production spec, not a marketing brief. Include body width, height, gusset depth, hem style, handle width, handle length, and the print area. State whether the canvas is natural, bleached, dyed, or garment-washed, because each choice changes hand feel, shade consistency, and cost. If the bag needs to be machine washed, say so in the spec. If it will only be spot-cleaned, that also matters because shrinkage and print wear behave differently.
Procurement teams should define tolerances before any sample is approved. A practical target is +/- 1/4 in on finished body dimensions and +/- 1/4 in on handle drop for a standard market tote, with tighter control if the bag is retail-facing. For print placement, ask the supplier to state how close the art may sit to a seam or fold. That small detail often determines whether the tote stays neat after repeated use or starts to look distorted after the first few trips.
- Write the end use first, then translate it into dimensions and construction.
- Specify body size, gusset depth, handle length, and handle width on one sheet.
- Call out whether the tote must be washable, foldable, or display-ready.
- Ask the supplier to quote against tolerances instead of assuming them.
Choose fabric based on weight, weave, and shrink control
Canvas durability is not just a fabric-weight question. Weight matters, but weave density, yarn consistency, finishing, and shrink behavior determine whether the bag keeps its shape after use. A loose 14 oz fabric can distort more than a tighter 12 oz fabric if the weave and finishing are not stable. That is why buyers should ask for the fabric description, not only the oz or gsm number. If the factory can tell you yarn count, weave type, and any pre-shrinking or washing process, you have a better basis for comparing quotes.
For farmers market tote programs, 12 oz to 14 oz canvas is a common procurement range because it balances hand feel, structure, and cost. Lighter 10 oz canvas can fit bread, herbs, or low-load promotional use, but it may feel too soft for heavier grocery carry. Heavier cloth can improve structure, but it also increases freight cost, sewing effort, and sometimes stiffness. Buyers should decide whether the bag needs a crisp retail look or a softer utility feel before locking fabric weight, because those are different product outcomes.
Shrink control matters if the tote will be washed, pressed, or shipped through humid conditions. Ask whether the canvas is pre-shrunk, garment-washed, or left in a raw finish. If the supplier cannot state expected shrinkage, push for a measured sample check before bulk approval. A bag that shrinks unevenly after washing can distort print placement and reduce the usable opening. If the tote will be sold as a reusable grocery bag, the supplier should be able to explain how fabric lot variation is controlled from sample to bulk.
- Ask for oz and gsm, but also ask about weave density and pre-shrinking.
- Use 12 oz to 14 oz as a common starting point for heavier market carry.
- Treat 10 oz as a lighter-duty option unless the load is clearly modest.
- Confirm expected shrink behavior if the tote will be washed or exposed to humidity.
Engineer the seams, handles, and bottom for the load path
Most tote failures are structural, not visual. The load enters the base, transfers through the side seams, and concentrates at the handle attachment points. If any of those transitions are weak, the bag may look acceptable but still fail in use. That is why buyers should ask specifically how the supplier builds the load path. A vague answer about strong stitching is not enough. You need the stitch type, stitch density, seam allowance, and reinforcement method.
For a durable grocery tote, cross-box reinforcement or bartacks at the handle base are often the key difference between a bag that survives weekly use and one that stretches out quickly. Ask whether the handle is self-fabric or webbing, how wide the handle is, and whether the handle fold direction pulls in line with the seam or twists across it. Handle width and handle drop should be matched to the expected load. A narrow handle may be acceptable on a light bag, but it can feel harsh and age faster on a heavier tote.
The bottom and side seams deserve the same attention. A boxed bottom or a properly formed gusset spreads load better than a weak flat seam with poor corner finish. As a procurement check, ask for a close-up image of the bottom corner, the side seam, and the handle attachment area. If the supplier cannot show those details before sample approval, the risk is usually hidden in the construction. For a bag meant to carry bottles or heavier produce, that is where the failure will happen first.
- Ask for stitch type, stitch density, seam allowance, and reinforcement details.
- Require handle-base reinforcement on any tote that carries dense or mixed groceries.
- Check the bottom corners and side seams as load-bearing points, not as finishing details.
- Reject samples with twisting handles, uneven reinforcement, or narrow seam allowances at the load path.
Choose decoration that does not weaken the bag
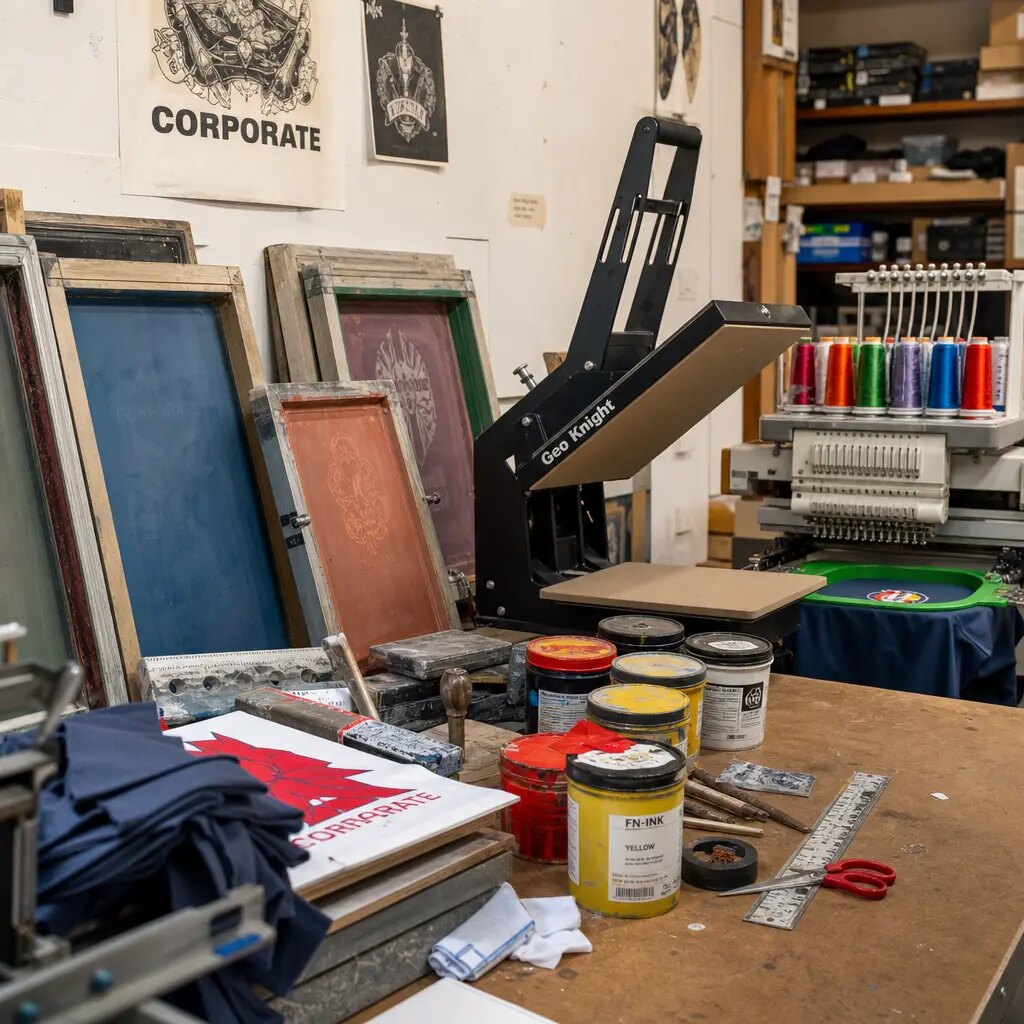
Decoration can make a durable tote fail sooner if the method is chosen for price alone. For simple logos on canvas grocery totes, screen print is usually the most practical option because it is repeatable and generally holds up better than many cheap transfer methods. But the print only remains durable if curing is done properly and the art is placed where it will not be repeatedly folded or rubbed against a cart edge. A nice logo in the wrong location is still a durability risk.
Buyers should specify where the decoration sits relative to the seams and the fold line. A useful rule is to keep artwork at least 1/2 in away from load-bearing seams and away from the main fold line whenever the layout allows. If the design must cross a seam or wrap around a corner, ask for a pre-production print sample and inspect it after folding the bag several times. The goal is not only color accuracy. It is whether the graphic survives the tote's actual handling pattern.
Finishing quality is part of durability, not just cosmetics. Loose thread tails, dirty press marks, uneven hems, and skipped topstitching usually indicate process control problems somewhere upstream. Ask the supplier how they verify cure, rub resistance, and final visual cleaning before packing. If the tote is sold at a farmers market or used as a branded retail item, the first impression matters, but the bigger issue is whether the decoration cracks, peels, or scuffs after regular use.
- Use a decoration method that matches the wear and fold pattern of the bag.
- Keep the graphic away from the main fold line and load-bearing seams when possible.
- Ask how the print is cured and how rub resistance is verified before packing.
- Treat loose threads, dirty press marks, and uneven hems as process warnings, not minor cosmetics.
Compare suppliers on the same build, not the same picture
Two quotes can look similar while representing very different production control. A direct cut-and-sew factory with in-house printing and final QC often gives the buyer the cleanest control path because fabric, sewing, decoration, and packing stay in one chain of accountability. A trading company can still work well if it controls the factory tightly, but then procurement needs to confirm where the sewing happens, who inspects, and who owns rework. If the seller cannot answer those questions clearly, the unit price is not enough to justify the risk.
The biggest quoting trap is hidden substitution. One supplier may assume 10 oz canvas, another 12 oz. One may include bartacks, another may not. One may price a simple folded handle, another a reinforced self-fabric handle. That is why every quote should be built from the same spec sheet and the same packing requirement. If the supplier proposes a lower cost, ask which element changed: fabric, stitching, print, packaging, or testing. A lower price is useful only when the build remains comparable.
Ask each supplier for a line-item quote or at least a clear breakdown of the cost drivers: fabric, cutting, sewing, print setup, packing, sample fee, carton spec, and any inspection or test charge. That makes it easier to compare FOB and landed cost. For a heavy canvas tote order, freight can move more than buyers expect, so the cheapest factory price is not always the best landed cost. If the bag is going into a retail program, consistency on reorders matters as much as the first order price.
- Compare only after fabric weight, reinforcement, print method, and pack spec are aligned.
- Ask who actually sews the bags and who performs final inspection.
- Request a line-item or at least driver-based quote breakdown.
- Treat a very low quote as a prompt to check for hidden spec changes.
Quote questions that expose hidden substitution
Good RFQs reduce ambiguity, but the quote-stage questions are where hidden shortcuts usually surface. Ask the supplier to quote against the exact fabric weight, the exact handle construction, and the exact print method. Then ask what would trigger a price revision. If the answer is vague, such as depending on final review, push for specifics. For example, does a handle change, a color count increase, or a different carton count alter the price? Those are the details procurement needs before approval.
You should also ask for the sample path in writing. Will the pre-production sample be made from the same fabric roll, same thread, same handles, and same print process as the bulk run? If the answer is no, the sample is only a visual reference, not a production approval. Ask what test the supplier uses on the sample: static load, seam pull, rub test, wash test, or fold test. If they cannot name the test, the QC process is probably too weak for a durable retail tote.
A useful quote question is whether the supplier can hold a shade band or reserved fabric lot for the order. That matters because even a small color shift can create a mismatch between the approved sample and the bulk carton. Also ask which charges are one-time setup costs and which are recurring costs. Screen setup, artwork prep, special folding, and custom carton printing can change the economics materially. The more exact the quote questions, the less likely the buyer is to be surprised after sample approval.
- Ask what triggers a price revision before you approve the quote.
- Confirm whether the pre-production sample will use the same materials and process as bulk.
- Ask how the supplier controls shade consistency and fabric lot reservation.
- Separate one-time setup charges from recurring unit costs.
Approve the sample like a production buyer
A good-looking sample is not enough. The approval sample should be made from final fabric, final thread, final handles, final print method, and final packing method. If the supplier shows a nicer showroom sample built from different cloth or special finishing, that may be useful for visual direction, but it should not be treated as the production standard. Procurement should approve the thing that will actually run through the bulk line.
When possible, compare multiple samples side by side. You are looking for repeatability: handle length consistency, seam straightness, panel symmetry, print placement, and the way the bag folds. A single sample can hide variation. Three samples usually show it. If the tote is going into a retail program, confirm how it will look flat, packed, and hanging. That matters because some bags look strong open on a table but reveal uneven folds or crooked prints once packed.
Write the approval record in plain language. State the approved fabric weight, body dimensions, handle dimensions, print artwork version, reinforcement method, fold direction, and carton pack. If any of those points are still open, the sample is not fully approved. This protects the buyer when a production issue appears later and the factory says the order was interpreted differently. A written approval should close the ambiguity, not extend it.
- Approve only from final materials and the final production process.
- Compare more than one sample if the order is important or repeated.
- Record the exact approved build before bulk release.
- Treat showroom samples as references unless they match the bulk spec exactly.
Set QC limits before shipment release
Quality control on canvas grocery totes needs to check both appearance and function. Start with dimensional checks against the approved spec, then inspect seam quality, handle symmetry, and reinforcement at the load points. A bag can look clean while still being weak at the corners or under the handle base. For a tote that will be used for groceries, that is not a cosmetic defect. It is a product failure waiting to happen.
A useful acceptance approach is to define critical, major, and minor defects before production starts. Critical defects would include open seams, missing handle reinforcement, broken stitching at the attachment point, or a bag that fails the load test. Major defects might include print placement outside tolerance, body size outside tolerance, or visible shade mismatch across cartons. Minor defects might include small loose threads or slight fold marks if they do not affect retail presentation. If the supplier uses its own standard, ask to see it in writing and compare it to yours.
Static and repeat-load testing should be practical, not theoretical. For a grocery tote, many buyers ask for a hang test in the 15 to 25 lb range for 30 to 60 seconds, followed by repeated lift cycles on the same sample. That level is not a universal law, but it is a useful procurement target because it exposes weak stitching and handle creep before shipment. Add a rub test on the printed panel and a fold test across the main crease. If the print cracks or transfers, the tote is not ready for bulk release.
- Define critical, major, and minor defects before bulk production starts.
- Use a realistic static load test and repeat-lift check on sample units.
- Check dimensions, reinforcement, and print placement with stated tolerances.
- Reject a shipment if the factory cannot show its acceptance criteria in writing.
Protect the tote in packing, storage, and transit
Packing is part of the product because the bag can be damaged before the end user ever touches it. If the tote is folded too tightly, the print can hold a permanent crease. If the carton is overpacked, the handles can distort and the front panel can crush. Buyers should define the fold direction, the unit count per inner pack or carton, and whether the bags need a polybag, moisture barrier, or desiccant. The right answer depends on route length, humidity, and how the bags will be stored at destination.
For manual warehouse receiving, carton weight matters. A common practical target is to keep master cartons light enough for normal handling, often below roughly 35 lb if the receiving team will lift by hand. That is not a hard rule, but it is a useful procurement constraint because a heavier carton can slow receiving and increase damage risk. Ask the supplier to confirm carton dimensions, carton count, and the final packed weight before shipment. If the tote is going to a distribution center, align the pack count with the receiving process instead of only optimizing for freight cube.
Ask for carton pack photos before the shipment closes. Those photos should show the fold, the stack height, the carton label, and any moisture protection. If the bags are shipped in humid conditions or stored before resale, ask whether the factory recommends a moisture barrier. The goal is to protect the product without over-compressing it. A tote that arrives technically correct but badly creased still creates a customer complaint and an avoidable cost to the buyer.
- Specify fold direction so the print and panel shape stay clean.
- Use moisture protection when transit or storage conditions justify it.
- Keep carton weight and count aligned with warehouse handling.
- Request carton pack photos before the shipment is released.
Specification comparison for buyers
| Spec decision | Recommended option | When it fits | Buyer risk to check |
|---|---|---|---|
| Supplier route | Direct cut-and-sew factory with in-house printing and QC | Best for repeat programs, private label lines, and buyers who need one team to control fabric, sewing, and print | Confirm the supplier is actually producing bags, not only brokering orders, and ask for line photos plus recent inspection records |
| Fabric weight | 12 oz to 14 oz canvas, or roughly 340 to 400 gsm | Fits daily market carrying, heavier produce, and buyers who want a sturdier hand feel | Too-light canvas may pass a sample but sag, soften, or shrink more than expected after repeated use |
| Handle construction | Self-fabric handles with cross-box stitching or bartack reinforcement | Fits bags that will carry bottles, root vegetables, and mixed dry goods | Check stitch density, handle fold direction, and whether the reinforcement is sewn on the actual bulk spec or only on a pre-production sample |
| Print method | 1 to 2 color screen print or a small woven label with print on a separate panel | Fits logos that need repeatability and decent abrasion resistance | Heat-applied graphics can crack or lift if the base fabric is too rough or the curing step is rushed |
| Sample route | Pre-production sample made from final fabric, final handles, and final print method | Fits new launches and any order where the tote will represent a retail brand | Do not approve from a showroom sample made from different cloth, different sewing, or different finishing |
| MOQ logic | One fabric, one print method, one carton spec per colorway | Fits buyers who need predictable cost and fewer production variables | Too many versions can raise setup cost, create short runs, and reduce consistency across cartons |
| Packing method | Flat-packed with moisture protection and a carton count that matches warehouse handling | Fits export shipments and retail distribution centers | Loose stuffing, over-compression, or high carton weight can crease the bag, damage print, and slow receiving |
| QC route | Inline inspection plus final carton check with pull tests on handles and seams | Fits importers that need evidence before shipment release | If the factory only checks appearance, hidden seam weakness may not show until market use |
| Lead-time plan | Fabric reservation before print approval, then production after sample sign-off | Fits seasonal programs with firm launch dates | If fabric is not reserved early, a low quote can turn into a late shipment or a different shade lot |
Buyer checklist before sampling
- Confirm the target use case: produce, bread, dairy, bottles, or general market carry.
- Set the fabric weight in oz or gsm before asking for quotes.
- Specify whether the canvas should be natural, bleached, dyed, or garment-washed.
- Write the finished bag size, gusset depth, and handle drop in inches or millimeters.
- Specify handle width, handle fold direction, and whether the handles are self-fabric or webbing.
- State the print method, number of colors, and artwork placement distance from seams and folds.
- Define whether the bag must be washable, folded daily, or reused every week.
- Ask for a pre-production sample made from final fabric and final trims.
- Request seam, handle, and print test results on the approval sample.
- Lock carton count, bag folding method, and polybag or moisture barrier needs.
Factory quote questions to send
- What fabric weight do you recommend for this tote, and is that weight before or after washing?
- Can you quote the bag with the final print method we plan to use, not a substitute decoration method?
- What is your MOQ by fabric color, print color count, and carton specification?
- What are your standard tolerances for body size, handle drop, and print placement?
- Will the pre-production sample use the same fabric roll, same thread, same handles, and same print process as bulk production?
- What seam reinforcement do you use at the handle attachment point, and can you share a close-up photo?
- What stitch density do you run at the load-bearing seams, and can you keep that setting in bulk?
- What is your standard carton pack count, and can it be adjusted for warehouse receiving or retail display needs?
- What is the lead time after sample approval, and which steps are on the critical path?
- How do you manage shade consistency across rolls and between sample and bulk production?
Quality-control points to confirm
- Check body dimensions against the approved spec, using a target tolerance of +/- 1/4 in on the finished bag.
- Verify handle drop and handle symmetry, with left-right variation no greater than 1/8 in if the bag is retail-facing.
- Inspect seam integrity at the bottom corners, side seams, and handle attachment points, not just the exterior appearance.
- Reject missing bartacks, skipped stitches, loose thread clusters, open seams, or needle damage at load-bearing points.
- Run a static load test on sample units, commonly 15 to 25 lb for 30 to 60 seconds depending on the final use case.
- Check print adhesion with a dry rub test and a fold test; no visible cracking, flaking, or transfer should appear on the approval sample.
- Verify print placement within +/- 1/8 in of the approved artwork map if the design sits near seams or fold lines.
- Inspect fabric shade across rolls and cartons so one shipment does not mix visibly different lots without approval.
- Confirm there is no odor, oil stain, moisture damage, or needle hole cluster from sewing and packing.
- Review carton pack count, folding direction, polybag or moisture barrier use, and carton crush risk before the shipment is sealed.