Start with the event brief, not the logo file
A canvas grocery tote for a trade show is a logistics item before it is a brand item. It has to be printed cleanly, carry the intended load, arrive flat and clean, fit the booth team’s handling process, and reach the advance warehouse or event site on time. A polished proof does not help if the handles are uncomfortable, the gusset is too shallow for sample boxes, or the cartons are labeled in a way the receiving team cannot sort.
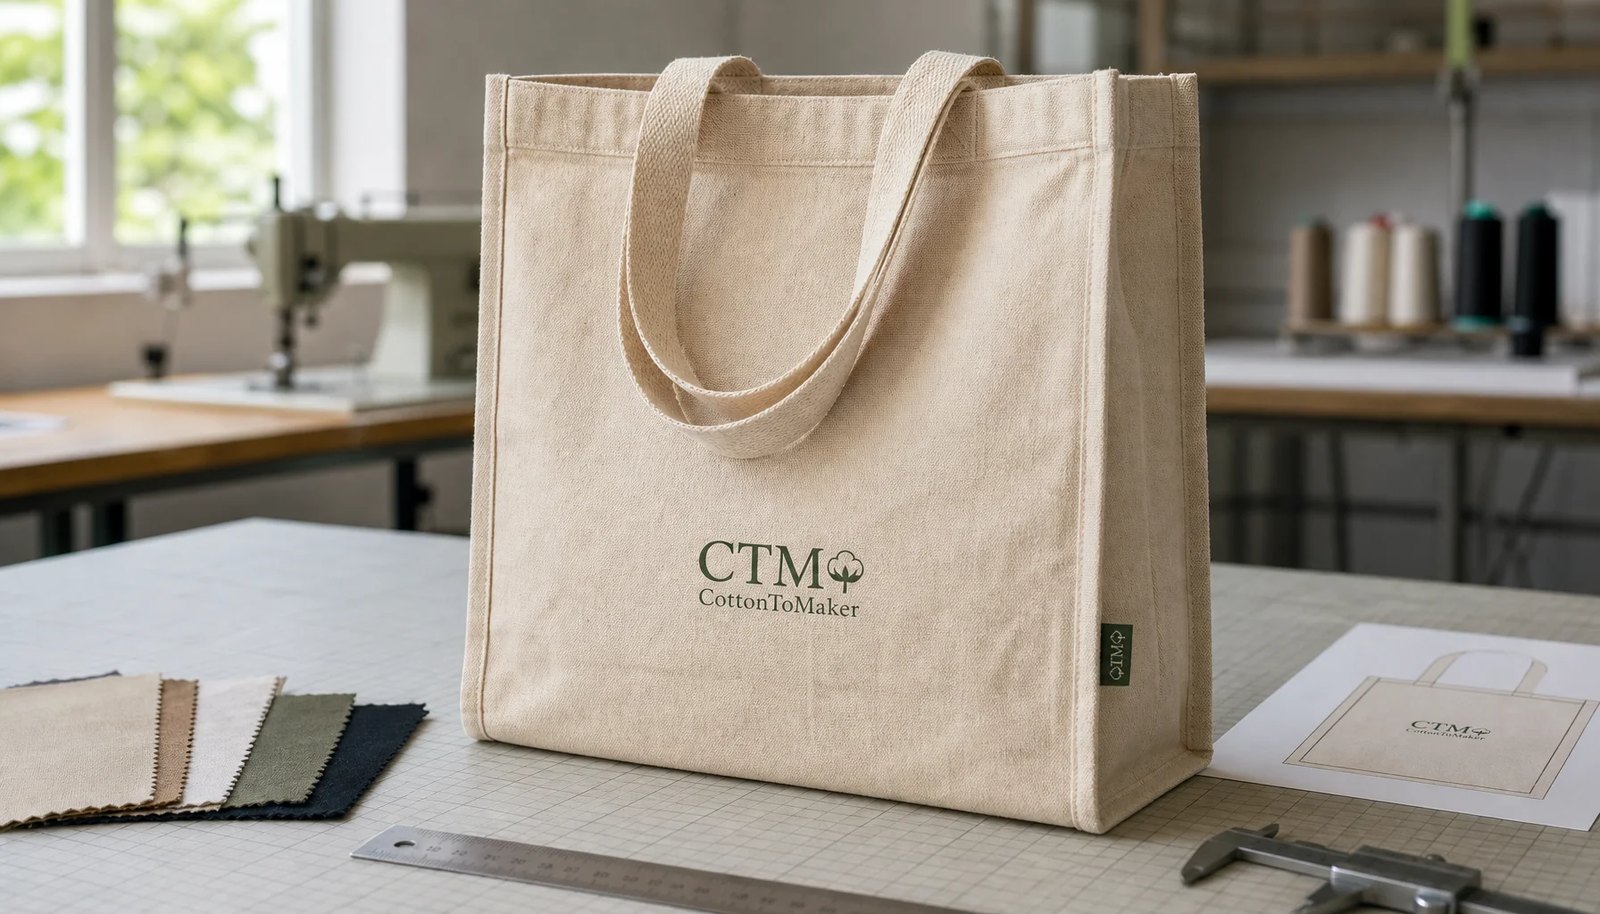
The right canvas grocery totes print proofing checklist for trade show exhibitors starts with how the tote will actually be used. A bag handed out empty at registration has different priorities from a bag pre-packed with bottles, catalogs, apparel, or VIP sponsor materials. A tote stacked behind a booth counter needs consistent folding and fast carton opening. A tote used as part of a paid sponsorship package needs tighter version control, cleaner logo placement, and stricter packing separation.
Treat the brief as a routing document, not a mood board. Define who gets the tote, what goes inside, how many pieces must arrive, where the cartons go, and what cannot slip. That keeps the spec tied to the event schedule instead of drifting into vague brand language that the factory cannot inspect against.
- For registration handouts, prioritize carton opening speed, clean presentation, consistent folding, and accurate event routing labels.
- For booth giveaways, prioritize logo readability, handle comfort, practical carton weights, and fast restocking during show hours.
- For sponsor kits, prioritize color control, logo-version separation, clean packing, and carton marks that match each sponsor or destination.
- For retail resale, prioritize sewing consistency, fabric hand feel, barcode or hangtag placement, and stricter cosmetic inspection.
- For grocery-positioned promotions, prioritize gusset depth, load behavior, handle reinforcement, and body structure over the lowest unit price.
Turn marketing goals into a purchase specification
Marketing teams usually describe a tote in broad terms: premium, sustainable, durable, on brand, useful, or giftable. Those words are direction, not a specification. Procurement needs a line-item RFQ that converts them into finished dimensions, fabric weight, fiber content, fabric color, handle construction, print method, print area, print placement, packing, inspection, and delivery requirements. Otherwise two suppliers can quote very different products under the same name.
A practical spec sheet for a common trade show order might read like this: 15 x 16 x 4 in finished size, 12 oz natural canvas, 2.5 cm cotton webbing handles, 60 cm handle drop, 1-color front print at 8 x 8 in, box-stitch reinforcement at the handle, 50 pcs per carton, critical defects at zero, major AQL 2.5, minor AQL 4.0, ship to advance warehouse. That level of detail removes the guesswork that causes the most RFQ disputes.
The most common gap is finished size. A supplier may write 15 x 16 inches, but that still leaves open whether the measurement is flat, open, before sewing, after sewing, with or without gusset depth, or after washing or pressing. For comparison across factories, write the finished sewn width, height, gusset depth, handle width, and handle drop. Add a tolerance in millimeters or inches so QC has a standard at inspection.
- Must specify: finished size, gusset depth, canvas weight, fiber type, handle drop, handle reinforcement, print dimensions, print location, artwork version, packing, and delivery deadline.
- Should specify: fabric shade range, thread color, print hand feel, carton marks, inspection standard, sample approval process, and repeat-order reference sample.
- Useful to specify: barcode, hangtag, inner bundle count, individual polybag, pallet pattern, 3PL routing, advance warehouse label, and appointment delivery needs.
- Avoid undefined phrases such as heavy duty, premium, eco-friendly, large logo, standard handle, retail packing, or strong stitching unless each term is tied to a measurable requirement.
Choose canvas weight with freight and feel in mind
For many exhibitor grocery totes, 10 oz to 12 oz cotton canvas, about 270 to 340 GSM, is a practical range. It gives enough body for catalogs, light samples, apparel, and small packaged items while keeping carton weight and freight volume manageable. An 8 oz canvas, about 220 GSM, can work for budget brochure distribution, but it usually has less structure and may feel closer to a light promotional shopper than a grocery tote.
Heavier canvas is not automatically the better buy. At 14 oz and above, the tote may feel more substantial, but the buyer should check fold memory, sewing strain, print cracking, carton quantity, gross weight, and freight cost. Thick canvas can make side seams and handle attachment points bulky. It can also reduce how neatly the tote packs, which matters when cartons need to move quickly at a booth or fly to a late event date.
Ask suppliers to state both oz and GSM because sourcing teams use different shorthand. Also clarify whether the fabric is natural greige cotton, bleached cotton, dyed cotton, recycled cotton, organic cotton, or a blend. Natural canvas often has seed flecks, slubs, and shade variation; these can be acceptable, but they should be reviewed on the approved sample. Dyed canvas adds dye-lot control, possible colorfastness questions, higher MOQ, and longer lead time.
- 8 oz or about 220 GSM: economical for light handouts, less structured, and more likely to collapse when displayed or filled.
- 10 oz or about 270 GSM: common middle option for trade show totes with useful structure and reasonable freight efficiency.
- 12 oz or about 340 GSM: stronger hand feel and better load confidence for heavier booth materials, with higher carton weight.
- 14 oz and above: premium-feeling but should be tested for fold marks, print cracking, needle penetration, and carton efficiency.
- Dyed canvas: useful for brand programs, but confirm dye lot, MOQ, lead time, and realistic color tolerance before approval.
- Recycled or organic cotton: confirm fiber content, certification scope, document availability, labeling rules, and whether the fabric can meet the event schedule.
Lock construction and handles before artwork is approved
A grocery tote is defined as much by construction as by size. A flat tote may have a larger print panel, but it will not carry bulky items the same way. A bottom-gusset tote adds capacity while keeping the side profile simple. A full side-and-bottom gusset creates the more familiar grocery shape and works better for boxes, bottles, catalogs, folded apparel, or sample packs. A box-style tote may stand more cleanly, but it can change the front panel geometry and sewing cost.
Artwork proofing depends on that construction. A logo centered on a flat proof can drift visually once the side gussets open. A wide print can wrap toward the side fold. A lower graphic can bend across the bottom crease when the bag is packed flat. Before screens are made, request a placement drawing based on finished sewn dimensions, with the safe print zone marked away from seams, gusset folds, handle stitch boxes, and heavy seam intersections.
Handles should be specified before proof approval as well. Cotton webbing around 2.5 to 3 cm wide is common for trade show grocery totes. A finished shoulder drop of about 55 to 65 cm works for many adult users, but the right drop depends on market preference, bag height, and load. If the tote will carry heavy samples, ask for reinforced attachment such as box stitching, cross stitching, bar tacking, or the factory’s proven equivalent, then make that construction inspectable.
- Confirm whether the tote is flat, bottom-gusset, full side-and-bottom-gusset, or box-constructed.
- Measure the usable print area after accounting for gusset folds, not just the visible width of the flat front panel.
- Keep logo edges clear of side seams, bottom fold lines, handle stitch boxes, top hem, and thick seam intersections.
- Use reinforced handle stitching when the tote may carry bottles, catalogs, electronics samples, packaged food, or boxed products.
- Ask for handle drop as a finished measurement, then test the sample by hand and over the shoulder with expected contents.
- If the tote must stand partly open at the booth, test the physical sample with actual or simulated event contents.
Set print rules before the proof is released
Screen printing remains the most common practical choice for canvas grocery totes used by trade show exhibitors. It works well for bold one-color to three-color logos, sponsor marks, and large front-panel branding. Water-based ink can give a softer hand feel when the fabric color allows enough opacity. Plastisol can provide stronger opacity and sharper coverage on some fabrics, but it may feel heavier on large solid areas. Either option should be evaluated on the chosen canvas, not assumed from a PDF.
Digital print, heat transfer, and embroidery solve different problems. Digital printing may support complex graphics or smaller runs, but cotton texture can soften fine detail and shift color expectations. Heat transfer can reproduce gradients or photographic art, but buyers should test edge adhesion, surface feel, and fold durability. Embroidery can look premium for small marks, but a large embroidered grocery tote logo can pucker the panel, increase cost, and reduce packing efficiency.
The print method should be selected after reviewing the actual artwork. Thin rules, tiny legal copy, reversed text, dense halftones, tight multi-color registration, and QR codes all increase risk. A capable supplier should recommend minimum line thickness, smallest readable text, maximum print area, and expected registration tolerance. For canvas, a practical minimum line thickness around 0.4 mm is often a safer starting point than hairline artwork, but the factory should confirm it based on mesh, ink, fabric texture, and design.
- Use screen print for bold solid logos, repeat orders, sponsor marks, and event quantities where cost and consistency matter.
- Use water-based ink when a softer hand feel is important and opacity is acceptable on the chosen fabric.
- Use plastisol when opacity is more important, but sample large coverage areas for surface feel and fold behavior.
- Use digital print for complex graphics or shorter runs only after checking detail clarity and color on textured canvas.
- Use heat transfer for gradients or photographic artwork after testing edge durability, surface feel, and folding.
- Use embroidery for small premium marks rather than large front-panel grocery tote graphics unless puckering and cost are acceptable.
- Avoid hairline icons, small reversed copy, dense halftones, and low-contrast QR codes unless the printer approves them on the actual fabric.
Build a proof package the factory can reproduce
A strong proof package removes interpretation from the print room. It should include vector artwork, outlined fonts, Pantone or brand color references, final print width and height, print method, color count, placement from finished sewn edges, and a scaled layout on the actual tote dimensions. A note that says center front is not enough because a printer might center on the cut panel, the sewn flat bag, or the visible area between gusset folds.
Placement should be stated in millimeters or inches. Show the distance from the finished top edge, side edges, bottom fold, gusset crease, and handle stitch area. If the design contains sponsor names, legal marks, URLs, campaign dates, or QR codes, identify the minimum readable sizes. QR codes need special care: include the destination URL, preserve the quiet zone, avoid low contrast, and scan the printed sample from realistic phone angles and distances.
Version control is a major B2B risk in trade show orders. One event may have a master logo, several sponsor logos, regional variations, language versions, or booth-specific artwork. Each file name should match the purchase order line, sample tag, carton mark, packing list, and destination. The goal is not paperwork for its own sake; it prevents wrong-logo cartons, mixed versions, and delays when the receiving team is working against a fixed event schedule.
- Provide vector files for line-art logos and outline all fonts before sending production artwork.
- State final print width and height, plus placement from the finished top edge and side edges.
- Mark no-print zones around seams, gusset folds, bottom crease, top hem, and handle stitch boxes.
- Give Pantone targets, but approve the final production standard against a physical sample printed on the selected canvas.
- Include QR code size, quiet zone, destination URL, contrast requirement, and a printed scan test if the tote includes a QR code.
- Name each artwork version consistently across file names, PO lines, sample tags, carton labels, and inspection documents.
- Require written approval before the supplier resizes, thickens, simplifies, recolors, or repositions artwork for production.
Use physical samples as the approval standard
A digital proof confirms layout, but it cannot prove fabric shade, ink absorption, opacity, hand feel, handle strength, stitch quality, or folding behavior. For first-time orders, custom fabric, strict brand standards, QR codes, sponsor versions, or fixed event dates, a physical pre-production sample is the safer approval standard. The sample should use the intended bulk fabric, thread, handle material, ink, print placement, stitching, and packing fold wherever possible.
Treat sampling as a controlled production step. Measure the sample after sewing and normal fabric relaxation. Record width, height, gusset depth, handle width, handle drop, print dimensions, print placement, fabric shade, thread color, stitch pattern, and visible natural canvas characteristics. Photographs with a ruler help communication, but the approved physical sample should remain available to the buyer, factory, or inspection team as the visual and construction reference.
Photo approval can be reasonable for repeat orders using the same supplier, same fabric, same logo, same print method, same approved standard, and same delivery path. For new orders, photo-only approval leaves too many variables open. If timing forces partial approval by photo, state exactly what is approved from the photo and what still requires inline inspection or post-production inspection. That keeps both sides from assuming a picture approved every hidden specification.
- Approve fabric weight, shade, surface texture, and hand feel before releasing bulk production.
- Measure the sample against the RFQ and purchase order after sewing, pressing, and normal relaxation.
- Check whether the printed face cracks, creases, sticks, or transfers when folded as it will be packed.
- Scan printed QR codes from realistic distances and phone angles, not only at close range under office lighting.
- Review handle comfort and attachment strength with expected contents, not only with an empty tote.
- Document acceptable natural canvas features such as seed flecks, slubs, slight shade range, and yarn irregularity.
- Do not release bulk printing until sample approval, final artwork files, quantities, and version names are aligned.
Quote MOQ, packing, and lead time separately
MOQ for canvas grocery totes is rarely just a sewing quantity. Fabric availability, dyeing minimums, screen setup, print color count, artwork versions, label requirements, packing style, and destination splits can all create practical minimums. A supplier may support a lower MOQ for stock natural canvas with a one-color print, while requiring higher quantities for custom dyed fabric, recycled-content fabric, certified materials, or several sponsor versions.
Quote comparison should separate the base tote from the print and handling variables. The base bag price should reflect the same finished size, GSM, gusset construction, handle specification, stitching, and fabric type. Print pricing should identify color count, screen charges, setup fees, artwork adjustment costs, sample fees, and any color-matching charges. Packing should state whether bags are bulk packed, inner bundled, individually polybagged, hangtagged, barcoded, master-cartoned, or palletized.
Lead time also needs precise wording. A quote that says 20 production days may mean 20 days after deposit, after final artwork, after sample approval, after fabric arrives, or after all approvals are complete. For trade shows, buyers should build the calendar backward from the receiving deadline. Include sample production, sample transit, revision time, bulk production, inspection, packing, export handling, freight, customs clearance, appointment delivery, and any advance warehouse cutoff.
- Ask MOQ by fabric color, artwork version, print color count, packing format, and destination split.
- Separate base bag unit cost from screen charges, sample charges, setup fees, color matching, packing labor, and labeling.
- Confirm whether dyed fabric, recycled content, organic cotton, or certification documents change MOQ or lead time.
- Ask whether multiple sponsor logos are treated as one order with several print runs or as separate production lots.
- Request quote validity because fabric, labor, exchange rates, and freight can move between RFQ and PO.
- Build the calendar backward from the show warehouse deadline, decorator cutoff, or 3PL receiving appointment.
- Keep buffer for sample revisions, inspection findings, customs delays, freight changes, and warehouse receiving issues.
Set QC limits before bulk production starts
Quality control works best when the standard is written before production. Canvas is textured, so tiny ink variations and natural fabric irregularities can be normal, but the main branding area should not show obvious smears, ghosting, double images, severe pinholes, color contamination, crooked placement, stains, or dirty handling marks. Buyers should define critical, major, and minor defects before the factory prints thousands of pieces.
Critical defects should usually have zero tolerance. These include wrong artwork, wrong fabric color, missing handles, unsafe contamination, incorrect logo version, mixed versions without labeling, and wrong routing marks that could send cartons to the wrong venue or warehouse. Major defects include visibly off-center logos, broken handle stitching, severe print defects on the front panel, incorrect size outside tolerance, and gussets that prevent the tote from opening properly. Minor defects can include small loose threads or natural fabric irregularities outside the main branding area if they fall within the approved standard.
Inspection should include both product checks and packing checks. Measure finished dimensions, handle drop, print position, print size, carton labeling, and piece count. Pull samples from the beginning, middle, and end of the run to catch production drift. For urgent trade show orders, QC should also verify that cartons are separated by version and marked for the correct destination before shipment. If you use an AQL plan, write the inspection level and defect classification into the purchase order or inspection booking.
- Use the approved physical sample as the visual standard for fabric shade, print color, print hand feel, stitching, handle construction, and packing fold.
- Measure print position from finished sewn edges, not from cut panels or loose templates.
- Classify wrong artwork, wrong bag color, missing handles, unsafe contamination, and wrong carton routing as critical defects.
- Classify obvious smears, double printing, crooked logos, broken handle stitches, major stains, and incorrect size outside tolerance as major defects.
- Define acceptable limits for tiny pinholes, natural slubs, shade variation, loose threads, and small sewing irregularities before production.
- Check handle attachment with a pull test suitable for the expected load and approved construction.
- Inspect carton labels, version separation, inner bundles, packing lists, and destination marks as part of the trade show QC process.
- Common starting points are zero critical defects, AQL 2.5 for major defects, and AQL 4.0 for minor defects unless your internal standard is stricter.
Plan the shipment around the show calendar
Trade show totes fail most often in the last mile, not in the sewing line. The buyer has to think through advance warehouse rules, label formats, appointment windows, and whether the cartons need to survive pallet handling, hand-carry receiving, or direct booth delivery. A tote that ships on time but misses the venue label format can still arrive too late to matter.
Ask for the carton and routing details before the order is released. Each carton should show the PO number, artwork version, piece count, destination, and any event or sponsor code that the receiving team needs. If the order is split across show sites or sponsor groups, keep versions in separate cartons whenever possible. That makes receiving faster and reduces the chance of mixed inventory at the show floor.
Build a buffer into the schedule. Sampling, approval, production, inspection, packing, freight booking, customs, and warehouse receiving all need time, and each step can add a day or more if something needs correction. For cross-border trade show orders, the safest margin is not the supplier’s fastest date but the date that still leaves room for reprint, re-pack, or re-routing if a problem appears.
- Confirm advance warehouse cutoff, receiving appointment rules, and any venue-specific carton labels before production starts.
- Ask whether the cartons need palletization, skids, stretch wrap, or tailgate delivery.
- Keep a clean packing list with PO number, SKU, artwork version, destination, and carton count.
- Separate sponsor versions or regional versions unless the receiving team explicitly wants mixed cartons.
- If the cartons will be hand-carried at receiving, keep gross weight manageable and avoid overpacked cartons.
- Hold a contingency window for reprint, re-pack, customs delays, and freight rescheduling.
Specification comparison for buyers
| Spec decision | Recommended B2B specification | Best fit | Quote and QC risk to control |
|---|---|---|---|
| Canvas weight | 10 oz to 12 oz cotton canvas, about 270 to 340 GSM, verified against the approved sample and purchase order | Most trade show grocery totes carrying catalogs, light samples, apparel, or boxed literature | Do not compare quotes by fabric name alone. Below about 8 oz may feel flimsy; above about 14 oz increases freight volume, fold stiffness, needle stress, and carton weight. |
| Tote construction | Full side-and-bottom gusset or box-style grocery construction with reinforced handle attachment | Exhibitors that need a tote to open wider, accept bulky items, and present well on registration counters or booth tables | Flat totes are cheaper but carry less volume, distort print when filled, and do not behave like a grocery tote. Confirm construction with a drawing or physical sample. |
| Finished size | Width, height, gusset depth, handle width, and handle drop stated as finished sewn measurements | Buyers comparing multiple factories, repeat orders, sponsor versions, or reorders against an approved sample | Cut-panel dimensions can hide seam allowance and shrinkage. State tolerances, such as plus or minus 5 mm for width and height and plus or minus 10 mm for handle drop unless another standard is agreed. |
| Print method | Screen print for 1 to 3 solid colors; digital print or transfer only when artwork complexity justifies physical testing | Most exhibitor logos, sponsor marks, campaign graphics, booth QR codes, and front-panel branding on natural or dyed canvas | Fine lines below about 0.4 mm, small reversed text, heavy ink coverage, tight registration, and QR codes need sample approval on the actual fabric. |
| Printable area | Safe zone measured from finished sewn edges, typically clear of top opening, side seams, gusset folds, bottom crease, and handle stitch boxes | Logos that must read while carried, stacked, folded, or displayed at a booth | A proof centered on a flat rectangle can be wrong on the finished tote. Require a 1:1 placement layout with no-print zones marked. |
| Color control | Pantone or brand references plus approval against a physical print on the selected canvas | Brand-sensitive exhibitors, franchise programs, sponsor packages, distributor kits, and retail resale programs | Monitor proofs and coated-paper references do not predict cotton shade, seed flecks, ink absorption, opacity, or color shift on dyed canvas. |
| Handle specification | 2.5 to 3 cm cotton webbing, finished shoulder drop commonly 55 to 65 cm, with box, cross, bar tack, or agreed reinforcement stitching | Trade show visitors carrying the tote for several hours across a venue | Short handles reduce usability; very long handles increase carton volume and may drag. Handle drop must be measured after sewing, not before attachment. |
| Carton pack count | State pieces per carton and carton dimensions; a practical starting point is 50 to 100 pcs/carton for lighter flat totes and 25 to 50 pcs/carton for heavier gusseted bags, then adjust to gross weight and fold | Show receiving, warehouse storage, and booth restock | Overpacked cartons crush corners, increase labor, and can push carton weight beyond manual handling limits. |
| MOQ basis | MOQ broken out by fabric color, artwork version, print color count, packing style, label requirement, and destination split | Orders from 500 to 5,000+ pieces with sponsor versions, regional logos, or distributor consolidation | A low headline MOQ can hide separate screen charges, higher per-version costs, missing samples, limited fabric choice, or extra packing labor. |
Buyer checklist before sampling
- Define the event use case first: registration handout, booth giveaway, sponsor kit, retail resale, pre-packed sample bag, or grocery-positioned promotional item.
- Write a finished size, not a cut size: width, height, gusset depth, handle width, and handle drop measured after sewing and normal relaxation.
- Specify canvas weight in oz and GSM, plus fiber type: natural cotton, bleached cotton, dyed cotton, recycled cotton, organic cotton, or cotton blend.
- State whether the fabric is stock or custom dyed, washed or unwashed, certified or uncertified, and whether there is a dye-lot minimum.
- Confirm construction: flat tote, bottom-gusset tote, full side-and-bottom gusset grocery tote, or box-style tote.
- Define the safe printable area with clearance from the top opening, side seams, bottom fold, gusset folds, handle stitch boxes, and heavy seam intersections.
- Provide vector artwork with outlined fonts, Pantone references, final print size, minimum line thickness, QR code quiet zone, and a 1:1 placement layout.
- Separate must-haves from preferences: deadline, logo placement, Pantone match, QR code scanability, certification claims, and approved packaging are not optional if they affect launch or compliance.
- Ask the supplier to confirm the print method, screen count, setup fee, color matching process, and the smallest readable text or line weight for the actual fabric.
- Require a physical pre-production sample for first orders, large logos, QR codes, multi-logo sponsor programs, dyed canvas, or fixed event deadlines.
Factory quote questions to send
- What exact canvas weight is included in the quote in oz and GSM, and is it natural greige, bleached, dyed, recycled, organic, or blended cotton?
- Is the quoted size the finished sewn size? What tolerances apply to width, height, gusset depth, handle width, and handle drop?
- Is this a flat tote, bottom-gusset tote, full side-and-bottom-gusset grocery tote, or box-style tote? Can you provide a construction drawing or clear sample photo?
- What handle material, width, total length, finished drop, and attachment stitch pattern are included? What reinforcement do you recommend for the expected load?
- Which print method is quoted, how many colors are included, and what screen, setup, plate, color-matching, artwork adjustment, or sample charges apply?
- What is the maximum safe print area for this finished tote size without crossing side seams, gusset folds, bottom creases, or handle stitch zones?
- What minimum line thickness, smallest positive text size, smallest reversed text size, QR code size, and registration tolerance do you recommend for this fabric and print method?
- Can you make a physical pre-production sample using the intended bulk fabric, thread, handle material, ink, print position, stitching, and packing fold before mass production?
- What is the sample lead time after artwork approval, and how many sample revisions are included before extra charges apply?
- What is the MOQ for each fabric color, artwork version, print color count, packing style, and destination split if the order is divided across sponsor, exhibitor, or regional logos?
Quality-control points to confirm
- Finished bag size should match the written tolerance, commonly plus or minus 5 mm for width and height and plus or minus 10 mm for handle drop unless the purchase order states a different requirement.
- Canvas GSM should be checked against the approved sample and purchase order because fabric weight affects structure, print absorption, carton count, and freight cost.
- Fabric shade should be compared with the approved sample under consistent light, especially for natural canvas where seed flecks, slubs, and shade variation are expected within agreed limits.
- Print center and print height should be measured from finished sewn edges, not from cut panels, loose templates, or unsewn fabric pieces.
- Print must remain clear of side seams, bottom folds, gusset corners, handle stitch boxes, and any crease line that will bend through the logo or QR code.
- Logo color should be judged against the approved physical sample on the same fabric, not only against a monitor, office printout, or coated-paper Pantone chip.
- QR codes, URLs, sponsor names, legal marks, and certification marks should remain readable after printing on textured cotton and after the tote is folded for packing.
- The main branding area should show no obvious ink smears, double images, ghosting, severe pinholes, dirty fingerprints, fabric dust embedded in ink, or color contamination.
- Handle attachment should match the approved construction and use secure box, cross, bar tack, or agreed reinforcement stitching suitable for the intended load.
- Side and bottom gussets should be symmetrical enough for the tote to open cleanly, sit reasonably flat when loaded, and avoid twisting the front logo.