Why material selection matters more than artwork in winery tote programs
For winery exhibition tote bags, the material choice usually determines the buyer experience more than the graphic. A strong logo printed on the wrong fabric still looks wrong: too thin and the bag collapses, too soft and the impression feels cheap, too heavy and the tote becomes awkward for giveaways. Procurement teams get better results when they start with the channel and the load requirement, then pick the canvas spec around that job.
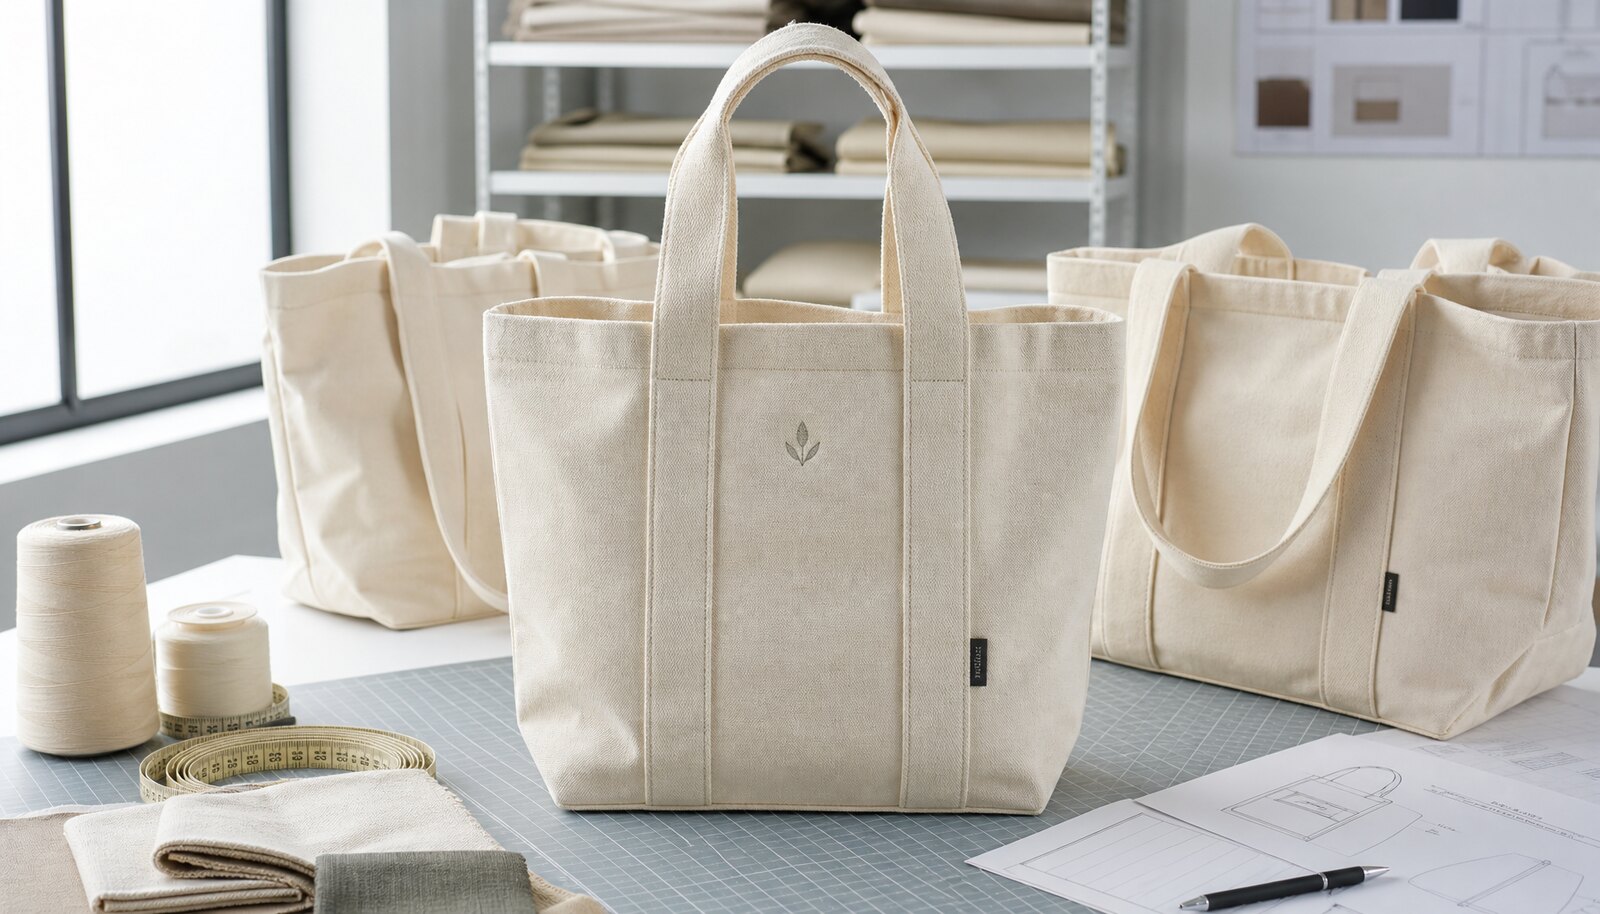
That matters because winery programs are not all the same. A tote handed out at a trade exhibition has different expectations from a retail bag sold in a tasting room or a gift bag packed for a wine club. The first can prioritize cost and efficient packing. The second needs better hand-feel, cleaner sewing, and a finish that holds up in front of shoppers. The third may need bottle support, stronger handles, and less variation between sample and bulk. The common mistake is buying from a logo-first mindset and discovering later that the fabric, seams, or wash behavior do not fit the use case.
- Start with channel, load, and presentation standard before asking for artwork quotes.
- Treat the canvas as part of the brand experience, not just the carrier for the logo.
- Compare supplier samples under the same light and the same fold condition, or the material differences will be harder to see.
Map the tote to the actual winery use case
The right canvas selection changes depending on how the bag will be used. If the tote is mainly for brochures, tasting notes, postcards, or a small takeaway item, a lighter canvas can work as long as the structure still looks intentional. If it needs to carry a bottle, a catalog, and a small gift insert, the material should be thick enough to resist distortion, and the handles should be wide enough to spread the load. If the tote is a retail SKU, the buyer should also care about how the fabric ages after folding, whether it keeps a clean silhouette on shelves, and how it looks when placed next to other premium gift items.
A practical RFQ should describe the real contents, not only the tote itself. A one-bottle carrier, a two-bottle carrier, and a flat exhibition tote can all be called canvas bags, but they should not be quoted as if they are the same product. For wineries, that distinction affects the cloth weight, gusset depth, handle stitch pattern, and even the carton size if the bag is packed with inserts. The faster you make that use case explicit, the faster the factory can quote the right material and the fewer revision rounds you need later.
- Brochure or event handout: prioritize low weight, clean print, and low packing cost.
- Retail gift bag: prioritize hand-feel, seam quality, and stable dimensions.
- Bottle-carry tote: prioritize denser canvas, reinforced handles, and a load test that mirrors actual use.
Choose the canvas weight by function, not by what sounds premium
Heavier canvas is not automatically better. For winery exhibition tote bags, the practical range is usually 10 oz to 12 oz for most mixed-use programs, with 8 oz to 9 oz reserved for light giveaway work and 14 oz or above reserved for premium retail or load-heavy applications. A lighter bag can be perfectly acceptable if the product is only carrying leaflets or small inserts, but if the contents are visible through the fabric or the body twists when loaded, the material is too light for the job. At the other end, a very heavy canvas may look substantial but can slow sewing, increase freight weight, and make the tote feel too stiff for a casual wine-event audience.
Procurement teams should ask suppliers to quote the same finished spec at more than one fabric weight if they are still deciding. That makes the tradeoff visible. A 10 oz body with reinforced handles may be enough for a standard tasting-room program. A 12 oz body can give more opacity and better drape control with a small cost increase. A 14 oz body may be justified only if the bag must carry bottles, resell as a premium item, or withstand repeated use over a longer life cycle. The decision should be based on fit-for-purpose, not on the assumption that thickest equals best.
- 8 oz to 9 oz: economical and light, but check for show-through and handle distortion.
- 10 oz to 12 oz: the most common working range for winery event and retail crossover use.
- 14 oz and above: better structure and durability, but higher sewing effort and freight weight.
Understand weave density, yarn count, and shrinkage before you sign off the fabric
Canvas weight alone does not tell the whole story. Two bags can both be labeled 12 oz and still feel different because one uses a tighter weave, different yarn count, or a different finishing process. That is why procurement teams should ask for weave density or yarn count whenever possible, or at minimum a physical swatch from the same production lot. A denser weave usually gives better opacity, cleaner print edges, and a more structured feel. A looser weave can be softer and cheaper, but it is more likely to show contents and may allow print to sink into the cloth unevenly.
Shrinkage deserves the same level of attention. If the tote will never be washed and is only used as a giveaway, the buyer can tolerate a looser shrinkage stance. If it is a retail item, a gift that may be washed, or a product with tight size expectations, the acceptable shrinkage band should be agreed in advance. Many buyers use a practical finished-size tolerance and ask the supplier to show how the bag behaves after a standard wash or steam process. The key is to judge the bag in the state that the customer will receive, not only in the unfinished sample state. That prevents disputes later when bulk units arrive slightly smaller, slightly softer, or more wrinkled than the approved prototype.
If the factory cannot speak clearly about weave density or shrink behavior, that is a procurement warning sign. It does not necessarily mean the supplier is weak, but it does mean the buyer should ask for a more complete technical description before approving the material. The more repeatable the spec, the easier it is to compare later orders and hold the same look across seasons.
- Ask whether the cloth is plain weave, duck canvas, or a heavier duck structure, because the weave changes drape and print result.
- Request the same swatch after finishing if the bag is washed, pre-shrunk, or garment-treated.
- Set a finished-size tolerance that matches the channel, then use it as the basis for inspection.
Use finishes deliberately: raw, washed, pre-shrunk, or dyed
The finish changes the behavior of the bag as much as the base fabric does. A raw natural canvas has a cleaner, more utilitarian look and is usually the easiest to quote, but it may feel rougher and may vary more from lot to lot. Washed canvas gives a softer retail presentation and can feel more premium in a tasting room or gift shop, but the buyer needs to control shade variation and finished size because the process can change both. Pre-shrunk or stabilized canvas is often the safer option when the tote is expected to sit in a retail channel or be compared directly against other branded merchandise.
Color is another finish decision that affects sourcing discipline. Natural canvas is forgiving and usually works well with winery branding, especially when the logo is dark and simple. Dyed canvas can be effective when the brand program needs a specific colorway, but it creates more risk around lot matching, rub fastness, and color shift under different lighting. If the bag is supposed to feel premium, do not ask the factory to improvise a finish after the sample. Ask for the exact finish on the sample you approve, then require bulk to match that sample as closely as the production process allows. That is the only way to control expectations across sales, marketing, and procurement.
- Raw natural canvas: easiest to source, but check for rough hand-feel and lot variation.
- Washed canvas: softer and more retail-friendly, but confirm size change and shade consistency.
- Pre-shrunk or stabilized canvas: better for repeatability when finished dimensions matter.
- Dyed canvas: use when color is part of the brand spec, and ask for rub-fastness and lot controls.
Construction details decide whether the bag survives real use
Construction is where many canvas tote programs fail. A bag can have the right fabric weight and still return as a complaint if the seam allowance is too narrow, the handle stitch pattern is weak, or the bottom shape collapses under load. For winery tote bags, the handle zone deserves the most attention because that is where repeated lifting puts stress on the sewing. The buyer should ask for visible reinforcement at the attachment points, even if the tote is meant for moderate loads. If the bag is expected to carry bottles or dense inserts, the handle webbing width and stitch pattern matter as much as the canvas itself.
The body pattern should also reflect the load. A flat tote is efficient for paper materials and lighter event use. A gusseted base helps the bag stand, distributes the load more evenly, and gives better volume for bottle packs or gift sets. But gussets add fabric and labor, so they should be used intentionally rather than by default. A good supplier should be able to explain why a certain seam allowance, gusset depth, and handle length were chosen. If they cannot, the buyer may be looking at a pattern that was copied from a generic bag rather than designed for the winery channel.
- Ask for a minimum seam allowance on body seams and wider reinforcement at stress points.
- Require bar-tacks or an equivalent reinforcement method at the handle anchors.
- Match gusset depth to the intended contents; deeper is not automatically better.
Set print compatibility rules before comparing suppliers
The print method should follow the material, not the other way around. On a dense natural canvas, screen printing usually gives the cleanest result for simple winery logos, vintage marks, or one-color brand text. The ink sits well, the edges stay readable, and the cost is usually easier to control at scale. For more complex artwork, transfer and digital methods can preserve detail, but buyers should expect differences in hand-feel, opacity, and long-term appearance. If the logo is small or the art depends on fine line work, ask the supplier to show the exact print scale on the actual fabric, not only on a digital mockup.
One mistake procurement teams make is comparing a screen-printed quote to a transfer-printed quote as if they were equivalent. They are not. The finished look, durability, and even the order economics can be different. A better RFQ states the artwork color count, print area, placement, acceptable color shift, and whether the design can tolerate slight softness at the edges. That lets buyers compare real alternatives instead of guessing whether a low quote hides a lower-grade print method. If the bag is for a retail channel, the print standard should be tight enough that the tote looks good on a shelf and not only in an email proof.
Wineries sometimes want a subtle brand treatment rather than a loud logo. That is another reason to align material and print early. A softer washed canvas may suit a quiet retail feel, while a dense natural duck may be the better background for a crisp, high-contrast logo. The material and the print need to work together, or the tote will look off even if each component is acceptable in isolation.
- Screen print: usually best for simple logos and repeatable runs.
- Transfer or digital print: useful for complex art, but confirm feel, opacity, and edge quality.
- Write print placement and size into the RFQ so suppliers cannot substitute a smaller or weaker decoration later.
Use a material comparison table, not a sourcing-route table, when you review quotes
For this keyword, the comparison has to stay focused on the fabric. Buyers need to see how weight, weave, finish, shrinkage, and print compatibility change the result. A sourcing-route comparison may be useful later, but it does not answer the first question: what material actually belongs in the tote? The table in this guide is designed to make that decision faster, especially when different suppliers use different fabric labels or slightly different finishing assumptions.
The most useful comparison language is measurable. Ask for oz and GSM, ask whether the fabric is plain weave or duck, ask whether the cloth is washed or pre-shrunk, and ask how much finished-size change is expected after any treatment. Once those are on the same sheet, the commercial discussion becomes clearer. You can then compare not only unit price, but the cost of rework, the risk of returns, and the probability that the tote will still look right after repeated handling or retail display.
- Do not compare a raw canvas quote against a washed canvas quote without noting the finish.
- Use the same fabric terminology across all suppliers, or the lowest quote may simply be the least complete spec.
- Tie the fabric choice to the actual contents and the expected life of the tote.
How to write an RFQ that gets you comparable material quotes
A strong RFQ for winery tote bags should be specific enough that two factories can quote the same thing. That means the document needs more than artwork and target quantity. It should name the fabric weight, weave type, finish, finished size, handle length, gusset depth, seam allowance, and whether the bag is intended for retail resale or event distribution. It should also specify whether the sample you want is pre-production, production-matched, or a reference only. The more you leave implicit, the more the supplier will fill in with their own assumptions, and the less comparable the quotes will be.
Procurement teams should also separate the base bag from optional extras. A tote with no wash finish, one-color print, and bulk carton packing should be quoted as the base. Then ask for separate adders for extra print colors, woven labels, hangtags, polybags, retail folding, bottle dividers, or special carton marks. That is how you see where the cost really sits and which spec changes are worth paying for. It also reduces the chance that the supplier builds hidden margins into a vague all-in quote.
If you need multiple size variants, put the same material language on every version. A 10 oz natural duck tote in two sizes is easier to compare than two bags described only by rough dimensions. For seasonal winery programs, this matters because the first order often becomes the reference point for reorder pricing and future packaging reviews.
- Specify material, dimensions, finish, and construction in the same document.
- Ask for base price and adders separately so you can see the impact of every upgrade.
- Keep the same terminology in all supplier replies to avoid mismatched interpretations.
Approve samples like a buyer, not like a designer
A sample is supposed to prove that the material can be produced consistently, not only that one unit looks attractive. When a winery tote sample arrives, inspect it under the same conditions you expect in bulk. Measure the finished dimensions after pressing. Check whether the canvas feels too loose or too rigid. Confirm that the print is centered and that the edges remain clean on the real fabric rather than looking sharp only in a mockup. If the tote is meant for retail, fold it in the same way the warehouse or store will receive it and confirm that the fold line does not leave a permanent ugly crease.
The sample stage is also the best time to test the handle and seam behavior. Put a realistic load in the bag and lift it evenly from the handle junctions. Look for twisting, puckering, or stitch spread. If the bag is intended for bottles, use weight that reflects the channel instead of a token paper load. If the finish is washed or pre-shrunk, check whether the sample matches the expected post-finish size. A sample that only passes on appearance is not a good approval sample for procurement. It needs to pass on material behavior as well.
When a supplier sends multiple sample versions, ask them to label the differences clearly. If one version is a raw fabric prototype and another is a finished reference, those cannot be used interchangeably for approval. The goal is to lock the exact combination of fabric, finish, print, and construction before the bulk order begins.
- Measure the actual sample, not just the cut pattern or drawing.
- Test the handle and seam with realistic load, especially if bottles are part of the use case.
- Approve the exact finish that will be used in bulk; do not approve a raw sample for a washed production run.
Specification comparison for buyers
| Material choice | Typical spec | Best fit | Buyer checks |
|---|---|---|---|
| Light plain-weave canvas | 8 oz to 9 oz, open or medium-density weave | Short-term giveaways, event handouts, brochure packs | Check for show-through, handle distortion, and whether screen print stays crisp on a thinner body |
| Standard duck canvas | 10 oz to 12 oz, tighter weave, natural or bleached finish | Most winery exhibition and tasting-room programs | Ask for fabric weight in oz and GSM, weave density, and a bulk swatch from the same lot |
| Pre-shrunk duck canvas | 10 oz to 12 oz, sanforized or otherwise stabilized | Retail resale, club gifts, programs that may be laundered | Confirm finished-size tolerance after a wash or steam test and ask whether shrinkage is measured before or after finishing |
| Heavy duck canvas | 14 oz or above, dense structure and firmer drape | Bottle carry, premium retail, or reusable tote programs | Check seam allowance, handle reinforcement, carton weight, and whether the bag becomes too rigid for your channel |
| Washed canvas | Usually 10 oz to 12 oz with garment or enzyme washing | Premium-looking gift bags and softer retail presentation | Expect shade variation, softer hand-feel, and possible size change after finishing; approve the actual finish, not only the greige sample |
| Dyed canvas | Any weight with piece-dyed or yarn-dyed color | Brand-color programs or retail SKUs that need a specific colorway | Request color standards, rub-fastness expectations, and lot-to-lot consistency, because dye variation is a common dispute point |
Buyer checklist before sampling
- Define the channel first: tasting-room retail, exhibition giveaway, wine club gift, distributor pack-in, or bottle-carry tote, because each one points to a different fabric weight and finish.
- Lock the fabric spec in measurable terms: oz, GSM, weave type, yarn count or weave density, and whether the fabric is pre-shrunk or washed after sewing.
- State the finished size, handle drop, gusset depth, seam allowance, and the maximum load the bag needs to carry without distortion.
- Choose the print method only after the artwork is final, since one-color logos, multi-color art, and small text each favor different print processes.
- Request a physical pre-production sample made from the same fabric and finish that will run in bulk, not only a flat artwork proof.
- Set acceptance criteria for shrinkage, size tolerance, stitching quality, print registration, and carton packing before the PO is issued.
- Ask the supplier to separate base bag cost from adders such as wash finish, extra print colors, woven labels, hangtags, retail folding, or individual polybags.
Factory quote questions to send
- What is the exact fabric weight in oz and GSM, and is that measurement taken before or after any wash, pre-shrink, or finishing process?
- What is the weave type and density, and can you share yarn count or another measurable description of the cloth structure?
- Is the canvas 100% cotton, a cotton-rich blend, or a different fiber mix, and how does that affect print result and shrinkage?
- What finished dimensions do you guarantee, and what tolerance do you use for width, height, gusset, and handle drop?
- What seam allowance is built into the pattern, and are handle anchors reinforced with bar-tacks, X-box stitching, or both?
- What print method is included, how many colors are covered, and what setup charges apply for extra placements or repeat runs?
- If the fabric is washed or pre-shrunk, what shrinkage range should we expect after the standard wash or steam test?
- What load or pull test do you use for handle and seam validation, and what happens if units fail that test?
- What is the MOQ by size, color, and print version, and can you hold pricing if we reorder the same spec later?
- What packing standard will you follow, including fold method, carton count, carton dimensions, label position, and whether polybags are required?
Quality-control points to confirm
- Agree a fabric acceptance band in writing instead of relying on vague language like premium or heavy canvas; procurement needs a number, not a description.
- Measure finished size after sewing and any planned finishing, then compare it to the approved sample under the same condition.
- Set a shrinkage target that matches the use case; for retail programs many buyers insist on a tight post-finish size range and reject lots that drift outside it.
- Require consistent seam allowance on body seams and wider reinforcement at handle anchors, because small pattern drift is how tote failures start.
- Check that stitch length is even, thread tails are trimmed, and no skipped stitches appear at the handle junction or top edge.
- Review print registration, ink coverage, and edge sharpness under daylight or standardized inspection lighting, especially for fine winery logos and small text.
- Confirm that the bag survives a realistic load test, not just a hand pull; if the tote is meant for bottles, test with weight that mirrors actual use.
- Inspect carton counts, carton marks, and fold quality so the first warehouse receipt or retail display does not create avoidable rework.