Why museum tote buying is different from general promotional totes
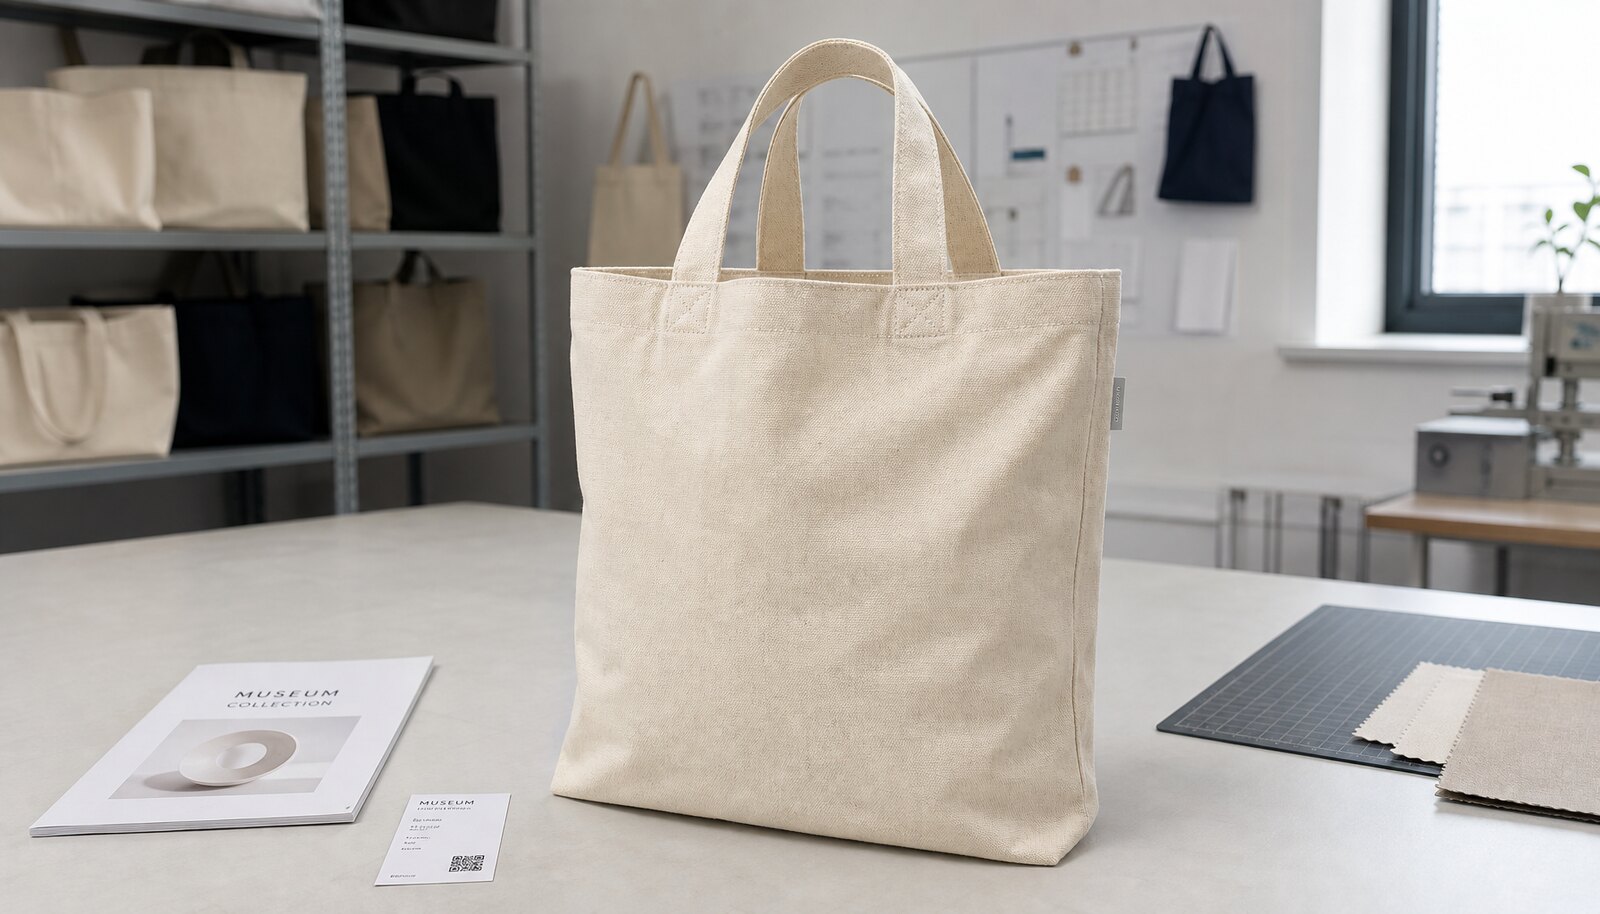
A museum exhibition tote is not just a giveaway bag. It often has to carry hardback catalogs, exhibition guides, notebooks, and purchase items from the shop, while still looking retail-ready enough to sit near the cashier. That combination changes the sourcing decision: the bag must feel durable, print cleanly on canvas, and arrive before the exhibition opening date, not after the launch window has passed.
For procurement teams, the real problem is usually not the tote design itself. It is the gap between what the buyer expects in a quote and what the factory assumes. If you do not define fabric weight, print size, handle construction, and packing format, you can end up with a quote that looks cheap but cannot hold books well, or a sample that looks acceptable but slows production by two weeks once artwork changes begin.
- Museum buyers usually care about display value, retail margin, and carry strength in the same order.
- The right spec must balance shelf appeal with print durability and freight efficiency.
- A tote that feels too flimsy creates complaints at the museum shop counter, even if it passed on paper.
Fabric weight and construction: the first cost driver in the quote
For most museum exhibition programs, 10 oz to 12 oz canvas is the practical base range. It is heavy enough to hold catalogs and boxed souvenirs without collapsing, yet still economical to sew and ship. If the bag will be sold as a premium merchandise item, or if you expect heavier loads and repeated reuse, 16 oz canvas is worth pricing separately. The weight choice should be stated in oz or GSM, because terms like 'thick canvas' are too vague for a factory quote.
Handle construction matters as much as body fabric. A narrow self-fabric handle on 10 oz canvas may be fine for light retail use, but museum buyers often need stronger carry performance. A wider handle, a longer handle drop, or bar tacks at the stress points may add modest cost but prevent returns and negative reviews. If the tote is meant for gift shop resale, the stitching finish and seam straightness become part of the perceived brand value.
- 10 oz to 12 oz: balanced option for standard exhibition retail and catalog carry.
- 16 oz: better for premium merchandise, larger books, and repeat-use positioning.
- Bar tacks and reinforced handle joins reduce failure risk more than cosmetic add-ons do.
Print method choice: what works on museum artwork and what slows the line
Screen printing is usually the default for museum totes when the design is one to three solid colors and the artwork is not overly detailed. It gives strong color, predictable placement, and manageable unit cost at scale. For exhibition logos, short text, and simple graphics, it is usually the cleanest route. If your artwork includes fine linework, gradients, or a complex poster reproduction, you need to decide early whether the effect is worth the higher risk and cost of transfer or multi-pass printing.
Heat transfer and digital transfer methods can support smaller runs or artwork with many colors, but they change the risk profile. These methods may look good on approval samples, yet they can be more sensitive to wash testing, abrasion, and canvas texture. On a rougher canvas surface, very fine text can lose clarity. For a museum buyer, the important issue is not whether a print can be made once; it is whether the same result can be repeated across a full batch with consistent registration and surface finish.
- Screen print is usually the safest choice for repeatable retail production.
- Transfer methods fit short runs or complex art, but need stronger durability testing.
- Avoid finalizing artwork size after sample approval; it can reset screens or plates and delay shipment.
MOQ logic: how factories actually build the minimum order
MOQ for canvas exhibition tote bags is usually driven by the way the factory allocates fabric, cutting, printing setup, and sewing line time. A simple bag body with one print location and one handle style can often be quoted at a lower MOQ than a fully customized program. But if you change fabric color, handle color, lining, inner pocket, or add a woven label on each side, the factory may treat each variation as a separate production item and raise the minimum accordingly.
The easiest way to manage MOQ is to keep the bag body consistent and vary only the print artwork across exhibition series. That lets the factory reuse cutting patterns and sewing methods while changing just the print screen or transfer file. If you are a distributor or retail buyer planning multiple museum accounts, it is often smarter to build one core spec and one packaging format, then vary the front graphic by order rather than by construction.
- One body spec + one handle spec + one print location usually keeps MOQ manageable.
- New trim colors, lining, zippers, or pocket additions can move the order into a higher MOQ tier.
- Ask whether MOQ is per design, per colorway, or per production batch before you compare quotes.
Supplier route comparison: direct factory, trading company, or local converter
For canvas exhibition tote bags, sourcing route affects more than price. A direct factory usually gives the best control over fabric weight, stitching, and print setup, which matters when you need a repeatable museum retail item. A trading company may be useful if your organization wants one point of contact and can accept a higher margin for coordination. A local converter can shorten communication time and help with last-minute artwork changes, but the unit cost and true production origin may be less favorable.
The right route depends on your internal workload and your tolerance for spec discipline. If your procurement team already writes tight RFQs, the factory route is usually the best fit. If your organization changes artwork often or combines many product categories in one shipment, a trading company may smooth communication. The key is to compare not just unit price, but how each route handles sample timing, change requests, packing, and final shipment booking.
- Direct factory: best for control, repeat orders, and clearer production accountability.
- Trading company: useful when you need consolidation, but confirm who owns QC responsibility.
- Local converter: helpful for fast coordination, but often less efficient on large volume orders.
Production-specific comparison: choosing the right sourcing route for museum tote orders
This comparison is most useful when you are deciding how to source a museum tote program across one exhibition or several seasonal launches. The same bag can be a clean fit for one route and a poor fit for another, depending on your internal deadlines, artwork complexity, and target landed cost.
Use this table to compare the way each route handles MOQ, change control, and quote reliability rather than focusing on headline price only. The cheapest quote is often the one with the most exclusions.
- Write decisions in measurable language, not only descriptive wording.
- Ask for sample photos plus one physical approval sample for important orders.
- Keep quotation, sample approval, and inspection notes tied to the same spec version.
Sample approval: what must match before bulk production starts
A museum tote sample should be treated as a production control tool, not just a visual approval. The sample must show the actual fabric weight, the final handle length, the exact print placement, the stitch density at stress points, and the intended packing format. A good sample is one you can measure, load, and compare directly to the quote line by line.
Before approval, place a realistic load in the bag. A flat sample that looks fine on a table may distort badly when it holds books. Check whether the bottom panel stays flat, whether the handles sit evenly, and whether the print area warps around seams. If the bag is meant for retail resale, also inspect edge finishing and whether the side seams present cleanly in a display stack.
- Measure finished dimensions, handle drop, and print location against the signed-off spec sheet.
- Load-test the sample with catalog weight or equivalent retail merchandise.
- Reject samples that look good only from one angle or only before use.
Packing, carton loading, and barcode detail for museum retail flow
Packing can quietly decide whether your tote program feels professional when it arrives. Flat-packed totes are usually the easiest format for museum distribution because they reduce carton volume and make shelf handling simpler. If the bags are to be sold individually at retail, a simple polybag, barcode sticker, and clean fold direction may be enough. If the buyer is distributing across multiple museum locations, carton labeling should match the receiving team’s workflow so stock can be counted and moved without repacking.
Do not leave carton quantity to the factory's standard habit. The right inner pack count depends on the tote thickness, whether the bag is folded with handles inside or outside, and how much compression the print can take without creasing. Oversized cartons can crush the fold line; undersized cartons can increase labor at receiving. A good quote should state carton dimensions, gross weight, inner pack count, and whether the bag has a retail hangtag or barcode already attached.
- Flat pack reduces freight cost and is usually best for museum shop replenishment.
- Polybagging is optional unless your retail team requires dust protection or scan-ready presentation.
- Outer carton marks should include style, color, qty, and PO reference to avoid receiving delays.
Lead time review: where the schedule really slips
A standard lead time for a simple canvas exhibition tote is often in the 25 to 35 day range after sample approval, but that is only useful if every dependency is frozen. The most common delay is not sewing capacity; it is artwork revisions, late confirmation on print color, or packaging changes after the sample stage. If the order is tied to an exhibition opening, build backward from the in-stock date, not from the purchase order date.
If you need a rush program, the first thing to compress is usually complexity. Keep one fabric weight, one print method, one body color, and one pack format. The more variable points you add, the less likely the factory can hold the schedule. Air freight can protect the launch date, but it should be treated as a recovery tool, not a default plan, because it can erase the cost advantage of a good factory quote.
- Sample approval time should be included separately from bulk production time.
- Artwork revisions after approval can add days even if the sewing line is ready.
- Rush freight may rescue a launch but should not be hidden inside the factory price comparison.
Quote data to compare on one sheet, not across scattered emails
A useful quote for canvas exhibition tote bags should let you compare suppliers without guessing what is included. The quote should show fabric weight, bag size, print method, MOQ, sample cost, production lead time, packing detail, and any extra charges for labels or cartons. If the factory sends only a unit price, the comparison is too thin to support procurement decisions.
When you line up multiple quotes, normalize them before you decide. One supplier may quote a lower unit price but exclude packing, while another includes a woven label and barcode sticker. One may quote a lower MOQ because it assumes one print plate, while another is pricing a more complex artwork file. The goal is to compare the same finished item, not just the same words.
- Require a full spec line for fabric weight, handles, print, and packing.
- Separate sample cost, bulk unit price, and freight so the landed cost is visible.
- Watch for hidden add-ons on labels, barcode stickers, and carton markings.
Specification comparison for buyers
| Spec decision | Recommended option | When it fits | Buyer risk to check |
|---|---|---|---|
| Fabric weight | 10 oz to 12 oz canvas for standard museum retail; 16 oz for premium catalog and gift use | General exhibition merchandise, book carry, tote resale, and repeat use | Too light causes sagging and seam stress; too heavy raises freight cost and slows sewing |
| Print method | Screen print for solid logos; heat transfer only for short runs or multi-color artwork | Simple museum logos, event names, and one- to three-color exhibition graphics | Fine text can fill in on coarse canvas; transfers may crack if wash testing is ignored |
| MOQ route | Factory-direct with one standard bag body and one print location | Programs that need 1-3 repeat designs or seasonal exhibition drops | Custom fabric, zipper add-ons, or multiple SKU colors can multiply MOQ unexpectedly |
| Lead time plan | 25-35 days after sample approval for standard canvas tote orders | Orders using existing fabric, standard handles, and simple print | Delay risk rises if artwork is not final, trim colors are unconfirmed, or packaging is customized |
| Sample stage | Pre-production sample with actual fabric, handle length, print placement, and stitching | Any first order, new supplier, or new museum brand line | Photo-only samples hide sewing and print defects that affect mass production |
| Packing format | Flat pack with carton inner quantity matched to shelf and receiving workflow | Museum shops, distributors, and importers needing efficient carton count and barcode labeling | Loose packing increases carton damage; over-tight carton loading can crease prints |
| Supplier route | Direct factory for lower unit cost and controlled customization | Established buyers with clear specs and forecasted reorder potential | Requires better RFQ discipline; weak spec sheets lead to quote gaps and change-order cost |
| Quality standard | AQL-based inspection with seam strength, print registration, and size tolerance targets | Retail programs that must survive customer handling and shelf presentation | No stated tolerance means the factory may treat cosmetic variation as acceptable |
| Freight strategy | Sea freight for replenishment orders; air only for launch-critical rush quantities | Orders with stable forecast and enough lead time before exhibition opening | Rush air freight can erase savings from a low factory quote |
Buyer checklist before sampling
- Confirm finished bag size, handle drop, and whether the tote must hold catalogs or boxed merchandise without distortion.
- Lock the canvas weight in oz or GSM, not just 'heavy canvas' or 'premium cotton'.
- Approve one print method and one print size range before sampling so artwork changes do not reset the schedule.
- State whether the bag needs an unbleached natural look, bleached white base, or dyed body color.
- Define packing: flat pack, polybagged, barcode label, master carton quantity, and any retail hangtag requirement.
- Set the target arrival window by exhibition opening date, not by order date alone.
- Ask for factory photos of sewing line, printing area, and carton packing workflow before first-order approval.
Factory quote questions to send
- What exact fabric weight, weave density, and shrinkage assumption are you quoting for the canvas body?
- Does your MOQ change if we keep one bag size but vary print design, handle color, or lining?
- What are your standard lead times for sample, production, and shipment booking separately?
- Which print method is included in the base quote, and what is the surcharge for extra colors or larger print coverage?
- What carton quantity, carton size, and gross weight are you planning for this tote?
- What acceptance tolerance do you use for size, print registration, and stitching defects during final inspection?
- Which items are charged separately: woven label, hangtag, inner polybag, barcode sticker, and carton marks?
- Can you show a similar canvas tote production photo or inspection record from the same fabric weight?
- What happens to lead time if we revise artwork after sample approval?
- Is the quoted MOQ based on one colorway, one print plate set, or one production batch across all SKUs?
Quality-control points to confirm
- Bag size tolerance: keep finished dimensions within plus or minus 0.5 cm to 1.0 cm depending on bag size and sewing construction.
- Fabric weight verification: confirm the incoming canvas matches the approved GSM or ounce target before cutting.
- Handle strength: test the handle stitching and bar tack area for load carry without thread break or seam distortion.
- Print alignment: inspect logo placement, color density, and edge clarity under daylight-equivalent lighting.
- Stitch quality: check seam skips, loose threads, and uneven topstitch on side seams and handle joins.
- Carton packing: verify flat-packed quantity, carton compression resistance, and barcode visibility on outer cartons.
- Smell and contamination: reject units with strong odor, oil marks, dye transfer, or dust contamination from packing.
- Sample-to-bulk match: compare production pieces against the approved sample for handle length, print size, and fabric shade.
- Drop and load practicality: place a realistic catalog stack or merchandise weight inside to confirm no base distortion.