Why procurement teams should treat event tote bags as a controlled custom item
Canvas exhibition tote bags for corporate events are often listed as a simple promotional item, but from a procurement standpoint they behave more like a controlled custom product. The bag has multiple specification layers: fabric, cutting, sewing, handle reinforcement, print method, packing, and delivery timing. If any one of those layers is left vague, the supplier will fill in the gap with a standard shop-floor assumption. That is where most quality disputes start.
For corporate events, the real cost of a mistake is rarely the bag itself. A weak handle can fail in the venue, a print shift can make the brand look inconsistent, and a packing error can create last-minute warehouse sorting work. Procurement buyers therefore need a spec that is measurable enough for factory production and strict enough to support inspection. The goal is not to over-engineer the tote; it is to prevent avoidable variation across a bulk order that may need to arrive on a fixed event date.
A practical buying rule is to separate three layers of control. First, define the commercial layer: quantity, deadline, destination, and Incoterms. Second, define the product layer: size, canvas weight, handle type, and decoration method. Third, define the quality layer: inspection method, defect thresholds, and repair/reject rules. When those three layers are combined into one written brief, the supplier has much less room to quote a different item than the one the buyer actually needs.
- Treat the tote as a custom production item, not a generic giveaway.
- Write the spec so a factory can quote it without guessing.
- Separate product requirements from logistics requirements.
- Make the approved sample the reference for bulk quality, not only the artwork file.
How to specify canvas weight, structure, and load performance without overbuying
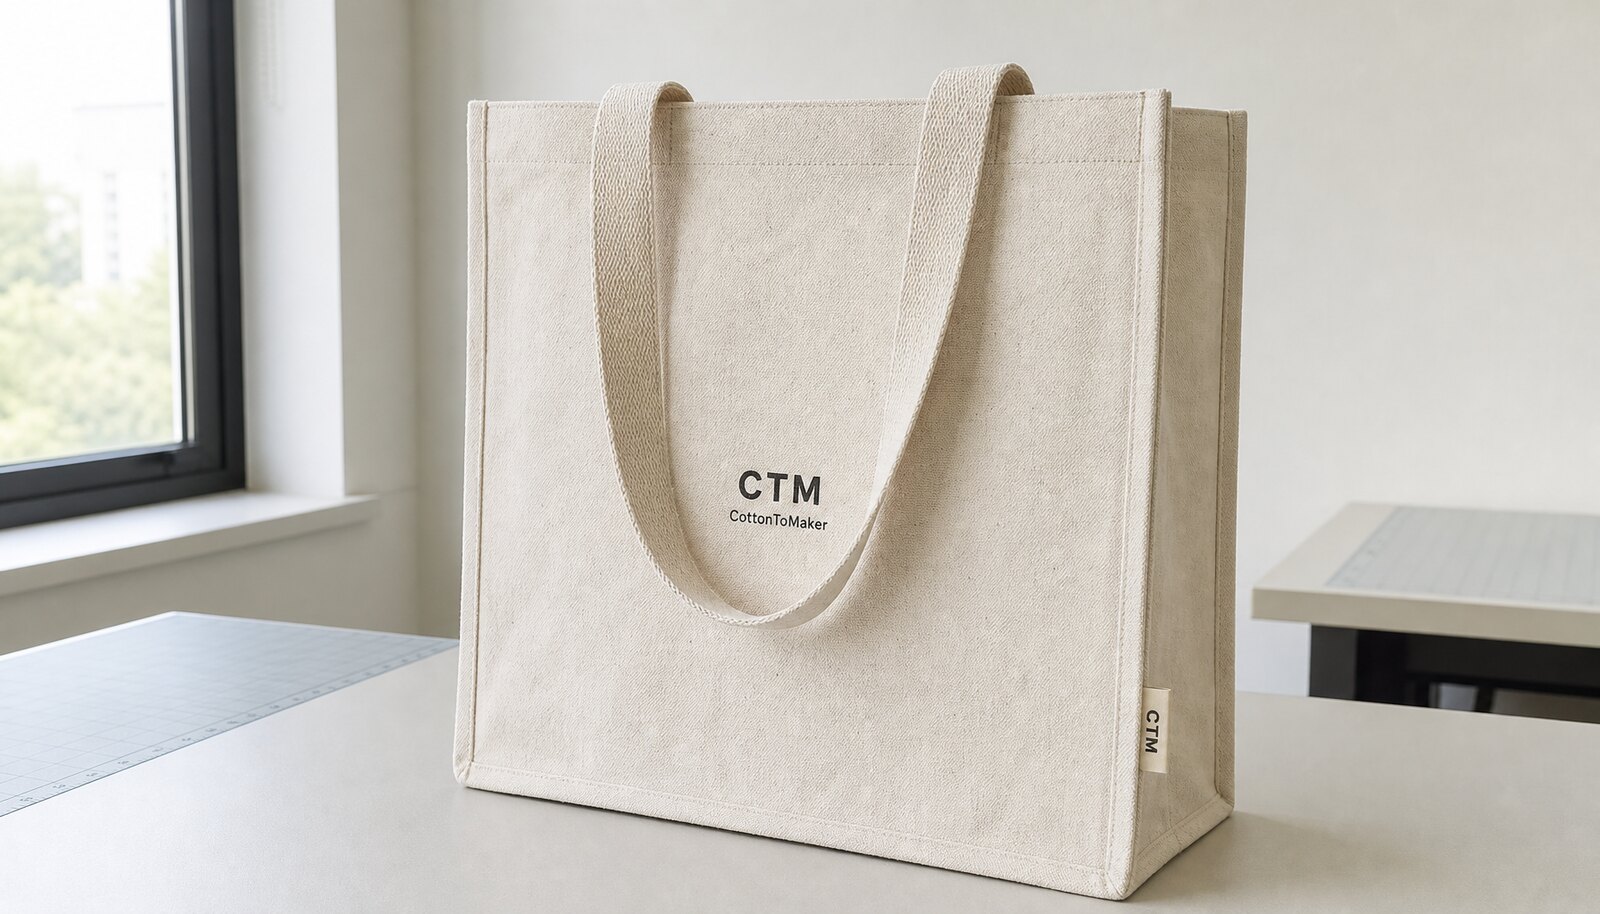
For many corporate events, a 12 oz / 340-360 GSM cotton canvas is the most balanced starting point. It is heavy enough to hold shape, show print detail cleanly, and carry a normal event pack without sagging. It also avoids the cost and bulk penalty of moving up to a much heavier body when the tote is mainly intended for brochures, notebooks, and a few small samples. Lighter 8 oz canvas can work when the goal is a low-cost handout, but buyers should expect more wrinkling, a softer body, and a less premium feel. Heavier 14 oz canvas is useful when the brand wants a more durable, gift-like item, but that decision affects sewing time, packing density, and freight cube.
The body structure matters as much as the weight. A flat tote is easier to sew and cheaper to quote, but a 10-12 cm gusset is often better for exhibition use because it gives the bag usable volume. If the event kit includes catalogs, product literature, or a bottle, the gusset prevents the bag from bowing outward at the side seams. Buyers should also pay attention to the top hem and bottom seam. A clean top hem improves appearance and stiffness, while a reinforced bottom seam helps the bag keep shape when it is set on a table or floor.
Procurement teams should ask the supplier not only what the canvas weighs, but how it behaves in production. Was the canvas pre-washed or pre-shrunk? Does the fabric fray at cut edges? Does the weave show irregular thick-and-thin bands that may affect print appearance? Those questions matter because a tote can look acceptable in a small sample but vary noticeably in bulk if the fabric source or finish is not controlled. If the buyer does not ask, the supplier may source whatever lot is convenient, even if it is not visually equivalent to the approved sample.
- Use 8 oz / 240-260 GSM only for light handouts or very price-sensitive campaigns.
- Use 12 oz / 340-360 GSM for the broadest corporate event use case.
- Use 14 oz / 400+ GSM when premium perception or repeated reuse is a priority.
- Specify gusset depth, top hem width, and bottom reinforcement in millimeters, not as a marketing phrase.
- Ask whether the fabric is greige, dyed, washed, or pre-shrunk before approving the spec.
Select the decoration method based on logo complexity, not habit
Print choice should follow the artwork, the order quantity, and the presentation standard. Screen printing remains the workhorse for simple corporate logos because it gives strong opacity on natural canvas and predictable unit economics when the design is limited to one or two spot colors. On a natural body, a well-executed screen print usually looks crisp and stable if the ink is properly cured. The key commercial advantage is that a buyer can often control setup cost by simplifying the artwork: one color, one position, one clean size. That matters in event procurement, where several similar items may be quoted side by side.
Heat transfer and digital printing are more useful when the logo has gradients, small type, or a multi-color visual that screen printing would handle poorly or too expensively. These methods give the buyer more art flexibility, but they also require closer checking of edge definition, rub resistance, and whether the finish feels plastic-heavy on canvas. If the event bag will be handled only briefly, that may be acceptable. If the brand wants a premium look and repeated use, the buyer should ask for a durability explanation rather than assuming all decoration methods perform the same.
Embroidery is often discussed because it feels premium, but it is not automatically the best route for canvas exhibition tote bags. Embroidery works best for smaller logos or emblems where the thread relief adds value rather than distortion. Large logos can pucker lighter canvas, increase cost, and create more variation between pieces. Procurement teams should ask the factory to show the decoration method on the actual body fabric, not on a substitute sample card, because canvas surface texture can change the final appearance more than buyers expect.
- Screen print: best for 1-2 color logos, repeat orders, and tight cost control.
- Heat transfer or digital: better for gradient artwork, small text, or short-run campaigns.
- Embroidery: suitable for small premium marks, not full-panel graphics.
- Always specify print size, placement, and clear space around the logo.
- Ask what curing, washing, or resting time is needed before packing printed bags.
Use supplier route, MOQ, and cost bands to understand whether a quote is real or just low on paper
A procurement buyer should read the supplier route before reading the price. Factory-direct sourcing usually gives the clearest control over fabric sourcing, sewing, decoration, and packing. It also makes it easier to hold one party accountable if the bulk order differs from the approved sample. Trading companies or agents can still be useful when a program includes several SKUs, mixed materials, or a need for consolidated shipping, but the buyer should know who actually makes the bag and who controls QC. Stock resellers are the fastest route, yet they typically limit customization in size, color, and print area.
MOQ should be treated as a production logic question, not just a commercial number. A factory quoting 1,000 pieces may be signaling that the setup is optimized for that volume: cutting, screen preparation, sewing flow, and packing are all efficient at that level. A supplier offering 300 pieces may still be legitimate, but the quote may rely on stock bodies, fewer print colors, or a higher per-unit price to cover fixed setup. The buyer should ask for price breaks at multiple volumes and compare the step-downs carefully. If the unit price barely changes between 1,000 and 3,000 pieces, the factory may be carrying a large hidden setup fee or may not actually be quoting a true production price.
A useful procurement habit is to compare quotes on a normalized basis. That means comparing the same fabric weight, same body dimensions, same handle construction, same print method, same packing method, and the same shipping term. If one supplier quotes EXW and another quotes FOB, or one includes carton labels while another does not, the apparent price gap is not meaningful. For canvas exhibition tote bags, a low price often comes from a difference that is easy to miss in the email thread: thinner fabric, shorter handles, weaker stitching, or a simpler packing method. The best quote is the one that clearly states what is included and what is not.
- Factory direct: strongest option for repeatability and accountability.
- Trading company: useful only if it adds coordination value you cannot get from the factory.
- Stock route: fast, but rarely ideal for exact event branding and sizing.
- Request price bands at 500, 1,000, 3,000, and 5,000 pcs to see where setup is absorbed.
- Compare only like-for-like quotes; normalize all packaging and shipping terms.
What a useful pre-production sample should prove before mass production starts
A pre-production sample is not a courtesy piece; it is the buyer’s proof that the factory understands the order. The sample should match the agreed size, handle length, fabric finish, decoration method, and pack style. When the sample arrives, procurement should measure it, photograph it, and compare it directly against the approved brief. A tote that looks right on a screen may still fail if the handle drop is too short for a shoulder carry, the logo is too low, or the gusset causes the bag to twist when standing upright.
The sample should also be tested under realistic event conditions. Put the same type of brochure stack, notebook, bottle, or sample box that will be used at the event into the bag. This is a simple but important check because canvas exhibition tote bags often fail in the hidden places: the bottom seam folds oddly, the handle join bunches under load, or the bag tips over because the gusset is too narrow. The sample is the time to discover that, not after 2,000 pieces are already printed.
Procurement teams should ask the supplier to label the sample status clearly: visual approval, size approval, print approval, or production reference. Those are different approvals. A design team may like the appearance but miss a structural issue, while a logistics team may notice a packing problem the brand team ignored. Documenting the sample approval status avoids confusion later when the factory says the buyer approved the sample and the buyer says they only approved the artwork.
- Measure the sample with a tape measure and a written spec sheet.
- Check handle drop by simulating shoulder carry and hand carry.
- Load the sample with actual event contents, not empty air.
- Use the sample as the production reference and version-control it by photo.
- Separate visual approval from structural approval.
QC checklist for incoming, in-process, and final inspection
A useful quality inspection checklist for canvas exhibition tote bags should follow the production flow, not just the final carton stage. Incoming inspection is the first gate. Here the buyer or supplier QC team should confirm that the canvas lot, handle material, thread, ink, and cartons match the approved sample and purchase order. If the incoming material is wrong, later inspection can only catch the error, not fix it. That is why buyers should ask whether the factory records lot numbers or material identification for each batch, especially if multiple colors or print variants are being produced.
In-process inspection is the second gate and often the most valuable one. This is where the factory checks cutting size, stitching stability, handle placement, and print registration before the whole run is finished. If the line is off-center, if stitch density drifts, or if the first printed panels show a curing issue, the factory can stop and correct the problem before the defect becomes a full-lot issue. Buyers should ask for an in-process checkpoint photo set or video if the event timeline is tight, because a single progress photo of a perfect sample does not prove the line is still producing correctly.
Final inspection should be written in measurable terms, ideally with an AQL-based sampling plan and defect categories. Major defects are those that affect function or brand appearance enough to trigger rejection, such as broken handles, severe print shift, missing stitches in load-bearing areas, heavy stains, or wrong size beyond tolerance. Minor defects are cosmetic issues that do not affect use, such as a small loose thread outside a structural area or a slight fold mark that can be pressed out. Repairable defects should be defined in advance, such as trimming stray threads, replacing an incorrect hangtag, or re-folding packed units. If a defect cannot be repaired quickly and consistently, it should be rejected rather than delayed into shipping conflict.
- Incoming inspection: fabric lot, handle material, thread, ink, cartons, and artwork version.
- In-process inspection: cutting size, stitch line, handle placement, and print registration.
- Final inspection: measure size, count quantity, check appearance, and sample load test.
- Use written major/minor/critical defect definitions before production begins.
- Require a repair/reject decision rule so the factory cannot improvise after packing.
Inspection measurements and acceptance criteria buyers should put in the PO
Procurement buyers get better results when the inspection standard is written in numbers. For example, size tolerance should be recorded for width, height, gusset, and handle length. If the tote is supposed to be 38 cm wide, 42 cm high, and 10 cm gusseted, the buyer should state the allowed variation range and whether the dimension is measured before or after pressing. Without that clarity, the same bag can be called acceptable by one person and out of spec by another.
Stitching also needs measurable attention. Instead of saying the handles should be “strong,” the buyer should specify that load-bearing areas must use reinforced stitching such as a box-X or a defined bar-tack pattern, and that there should be no skipped stitches, broken thread, or obvious seam puckering on the visible face. If stitch density matters for the look and durability of the bag, define the requirement in the approval sample or the tech pack. That way the factory is judged against a visible standard, not a vague expectation.
Print acceptance should cover placement and finish. Buyers should define the print zone in centimeters from the top seam and side edge, then specify what constitutes unacceptable deviation. A small shift may not matter on a plain tote, but on a corporate event bag the logo often sits close to the visual center, so even a modest movement can make the product feel low grade. If the artwork includes small text, ask the factory how they control line sharpness and what they consider acceptable under normal viewing distance. Finally, add cleanliness criteria. Canvas can pick up lint, oil marks, or dust in sewing and packing. Those are easy to miss in a busy factory, but they are visible in a conference hall under bright light.
- Set width, height, gusset, and handle tolerances in writing.
- Define load-bearing stitching by construction type, not just by “good quality.”
- State print position in centimeters from reference edges.
- Include stain, lint, oil mark, and foreign fiber limits.
- Tie all acceptance criteria back to the approved sample and versioned tech pack.
Comparison table: spec choices, cost bands, and buyer tradeoffs
The table below is intentionally practical rather than promotional. It helps procurement teams compare the most common spec choices for canvas exhibition tote bags for corporate events and understand where cost tends to move. These are not universal prices, because country of origin, artwork complexity, and freight route all change the final number. Use the bands as a sourcing guide, then normalize every quote to the same spec before comparing suppliers.
Ask for fabric swatch, approved sample, seam close-ups, logo test photos, packing pilot, and final inspection evidence. The point is not to collect paperwork for its own sake; it is to see whether the supplier can connect the approved sample to the bulk production line.
- Write decisions in measurable language, not only descriptive wording.
- Ask for sample photos plus one physical approval sample for important orders.
- Keep quotation, sample approval, and inspection notes tied to the same spec version.
Packing, cartonization, and logistics decisions that change landed cost
Packing is one of the most underappreciated cost drivers in tote procurement. Canvas bags are bulky by nature, so the way they are folded and cartonized directly affects container efficiency, warehouse handling, and the condition of the print on arrival. For most corporate event programs, bulk packing or nested stacking inside an export carton gives the best balance of cost and protection. If the tote is going straight from warehouse to event booth, this is often enough. If the bag will be handed to attendees as a more premium branded object, individual polybags or insert cards may be justified, but the buyer should ask what those extras do to freight cube and carton count.
Carton data should be part of the quote, not an afterthought. Procurement should request carton dimensions, quantity per carton, gross weight, and whether the bags are compressed during packing. Over-compression can leave stubborn fold marks on the logo panel, especially if the print has not fully cured or if the canvas has a heavy finish. Under-compression wastes space and raises shipping cost. If the event is being supplied to multiple venues or regional offices, carton labeling also matters: destination code, carton number, piece count, and barcode format should be defined in advance so receiving teams do not lose time sorting cases.
Another practical logistics issue is the relationship between bag dimensions and carton yield. A slightly larger tote may seem like a small design improvement, but if it reduces the carton count per box by a meaningful amount, freight cost rises quickly across a bulk order. Buyers should ask for a carton packing mock-up early, especially for oversized exhibit totes or bags with thick gussets. That allows procurement to see whether the design is still commercially efficient before approving a sample that looks good but ships poorly.
- Ask for carton dimensions before approving final pack style.
- Avoid over-compression on fresh prints or thick canvas bodies.
- Confirm carton labels, destination marks, and barcode requirements early.
- Check the freight cube impact of gusset depth and handle bulk.
- Align the packing format with the actual handoff path, not just with aesthetics.
Lead time, sample timing, and event-date risk management
Lead time is often presented as a single number, but for procurement it should be read as a chain of separate steps. Sample development, artwork confirmation, material sourcing, production, in-line inspection, final packing, and dispatch all consume time. For custom canvas exhibition tote bags, a common planning window is 5-10 days for sample approval and 25-35 days for production after approval, but those numbers only work when the spec is already frozen and the supplier has the necessary materials available. If artwork is still changing, if the supplier must source a special color, or if the factory needs to print multiple versions, the true schedule can be longer.
The most common schedule failure is not sewing delay; it is approval delay. Buyers send comments late, the supplier revises the sample twice, and the production start moves while the event date stays fixed. The safer process is to build two approval gates. Gate one is the pre-production sample approval, which confirms size, print, and packing. Gate two is the production release, which confirms that the approved sample is now the factory reference. If the event is important, ask for a dated production plan with checkpoints rather than a single promised ship date. That lets procurement see where the risk sits and act before it becomes a missed delivery.
Buyers should also ask a straightforward question: which components are already available, and which are not? If the canvas body is stock, the print is simple, and the carton spec is standard, the order may move quickly. If the fabric needs custom dyeing, the logo requires a special print process, or the packing requires custom inserts, the lead time should reflect that complexity. A supplier who cannot explain the critical path in simple terms may not have the order under control. That is a warning sign worth taking seriously, especially when the event date cannot move.
- Plan around approval delay, not just sewing time.
- Use two gates: sample approval and production release.
- Ask which materials are in stock and which must be sourced.
- Request a dated production plan with checkpoints for print, sewing, packing, and dispatch.
- Build buffer time for curing, inspection, and carton rework.
Specification comparison for buyers
| Procurement decision | Practical recommendation | Why it matters at corporate events | QC / commercial risk to check |
|---|---|---|---|
| Fabric weight | 12 oz / 340-360 GSM cotton canvas for most event kits | Balances hand feel, structure, and print clarity without making cartons overly bulky | Ask for actual GSM tolerance, shrinkage behavior, and whether the body is pre-washed or greige |
| Body style | Flat tote for flyers only; 10-12 cm gusset for brochures, notebooks, and sample kits | Gusseted bags carry more without distorting the logo panel | Confirm gusset depth, bottom seam reinforcement, and whether the load test matches the event pack-out |
| Handle construction | Cotton webbing or self-fabric handles with box-X stitching and top reinforcement | Handles are the first load-bearing failure point in event use | Check stitch count, handle drop consistency, bar-tack length, and symmetry left-to-right |
| Decoration method | Screen print for 1-2 spot colors; heat transfer or digital for complex art; embroidery only for small premium marks | Decoration choice controls cost, speed, and brand appearance | Request curing method, rub test approach, color matching method, and print placement tolerance |
| Supplier route | Factory direct for repeatable custom orders; trading company only when service value is clear | The route changes who owns QC, communication, and cost transparency | Ask who actually manufactures, who inspects, and who pays for rework if the sample and bulk differ |
| MOQ strategy | 1,000-3,000 pcs is often efficient for custom production; lower MOQ usually needs stock body or higher price | MOQ affects unit price, lead time, and customization depth | Request price breaks at 500 / 1,000 / 3,000 / 5,000 pcs and note where setup costs disappear |
| Packing method | Bulk pack or nested pack for cost control; individual polybag only when presentation requires it | Packing changes freight cube, carton count, and bag appearance on arrival | Confirm carton dimensions, quantity per carton, compression method, and whether print surfaces are protected |
| Inspection standard | AQL-based incoming, in-process, and final inspection with written defect limits | Without a written standard, acceptable quality becomes subjective | Ask supplier to state sampling plan, major/minor defect thresholds, and rework/reject rules |
| Lead time | Sample approval 5-10 days; production 25-35 days after approval for typical orders | Event timing is usually lost in approvals, not sewing | Confirm whether fabric, ink, cartons, and print plates are already ready or still need sourcing |
Buyer checklist before sampling
- Lock the final bag size, gusset depth, handle drop, and target load before requesting quotes.
- Specify fabric type, GSM/oz weight, weave count if available, color tolerance, and whether the canvas is pre-washed or shrunk.
- Send vector artwork, font outlines, Pantone references, print size, print position, and required clear space around the logo.
- Request a physical pre-production sample and a sample photo set showing front, back, inside, stitch details, and carton pack.
- State the inspection method in the PO: incoming material check, in-process check, and final AQL inspection before shipment.
- Agree reject and rework rules for stains, missing stitches, print defects, measurement failures, and carton damage.
- Confirm packing quantity per carton, carton dimensions, shipping marks, barcode needs, and destination labeling before production release.
- Ask for the factory’s actual lead time for sample, bulk production, inspection, and packing separately rather than only the total estimate.
Factory quote questions to send
- Who is the actual manufacturing factory, and which steps are done in-house versus subcontracted, such as printing, washing, or carton packing?
- What is the exact canvas specification in GSM, yarn count, weave type, finish, and fabric width, and can you show the current fabric card or mill reference?
- Is the quoted body made from greige, dyed, or pre-washed canvas, and what shrinkage or dimensional change should we expect after pressing or storage?
- What print method is included in the quoted unit price, what is the setup cost per color and per position, and what are the price breaks at 500, 1,000, 3,000, and 5,000 pcs?
- What stitch construction is used at the handle joins and bottom corners, what is the stitch density or SPI, and do you use box-X stitching or bar-tacks?
- What size tolerance do you accept for width, height, gusset, and handle length, and what is the tolerance for logo placement from center line and top edge?
- What defect levels count as major, minor, and critical in your final inspection, and what is your sampling plan if we use AQL?
- What is your standard packing method, carton size, quantity per carton, gross weight, and whether bags are folded, nested, or individually bagged?
- Which charges are included in the quote and which are excluded, such as sampling, artwork setup, plate making, courier freight, export cartons, and inspection fees?
- If the pre-production sample is approved, what is the production schedule by step, and who signs off on in-line inspection before packing starts?
Quality-control points to confirm
- Fabric verification: confirm that the canvas weight, weave, and finish match the approved sample and written spec; reject obvious underweight fabric, uneven weave, or visible contamination.
- Dimensional check: measure width, height, gusset, and handle length on a defined sample size; if the order includes a tolerance band, separate pass, repair, and reject outcomes should be written before bulk production.
- Handle and seam inspection: check the top seam, handle join, bottom corners, and side seams for skipped stitches, loose thread tails, broken thread, twist, or uneven reinforcement.
- Print inspection: confirm logo placement, registration, opacity, color match, curing, edge sharpness, and rub resistance; reject smearing, cracking, pinholes, ghosting, and off-center placement beyond tolerance.
- Function test: load the tote with the actual event kit weight and confirm the handles, seams, and bottom structure hold without distortion or immediate stress marks.
- Cleanliness inspection: reject visible oil marks, glue marks, rust spots, lint clumps, foreign fibers, or packing dust on the display surfaces.
- Packing inspection: verify the right folding method, carton count, inner protection, outer carton condition, shipping marks, barcode accuracy, and carton weight consistency.
- Document control: ensure the approved sample reference, artwork version, carton spec, and inspection checklist all match the PO so the factory cannot use an outdated instruction set.