Why ecommerce buyers should spec canvas drawstring backpacks tightly
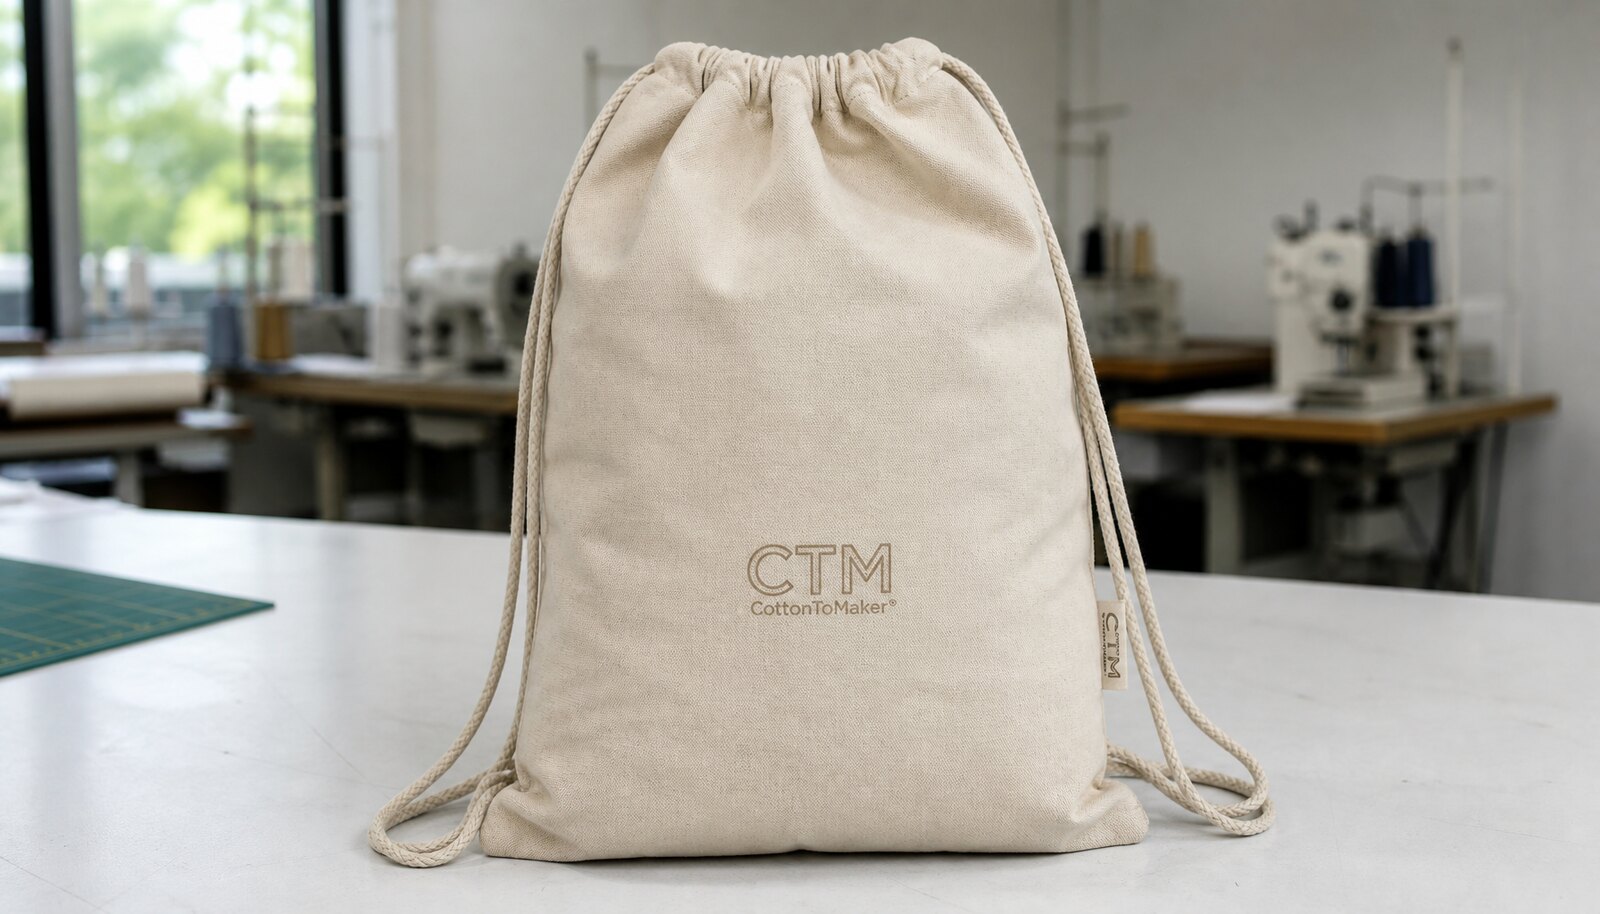
Canvas drawstring backpacks for ecommerce look simple from the outside, which is why many purchasing teams under-spec them on the first order. That is usually where the hidden cost starts. The item has to photograph cleanly, hold a logo with enough contrast to read on screen, pack flat enough for efficient fulfillment, and still arrive without seam distortion, stains, or a crushed shape. A bag that is acceptable as a promo giveaway can become a poor retail product once it is photographed, boxed, shipped, and handled by end customers.
For procurement teams, the most useful way to think about this product is not as a generic bag category but as a bundle of process decisions. Fabric weight changes the drape and the visual structure. Print method changes the look, unit economics, and defect profile. Packing method changes warehouse speed and damage risk. When those choices are left vague, the supplier fills the gaps with whatever version is easiest to make, not necessarily the version your channel needs.
There is also a brand risk that does not show up in the unit price. A low-cost bag can still be expensive if it drives returns, causes barcode errors, or creates inconsistent listing photos across replenishment. Ecommerce buyers need the spec to protect the customer experience from the factory floor to the first unboxing. The best version of this product is not the most overbuilt one; it is the one that matches the intended channel, margin target, and replenishment rhythm without hidden surprises.
- Buy the product as a retail item, not as a generic giveaway.
- Use channel requirements—DTC, marketplace, gift set, or promo bundle—to drive the spec.
- Treat sample approval, packing, and QC as part of the product, not as afterthoughts.
Choose canvas weight, dimensions, and body construction by end use
Canvas weight is the first decision that changes how the bag looks and performs. In ecommerce buying, it helps to think in practical bands rather than exact numbers alone. A 10–12oz canvas is often the lower-cost range for light merch, event use, or products that only need a basic natural-fiber look. A 12–14oz canvas is a common middle ground for retail-grade bags that should photograph cleanly, keep a flatter front panel, and feel less flimsy in customer hands. A 14–16oz canvas is usually better when the bag needs more body, a premium touch, or a stronger case for repeated daily use.
Those ranges are only meaningful when paired with the use case. If the bag will carry soft items like folded apparel, printed inserts, or lightweight promotional kits, a midweight body can be enough. If it needs to hold boxed goods, multiple items, or heavier contents that stress the top channel, a heavier fabric and stronger seam build are easier to justify. The wrong mistake is assuming heavier always equals better. Too much weight can raise freight cost, increase folding labor, and create a stiff product that does not pack well for ecommerce.
Finished size matters just as much as weight. Buyers should ask for the final sewn measurement, not just the cut panel size. Sewing loss can change both capacity and shelf appearance. A bag that shrinks after stitching may no longer fit the intended product insert or garment set. A bag that is taller than expected can also look awkward in listing images if the proportions were built around a different shape. When the bag needs to stand upright for photography, the structure should be tested in sample form, because some lighter canvases collapse once the drawcord is tightened and the base is loaded.
- 10–12oz: value programs, light carry, lower-cost gifting.
- 12–14oz: best all-around range for many ecommerce retail bags.
- 14–16oz: premium feel, better body, more structure, but higher material and freight cost.
- Ask for finished size after sewing and the allowed tolerance in both width and height.
- If the bag will hold boxed goods, share the actual product dimensions during quoting.
Compare sourcing routes before you compare unit price
The sourcing route shapes the quality outcome as much as the fabric spec. A direct factory with its own sewing line and decoration process usually gives the buyer the clearest chain of responsibility. That does not mean the factory is automatically the best partner, but it does make sample approval, production follow-up, and defect tracing easier. For a replenishment-heavy ecommerce program, that traceability is often worth more than a small price difference.
A trading company can be useful when you need several product types consolidated, especially if your team wants one contact for communication and export handling. The tradeoff is that the real production site may be less visible unless you push for documentation. If the supplier changes factories between orders, the same bag can come back with different stitching, different canvas tone, or slightly different packing. That inconsistency is a major issue for brands that need continuity across seasons.
Sourcing agents can be helpful for local oversight, but they add another layer of margin and another handoff in the process. Buyers sometimes choose them for comfort, then discover that the agent does not control the sewing or print room directly. The practical question is not whether a supplier says they are a factory; it is whether they can show process ownership, sample control, and pack-out consistency. A lower quote from an unclear chain is not a strong procurement win if it creates more rework later.
- Direct factory: best for repeatability, clearer accountability, and tighter sample control.
- Trading company: useful for coordination, but identify the real production site and process owners.
- Sourcing agent: helpful for oversight, but adds cost and another communication layer.
- Ask who cuts, sews, prints, labels, and packs before treating a quote as comparable.
Use decoration method as a cost, durability, and artwork decision
The decoration method should be chosen from the artwork and channel requirements, not from habit. Screen printing is a strong fit for simple logos, especially one- or two-color artwork with clear shapes. It is commonly attractive to ecommerce buyers because it can balance cost, opacity, and repeatability. That said, it is not automatically the best method for every canvas bag. The right choice depends on artwork complexity, fabric color, coverage area, and the look you want on a natural textured surface.
If your design includes gradients, photographic detail, very fine type, or multiple colors with tight registration, the supplier may suggest transfer or digital print. Those methods can solve an artwork problem, but they also introduce different risks. Transfers can edge lift or crack if they are stretched, folded, or cured poorly. Digital methods can be excellent for detail, but the hand-feel, wash behavior, and opacity need review on the actual canvas. On a rough weave, a technically correct print can still look weak if the fabric texture disrupts the image.
A good sample review should include more than a visual glance. Inspect the print in daylight, check the edges against the approved artwork, and fold the bag the way it will ship. If the logo will sit near a seam or curve over a panel transition, that is where distortion usually appears first. Buyers should also ask what curing or finishing step is used, because an under-cured ink can look acceptable at first and then fail after handling or abrasion. In short, print choice is not just decoration; it is part of durability planning.
- Screen print: often strong for simple logos, lower long-run cost, and good opacity.
- Transfer print: useful for small batches or complex art, but test edge lift and cracking.
- Digital print: good for detailed images, but evaluate hand-feel, rub resistance, and color stability.
- Review a sewn sample, not just a print proof or fabric swatch.
Build an RFQ that produces comparable quotes
A useful RFQ removes guesswork. For canvas drawstring backpacks for ecommerce, the buyer should describe the item as a finished product with all critical choices attached: fabric weight, finished size, closure style, reinforcement, print method, labeling, pack format, and carton requirement. If those elements are missing, the supplier will complete the picture using its own defaults. The result is often a quote that looks attractive but does not match your intended product.
It helps to separate product cost from service assumptions. Ask whether sample fees, print screens, barcode labels, care labels, polybags, and export marks are included. Ask whether the quote assumes a standard natural canvas body or a dyed fabric with a different cost profile. If you need a landed-cost comparison, keep the quantity, pack count, and shipping terms the same across suppliers. Otherwise, a lower ex-factory price may hide higher packing, freight, or handling cost later.
The RFQ should also be readable by operations and QC staff, not only by salespeople. A supplier can quote a bag more accurately when the spec is visual and practical. Include flat sketches, logo placement dimensions, and the exact packaging format. If the buyer expects the bag to be foldable without marking the front graphic, say so. If the bag must hold a specific insert or bundled item, include the item dimensions. The more the supplier understands the real use case, the less likely the production team is to improvise.
- Include finished size, canvas weight, cord spec, print method, labels, packing, and carton count.
- Ask the supplier to price setup items separately from unit cost.
- Use one RFQ format for every bidder so comparisons are clean.
- Attach artwork placement dimensions and a simple flat sketch whenever possible.
Read MOQ logic instead of chasing the lowest headline price
MOQ is not just an arbitrary factory gate; it reflects how the supplier absorbs cutting waste, setup time, printing screens or plates, label application, and packing labor. A basic one-color logo on a standard natural canvas bag can often support a lower MOQ than a multicolor design on a dyed body with custom labels and special folding. That is why two quotes with the same unit price can still carry very different total costs. One may be cheaper only because it assumes less customization.
For launch planning, the smartest approach is usually to simplify the first order. Keep the number of colorways small, limit artwork versions, and avoid over-fragmenting the range. A buyer may want three colorways and two logos because the brand team likes the options, but the inventory economics can get worse very quickly. Smaller runs across many SKUs often increase the effective landed cost because setup is spread across fewer pieces and warehouse receiving becomes more complicated.
The “right” MOQ is therefore the one that matches your sales plan, not the supplier’s preferred batch size. If you are testing a new listing or seasonal drop, a practical first order can often sit in the several-hundred-piece range per color or design when customization is involved, but that should be treated as a planning starting point, not a universal rule. Quote multiple quantities and compare the full cost curve. Sometimes a slightly larger order lowers the per-unit cost enough to offset storage and cash flow pressure; other times it simply creates slow-moving inventory.
- Compare MOQ together with setup cost, not in isolation.
- Limit the first order to the fewest colorways and artwork versions that still test the market.
- Ask for pricing at two or three quantity levels to see where the cost curve flattens.
- Avoid unnecessary SKU fragmentation in the first replenishment cycle.
Approve samples for construction, not just appearance
A pre-production sample should represent the real production method, not a display version assembled to look good for one photo. That means production fabric, actual cords, the intended label, the intended print process, and the intended stitching method. A printed fabric swatch alone cannot show whether the top channel twists, whether the cord snags, or whether the seam line shifts once the body is sewn. For canvas drawstring backpacks, those construction details are where many factory mistakes hide.
When reviewing the sample, test the user actions that matter. Open and close the bag repeatedly. Check whether the drawcord runs smoothly and whether both sides close evenly. Measure the actual bag against the approved spec. Look at the print after folding, because some artwork looks fine flat but distorts when the fabric bends. If the bag is intended for ecommerce photography, place it on a flat surface and see whether it sits in the pose your product images require. If it does not, the sample may be physically correct but commercially wrong.
It is also smart to treat the sample like the beginning of QC, not the end of it. Ask the factory to note what changed from the first sample to the approved version. Save a signed master sample and mark it clearly with date, version, and order reference. That gives both sides a clear comparison point when production starts. If a later shipment drifts from the master in size, placement, or finish, you have a common reference for the dispute.
- Approve a sewn sample made from production materials and actual decoration.
- Test cord action, seam symmetry, size, print placement, and fold behavior.
- Keep a signed master sample with version/date markings for replenishment control.
Set QC thresholds that can be measured on the factory floor
QC is most useful when it tells the factory exactly what will pass and what will fail. Buyers often say they want “good quality,” but a factory cannot inspect to that phrase. A better standard is to identify the defects that matter most to ecommerce: weak stitching, misaligned artwork, dirty fabric, uneven sizing, and packing mistakes. Those issues are more likely than dramatic catastrophic failure, and they are the ones that drive complaints, refunds, and negative reviews.
A practical inspection plan begins with measurement. Decide the allowed dimensional variation for width and height. Decide how much print drift is acceptable before the item looks off-center in a product photo. Decide whether one small oil spot is tolerable or not, and how large a stain can be before the bag is rejected. For premium retail, the tolerance window should be tighter; for value programs, cosmetic variation may be wider, but the bag still needs to look deliberate rather than sloppy.
It also helps to define how many defects trigger a hold or rework. For example, if the first inspection pieces show missed bar-tacks, frayed cord exits, or repeated size drift, the lot should not continue packing until the cause is corrected. Ask for in-line photos of early pieces, mid-run pieces, and packed cartons if you cannot inspect on site. That is more useful than a single final photo because it shows whether the process stayed stable over the run. The buyer’s goal is not perfection in theory; it is a shipment that looks the same across the entire order.
- Measure finished size on the sewn bag and compare it to the approved tolerance.
- Reject skipped stitches, broken seam ends, missing reinforcement, and obvious print drift.
- Define stain allowance, thread allowance, and pack accuracy before the run starts.
- Request in-line photos of early production, mid-run output, and packed cartons when third-party inspection is not used.
Packing choices affect warehouse cost, damage rate, and SKU accuracy
Packing is often treated as a final clerical task, but for ecommerce it is part of the operating cost. The same canvas drawstring backpack can be cheap to make and expensive to fulfill if it arrives in inconsistent folds, without barcode control, or in mixed cartons that slow receiving. For warehouse-driven channels, individual polybags with a clear barcode sticker are often the most practical option because they reduce receiving errors and keep each SKU identifiable. If the item is being shipped into a 3PL or FBA-like environment, that consistency matters a lot.
Loose folding can save a small amount of labor, but it also creates variability. The bag may pick up dust, the logo may crease, or the carton count may drift because workers do not pack exactly the same way every time. A simple, repeatable fold instruction is usually better than a casual “fold neatly” note. If the brand requires a retail-ready look, you can add an insert card, hanging tag, or care label, but only if the channel justifies the extra labor and material cost. Otherwise, packaging can quietly erase the margin you gained on the unit price.
The carton spec is part of the packaging spec. Ask for carton dimensions, gross weight, and unit count, then compare how those cartons fit your warehouse constraints and freight planning. Large cartons may lower per-piece shipping cost in some lanes, but they can be harder to handle, more prone to damage, and less efficient in e-commerce receiving environments. The best pack-out is the one that works for your actual logistics flow, not the one that merely looks tidy on paper.
- Use one pack method across replenishment orders whenever possible.
- Confirm whether polybag thickness, warning text, and barcode placement are required for your channel.
- Set carton quantity and carton dimensions before booking freight or inbound slots.
- Ask for a simple fold diagram if your warehouse needs consistent pack-out.
Lead time and landed cost: where delays and hidden expenses really come from
Lead time for canvas drawstring backpacks is rarely delayed by sewing alone. The real bottlenecks are usually fabric confirmation, decoration setup, sample sign-off, and packing approval. If the order uses standard natural canvas, a simple logo, and familiar packing, the cycle is easier to predict. If the fabric is custom dyed, the artwork is complex, or the bag needs special labeling, the schedule becomes more fragile. Buyers should measure lead time from approved sample, not from the first inquiry, because the first stage often includes back-and-forth that does not belong in production planning.
A practical landed-cost model should include more than ex-factory price. Add sample fees, screen or setup costs, print overruns or wastage assumptions, packaging materials, carton charges, and freight. Freight can change the economics more than buyers expect, especially when the bag is heavier canvas or packed in bulky cartons. Even when the product price is low, a larger carton volume can raise transport cost per unit and reduce warehouse density. If the buyer uses air freight for a launch, the extra weight and volume become even more visible in the landed number.
Packaging also affects cost in ways that are easy to miss. A polybag, barcode sticker, and insert card each add material and labor. A second folding step can slow packing. A branded box or more elaborate retail presentation can be justified for premium positioning, but it should be treated as a deliberate margin decision, not as a free upgrade. The best procurement habit is to compare quotes on the same basis: same fabric, same decoration, same pack-out, same carton count, and same shipment term. That is the only way a unit price is truly comparable.
- Measure lead time from sample approval and confirmed materials, not from initial inquiry.
- Ask the supplier which stage is most likely to delay the order: fabric, print, sewing, packing, or dispatch.
- Compare landed cost with freight, packaging, waste, and receiving costs included.
- Check carton volume as well as gross weight because both influence transport and storage cost.
Specification comparison for buyers
| Spec decision | Buyer-side recommendation | Practical use case | Tradeoff / failure mode to watch |
|---|---|---|---|
| Source route | Direct factory with in-house sewing plus decoration, or a verified factory/trading model with named production site | Repeat ecommerce SKUs, stable replenishment, and tighter control over artwork placement | If the quote comes through a middle layer, the factory can change between orders; ask who actually cuts, sews, prints, and packs |
| Canvas weight | 10–12oz for value programs, 12–14oz for balanced retail, 14–16oz for premium or heavier-use carry | 10–12oz works for low-cost promo or light merchandise; 12–14oz is often the most flexible ecommerce range; 14–16oz suits gift sets and better shelf presentation | Below about 10oz, the bag can look limp and wrinkle heavily; above 16oz, weight, cost, and folding labor rise quickly without always improving conversion |
| Bag structure | Simple unlined body with reinforced mouth channel and stress stitching at cord exits | Best when you need a clean look, lower cost, and lower pack volume | Without reinforcement, failures usually show first at the top channel, cord exit, or seam ends after a few packing cycles |
| Decoration method | Screen print for simple one- to two-color graphics; transfer or digital only when artwork complexity requires it | Best for logos, text, and bold brand marks on natural canvas | Fine lines, gradients, and high-coverage prints can crack, bleed, or feel stiff if the wrong process is chosen for the fabric |
| MOQ strategy | Start with the fewest colorways and artwork versions that still test the market | Useful for launch drops, marketplace validation, and seasonal ecommerce tests | Low MOQ can hide higher setup charges, fabric loss, or limited embellishment options; compare total setup cost, not only unit price |
| Pack format | Flat-folded, individually polybagged when warehouse handling or FBA-like intake is involved | Helps barcode control, receiving accuracy, and clean unboxing | Loose folding saves some labor but can increase wrinkling, dust pickup, and carton count variation |
| Labeling | Woven side label plus care/content label or barcode label as channel requires | Retail-ready ecommerce, brand building, and compliance-sensitive channels | Poor label placement can interfere with seams, print area, or the bag’s visual balance in listing photos |
| Reinforcement | Bar-tack or double-stitch reinforcement at the mouth, cord tunnels, and side seams where stress concentrates | Best for products expected to carry daily-use items, boxed goods, or heavier inserts | A bag can pass visual inspection yet fail in customer hands if stress points are underbuilt |
| Supplier communication | Request sample photos, material data, process ownership, and pack-out details in writing | Best when your team needs audit trail and less ambiguity during replenishment | If the supplier cannot clearly explain who makes what, the risk of rework and shipment disputes rises |
Buyer checklist before sampling
- State the finished size, not just the cut size, and include the tolerated dimensional variance.
- Choose the canvas weight by use case: light promo, balanced retail, or premium carry—not by catalog default.
- Specify whether the bag must stand upright for photography or only function as a soft-pack carry item.
- Lock the logo artwork, print count, print size, and placement zone before sampling begins.
- Describe the closure system in full: drawcord material, cord diameter, tunnel construction, and reinforcement method.
- Define the pack-out method by channel: flat fold, polybag, barcode sticker, insert card, suffocation warning, or bulk carton.
- Ask the supplier to quote setup charges separately from unit price so cost comparisons stay meaningful.
- Request a sewn pre-production sample made with production fabric, cord, label, and decoration process.
- Get carton dimensions, gross weight, and units per carton before booking freight or warehouse inbound slots.
- Write QC thresholds for stitch quality, size tolerance, print registration, stains, odors, and packaging accuracy.
Factory quote questions to send
- What is the exact canvas spec in GSM or oz, and is that measurement for greige fabric, finished fabric, or after any wash/finish process?
- Who performs cutting, sewing, printing, labeling, and packing—your factory, a sub-supplier, or another workshop?
- What is the MOQ per color, per artwork version, and per packing configuration, and what additional setup fee applies if we reduce quantity?
- Which decoration method do you recommend for this artwork, and what limits should we expect on line thickness, color count, or opacity on natural canvas?
- Can you quote at least two options: one optimized for lower cost and one optimized for better structure or retail presentation?
- Can you provide a sewn pre-production sample using real production materials before bulk approval?
- What reinforcement do you use at the mouth channel, drawcord exits, and side seams, and can you show photos of those details?
- How do you fold, polybag, barcode, and carton-pack the finished bags, and what carton count do you recommend for warehouse handling?
- What is the production lead time after sample approval, and which steps are most likely to cause delay?
- Which defects do you reject internally before packing, and what inspection standard do you follow for final carton release?
Quality-control points to confirm
- Fabric weight should fall within the approved range, with a practical buyer tolerance of about ±5% unless the program is intentionally fashion-led. A bag that arrives noticeably lighter usually changes drape, print opacity, and perceived quality.
- Finished dimensions should be measured on a flat, laid-out bag after sewing, not on cut panels. Many buyers get the wrong size because the supplier quoted cut size or neglected seam loss.
- Stitching should be even, straight, and secure at the side seams, base corners, and cord tunnel. Accept only minor cosmetic variation; reject skipped stitches, broken thread runs, or seam gaps that can open under light pull.
- The drawcord should move smoothly through the tunnel without snagging, fraying, or uneven resistance. A simple functional test is to open and close the bag 10 consecutive times; any sticking, bunching, or tunnel distortion is a red flag.
- Reinforcement at stress points should be visible and consistent. Reject missing bar-tacks, weak backstitching, or loose knotting at the cord exits if the bag is intended for repeated use.
- Print placement should remain within the approved position window. A practical pass/fail approach is to allow only small placement drift; reject artwork that visibly sits off-center, slopes, or sits too close to seams.
- Print opacity should be adequate for the chosen fabric color. On natural canvas, a weak logo can look washed out or textured to the point that it hurts listing photography.
- Surface quality should be clean enough for ecommerce imaging: no oil spots, no dye smears, no obvious loose threads on the front panel, and no contamination embedded in the weave.
- Packaging should match the SKU plan exactly. Mixed labels, mixed artwork, or wrong pack counts are especially costly because they create warehouse rework rather than simple cosmetic defects.
- Smell, moisture, and carton cleanliness should be acceptable for direct-to-consumer fulfillment. If the cartons smell strongly of storage chemicals or arrive damp, treat that as a shipping and storage issue, not just a cosmetic issue.