Start With The Event Job To Be Done
The fastest way to overpay for canvas conference bags is to start with a style preference instead of the actual event job. A tote for a registration desk, a VIP gift drop, a press kit, and a reusable post-event carry bag are different products even when they share the same outer shape. Procurement gets better quotes when the brief names the job first and the supplier can then size the bag, choose the fabric, and set the packing method around that use.
For canvas conference bags for corporate events, the minimum useful brief is short but specific: what the bag has to carry, where the handoff happens, how the attendee will use it, and whether it is expected to be reused after the event. If the event team cannot describe the contents and distribution flow in plain language, suppliers will fill the gaps with assumptions. Those assumptions are where rework starts, especially when the bag looks acceptable in a mockup but fails once the real contents are packed.
- Attendee handout: optimize for speed at registration, low pack cost, and simple stacking.
- VIP or partner gift: allow more structure, cleaner finishing, and stronger branding control.
- Reusable post-event bag: require stronger seams, better fabric hand, and a finish people will keep.
- Mixed kit program: list every item that must fit, including notebooks, chargers, brochures, and bottles.
Choose Dimensions, Shape, And Closure Around The Contents
Bag dimensions should be set from internal usable space, not from a nominal marketing size. Seam allowances, gussets, zipper tape, lining, and fold method all reduce the space the attendee actually gets. A notebook, brochure set, charger, and bottle can fit in a bag that looks large enough on paper and still bind at the top once the side seams are closed. The practical way to avoid that mistake is to measure the real contents and then add clearances for insertion and daily use.
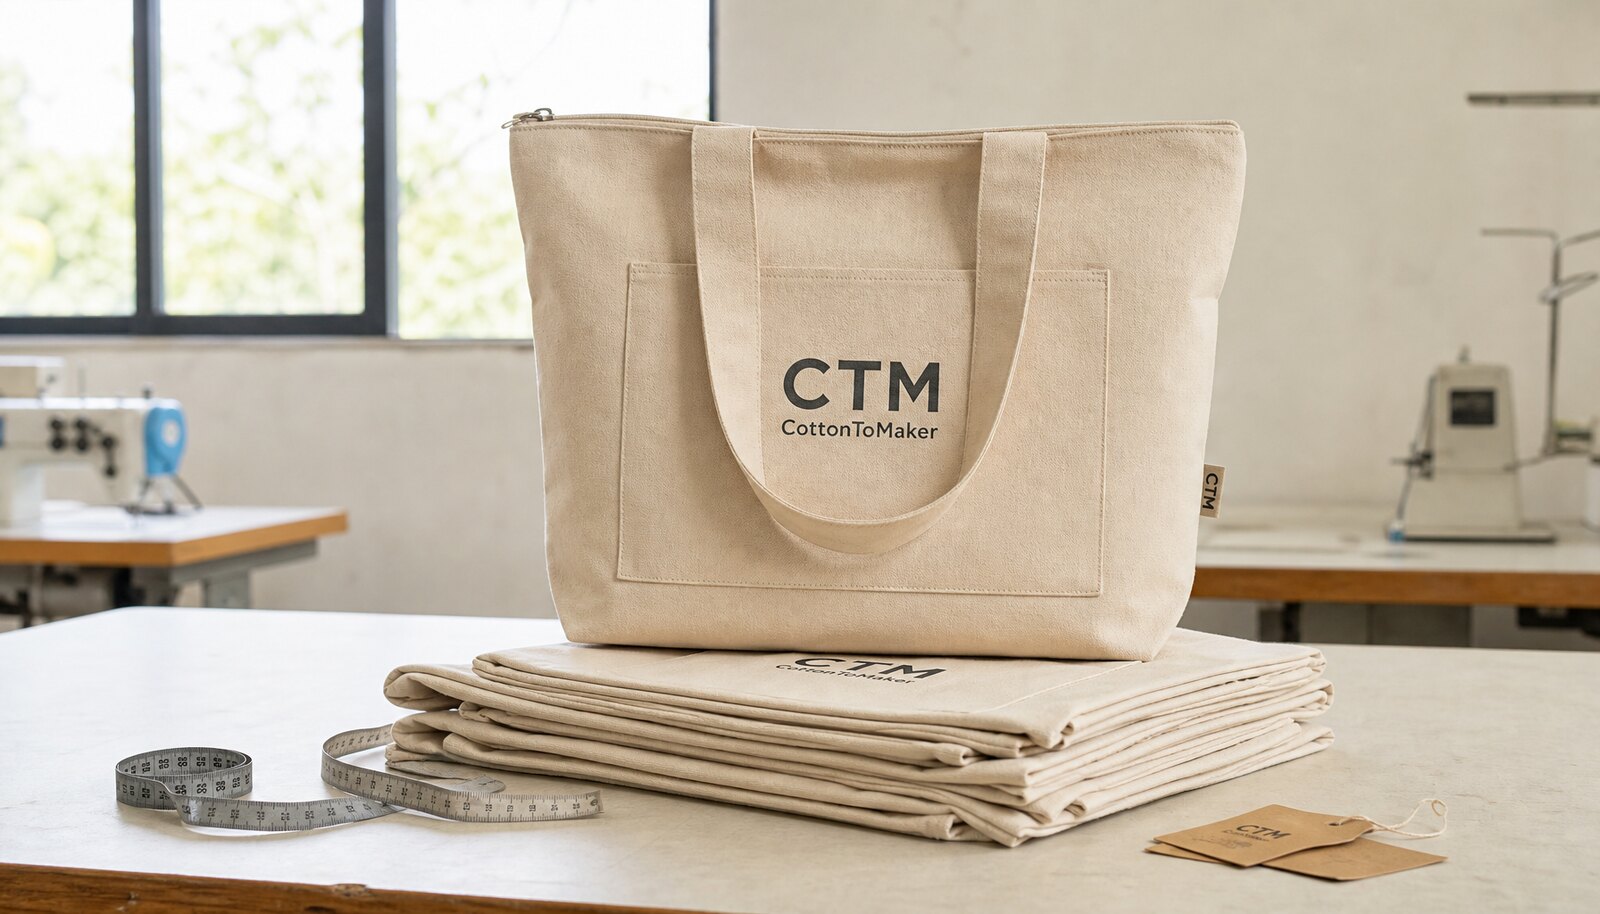
Shape decisions matter as much as the printed logo. An open-top tote is quick to fill and better for high-volume registration, but it offers less protection for small items and often looks more casual. A zipper adds security and a more finished appearance, but it also introduces hardware risk, more sewing steps, and more inspection points. A flat base or gusset can help the bag stand upright for pack-out, which is useful when a warehouse team is loading kits before the event.
- Use the real kit as the size reference, not the artwork mockup.
- Ask for finished width, height, gusset depth, and handle drop in the quote.
- Leave enough clearance for zipper tape, seam thickness, and thick brochures.
- Specify whether the bag must stand upright for packing or sit flat for storage.
Fabric Weight, Weave, And Reinforcement Decide Whether The Bag Feels Cheap Or Durable
Canvas sourcing is often discussed as if the ounce number alone determines the result. It does not. Buyers should ask whether the quoted weight is based on greige fabric, washed fabric, dyed fabric, or coated fabric, because finishing changes hand feel, shrinkage, opacity, and print behavior. Two suppliers can both say 12 oz and still deliver a very different tote once the cloth is cut, sewn, and packed.
As a procurement rule, 10 oz is typically the lowest-cost fit for short-use giveaways, 12 oz is the most balanced option for standard conference use, and 16 oz or higher is more appropriate when the tote needs to feel premium or survive repeated reuse. The fabric choice only works if the stitching and reinforcement are matched to it. A strong cloth with weak handle joins will still fail in front of attendees, and a thin cloth with a heavy load can distort so much that the logo looks off-center when the bag is full.
- Ask the supplier to state the finished fabric basis, not only the nominal ounce label.
- Check for thin spots, broken weave, slubs, or uneven dye in the print area.
- Require reinforcement at the handle joins, bottom corners, and any pocket or zipper anchor point.
- Match thread color, stitch density, and bartack length to the approved sample.
Branding And Decoration Should Be Chosen For Wear, Not Just Artwork
Decoration method should be driven by the logo, the use case, and the lifetime of the bag. Screen print is usually the most practical default for simple logos, repeat programs, and large quantities because it gives predictable color, clean edges, and good unit economics. Transfer decoration can make sense when the artwork has more detail, more colors, or variable names. Embroidery is useful when the logo is small and the buyer wants a tactile premium feel, but it is not always the best answer for large tote panels or fast event timelines.
The main control point is not the art file alone. It is where the art lands on the sewn bag. Ask for a dimensioned proof with the print area, keep-out zones, and any seam or zipper interference marked clearly. Many complaint calls from event teams come from a logo that was perfectly correct on a flat mockup but looks awkward once the tote is folded, stuffed, and photographed in use. If the print sits too close to a seam or handle join, it can also distort during sewing and then fail a basic quality check even though the color itself is fine.
- Use screen print for bold logos, clean geometry, and repeat orders.
- Use transfer methods when artwork complexity or variable personalization justifies the extra control.
- Keep fine text away from seams, folds, and closure hardware.
- Approve print placement on a sewn sample, not only on a flat digital proof.
Supplier Route And Landed Cost: Compare More Than The Unit Price
Direct factory, trading company, and local decorator are not interchangeable sourcing options. A direct factory is usually strongest when the specification is stable, the buyer wants clearer control over fabric and sewing, and the order may be repeated for more than one event. A trading company can help when the program includes multiple SKUs or the buyer wants one commercial point of contact, but the actual factory and the QC chain still need to be clear. A local decorator can be the right answer for urgent or small orders, especially when freight time matters more than deep customization.
To compare suppliers responsibly, procurement has to normalize the whole landed-cost picture. The cheapest quoted unit price can hide expensive freight because the carton is too large, expensive rework because the sample was not clear, or a delay that forces rush shipping right before the event. The right comparison asks for the same spec, the same Incoterm, the same pack count, the same document set, and the same decoration assumptions. Without that discipline, low quotes simply shift cost into the part of the project that is harder to see.
- Direct factory: strongest for repeatability, spec control, and a stable reorder file.
- Trading company: useful when you need service coordination across mixed product programs.
- Local decorator: practical for small, urgent, or domestic programs with limited customization.
- Compare landed cost, not only ex-works or factory price, before deciding.
Build The RFQ So Every Supplier Is Quoting The Same Product
A useful RFQ for canvas conference bags does not need to be long, but it does need to be complete. The supplier should receive one product brief, one artwork file, one packing instruction, one compliance note, and one delivery timeline. If any of those pieces are missing, the quote will contain assumptions, and those assumptions usually surface later as exclusions, price adjustments, or sample changes. Procurement should not accept a quote that leaves key construction choices unresolved.
The questions that matter most are the ones that change the finished bag and the freight profile. Ask which fabric basis is being quoted, which print setup is included, whether the size is finished or cut size, and which carton count the supplier used to calculate shipping. Ask for a dimensioned artwork proof before production approval. If the bag has a zipper, lining, pocket, or label, make sure the supplier states whether those items are included in the unit price or billed separately. This is the point where the buyer prevents the most expensive surprises.
- Ask for the exact Incoterm, destination assumption, and freight method used in the quote.
- Require a line item for setup, sample, packaging, and any special label work.
- Request a dimensioned proof that shows logo position and seam interference.
- Make the supplier state the MOQ for the exact size and construction, not a generic tote minimum.
Sampling And Approval Are Production Controls, Not Courtesy Steps
For event totes, the sample is the first real production decision. A flat mockup cannot show how the fabric drapes, whether the handle drop feels right on the shoulder, or whether the print is too close to a stitched edge. A good sample process usually has two stages: an artwork proof or strike-off for placement and color, then a sewn sample that uses the real fabric, real hardware, and intended packing method. If the factory skips either stage, the buyer is approving a guess instead of a product.
The sample review should be practical. Put the actual event contents into the bag and test the way attendees will use it. Open and close the zipper, lift the tote by the handles, fold it the way the warehouse will pack it, and inspect the logo under normal light, not only under a photo light. If the sample is off in size, shape, or decoration position, revise the spec before mass production. The whole point is to make the production run boring because the hard decisions were finished during sampling.
- Keep a sealed gold sample tied to the PO and the final artwork version.
- Check the bag empty, partially filled, and loaded with the real event contents.
- Confirm that the factory sample matches the intended fold, tag, and carton pack.
- Do not release bulk production until the print, stitching, and packaging are all approved together.
Packing, Cartons, And Warehouse Handling Need Their Own Specification
Event bags usually pass through more handling steps than the buyer sees on paper. They may arrive at a warehouse, sit in storage, be re-counted for fulfillment, travel to the venue, and be distributed at a registration desk in a tight time window. That is why packing is not a minor detail. It affects appearance, receiving speed, freight cost, and whether the event team can hand out the bags without opening every carton.
For most conference tote programs, a flat fold with a consistent inner count is the simplest and safest default. Premium programs may need tissue, paper inserts, or a protective slip if the print is delicate or if the bag has a zipper that could rub during transit. Master carton labels should show the PO, size, color, pack count, and quantity. If you expect the bags to be stored for a while before the event, ask for carton construction that can survive warehouse stacking without crushing the contents.
- Specify inner pack count and master carton count in the PO.
- Use a flat-fold method unless the product or brand experience requires another approach.
- Ask for carton dimensions and gross weight early so freight and pallet planning are accurate.
- Make sure the label format works for receiving, warehousing, and event-site distribution.
QC And Compliance Should Be Written In Measurable Terms
Quality control for canvas conference bags should focus on the defects that will be visible or operationally painful at the event: wrong size, weak seams, print shift, stains, odor, loose threads, and carton count errors. A buyer does not need a long generic inspection list. The useful approach is to turn the approved sample into measurable acceptance criteria. If your organization uses AQL, write the target in the PO and define what counts as major, minor, and critical. If you do not use AQL, state equivalent acceptance language so the supplier knows what will fail the lot.
A practical specification often includes an AQL 2.5 major and 4.0 minor target, zero tolerance for critical defects, seam-strength expectations for the handle joint, and a print-fastness test appropriate to the decoration method. For example, many buyers ask for dry rub fastness at grade 4 or better and wet rub fastness at grade 3 or better, or an equivalent internal standard if the factory uses a different test protocol. For handle reinforcement, it is reasonable to ask the supplier to document a pull test or internal seam-strength test, such as a 60 N minimum at the stress point, if that matches the intended load. If your market requires restricted-substance or material declarations, ask for them before shipment release instead of after the bags are already packed.
- State AQL targets or an equivalent defect policy in the PO.
- Define seam-strength, print-fastness, and dimension tolerances before production starts.
- Require no critical defects, including holes, contamination, wrong artwork, or missing hardware.
- Ask for compliance documents early if the destination market or customer policy requires them.
- Tie final inspection back to the approved gold sample and the final packing spec.
Use The Timeline To Protect The Event Date, Not Just The Factory Schedule
The production calendar for a tote order is usually longer than the sewing time. Artwork proofing, sample production, sample revision, material reservation, production, inspection, freight booking, and receiving all consume time. The buyer who only asks for the factory lead time is missing the parts of the schedule that actually cause event-day stress. Backward planning is the safer method: start from the event date, add review time, and then create a release date that leaves room for one correction without triggering rush freight.
This matters even more for multi-location event programs. A bag that is only used once can tolerate a tight timeline, but a bag that has to reach a warehouse, be broken into regional shipments, or be packed alongside other giveaway items needs more slack. The best procurement habit is to keep a reusable spec pack with the approved sample photos, artwork versions, carton data, and supplier contacts so the next event run does not start from zero. That archive reduces delays and keeps future quote comparisons honest.
- Plan backward from the event date and include sample approval, inspection, and freight time.
- Keep a spare stock buffer if the bags will be handed out across multiple event checkpoints.
- Archive the approved spec pack so the next reorder uses the same reference point.
- Treat project lead time and production lead time as different numbers.
Specification comparison for buyers
| Spec or sourcing decision | What to lock in | Cost and freight drivers | Risk if under-specified | When it fits |
|---|---|---|---|---|
| Fabric weight | State the finished fabric weight, whether it is raw, washed, dyed, or coated, and ask for a pre-production swatch. | Heavier cloth usually raises material cost, sewing time, carton weight, and freight. | The bag can feel flimsy, print can show through, or a premium program can look cheap. | Best for short-use giveaway bags, standard conference kits, or premium reusable totes depending on weight. |
| Body shape and gusset | Lock finished width, height, depth, handle drop, and any base or side gusset. | More structure usually adds cutting and sewing time and may increase carton volume. | Contents may not fit, the bag can collapse in transit, or the logo can land on a seam. | Useful when you need exact kit fit, bottle capacity, or a bag that stands upright for pack-out. |
| Closure and internal features | Specify open top, zipper, snap, inner pocket, lining, or divider requirements. | Closures and lining increase hardware, sewing steps, inspection points, and possible rework. | The bag can fail at the zipper, feel unfinished, or slow down registration if overbuilt. | Best for VIP kits, partner gifts, or reusable post-event bags where security matters. |
| Decoration method | Choose screen print, transfer, embroidery, or woven patch and define print area, colors, and keep-out zones. | Decoration changes setup time, yield, durability, and the chance of touch-up work. | Logos can crack, peel, shift across seams, or fail rub tests after delivery. | Match the method to artwork complexity, quantity, and how long the bag needs to last. |
| Supplier route | State whether you are sourcing from a direct factory, trading company, or local decorator, and ask who owns QC. | Routing changes communication overhead, document handling, consolidation, and freight coordination. | You may compare quotes that include different service scopes and think the cheapest is the best. | Use direct factory for repeat programs, trading company for mixed baskets, and local decorator for urgent small runs. |
| Packing format | Define flat fold, tissue, individual polybag, carton count, and carton label format. | Packing affects labor, carton size, warehouse handling, and event-site distribution speed. | The bags can arrive creased, contaminated, mislabeled, or awkward to distribute on-site. | Useful for warehoused events, staged fulfillment, or high-touch VIP delivery. |
| Compliance and test docs | Ask for the exact market documents you need before PO release, not after production starts. | Document collection can add lead time if the supplier must arrange testing or declarations. | Customs, legal, or customer-policy blocks can delay release even when the bags are sewn on time. | Important for cross-border shipments, restricted-substance policies, or regulated customer programs. |
Buyer checklist before sampling
- Write a one-page brief that states the event type, audience, destination country, handout method, and whether the tote must be reused after the event.
- Measure the actual contents the bag must hold, then add clearance for seams, zipper tape, folded brochures, cables, and any bottle or box insert.
- Specify the finished dimensions, handle drop, fabric weight, closure type, print method, print area, and the exact side or panel where the logo should land.
- Ask every supplier to quote the same Incoterm, carton count, carton dimensions, packing format, and compliance documents so you can compare landed cost, not just unit price.
- Request a pre-production sample or sealed gold sample that matches the intended fabric, thread, decoration, label, and folding method.
- Confirm whether setup, strike-offs, color matching, labels, and standard packaging are included in the unit price or charged separately.
- Put acceptance criteria in writing before mass production: AQL level, seam strength target, dimension tolerance, print-fastness requirement, and carton count accuracy.
- Build the schedule backward from the event date and leave time for artwork proofing, sample revision, production, inspection, freight, and on-site contingency stock.
- If the program is cross-border, ask for the exact compliance evidence needed for your destination market before you release the PO.
- Keep the approved sample, final artwork file, packing spec, and inspection report in one place for reorders and future event planning.
Factory quote questions to send
- What is the finished size, handle drop, gusset depth, and usable internal space after seams are sewn?
- Is the quoted fabric weight based on greige, washed, dyed, or coated fabric, and can you share a swatch photo or sample reference?
- What exactly is included in the unit price: bag body, lining, pocket, zipper, label, print, packaging, and standard carton marking?
- What is the MOQ for this exact construction, and what element changes the MOQ if we switch fabric, print method, or hardware color?
- Which Incoterm are you quoting, and what are the assumptions for destination, palletization, and freight method?
- Can you provide a dimensioned artwork proof showing logo position, keep-out zones, and seam interference before we approve production?
- What is the sample charge, the sample lead time, and whether the charge is refundable after order confirmation?
- Which QC standard do you inspect against at final audit, and can you state the major and minor defect definitions in writing?
- What documents can you provide for restricted substances, material content, or destination-market compliance if our buyer policy requires them?
- What carton pack count, carton dimensions, and gross weight do you expect, and what changes if the order quantity increases?
Quality-control points to confirm
- Use a final inspection target such as AQL 2.5 for major defects and 4.0 for minor defects, with zero tolerance for critical issues like holes, contamination, or wrong artwork.
- Set a minimum seam-strength target for handle attachments and stress points, for example 60 N or your internal engineering standard, and require the supplier to test or document it.
- Require print durability evidence appropriate to the decoration method, such as dry rub grade 4 or better and wet rub grade 3 or better, or your equivalent internal fastness standard.
- Confirm dimensional tolerance in the PO, for example +/- 1 cm on height and width and a tighter tolerance on handle drop if the bag must fit a specific insert or kit.
- Check stitch quality for skipped stitches, broken threads, loose ends, and uneven bartacks at the handle join, bottom corners, and any pocket or zipper anchor point.
- Inspect the full decoration area for registration, coverage, edge sharpness, color consistency, and no print cracking or peeling after fold and load stress.
- Review odor, stains, dust, and moisture at final packing because these defects are highly visible at event handout and are often missed in a flat sample review.
- Verify the closure, zipper pull, snap, or pocket function on a random sample from the run and confirm there are no sharp edges, exposed hardware defects, or jams.
- Check carton count, carton labels, pack order, and fold direction against the approved packing spec so warehouse receiving and event-site distribution stay simple.
- If the program has compliance obligations, require test reports or declarations before shipment release instead of treating them as post-shipment paperwork.