Why material choice matters more than artwork on conference bags
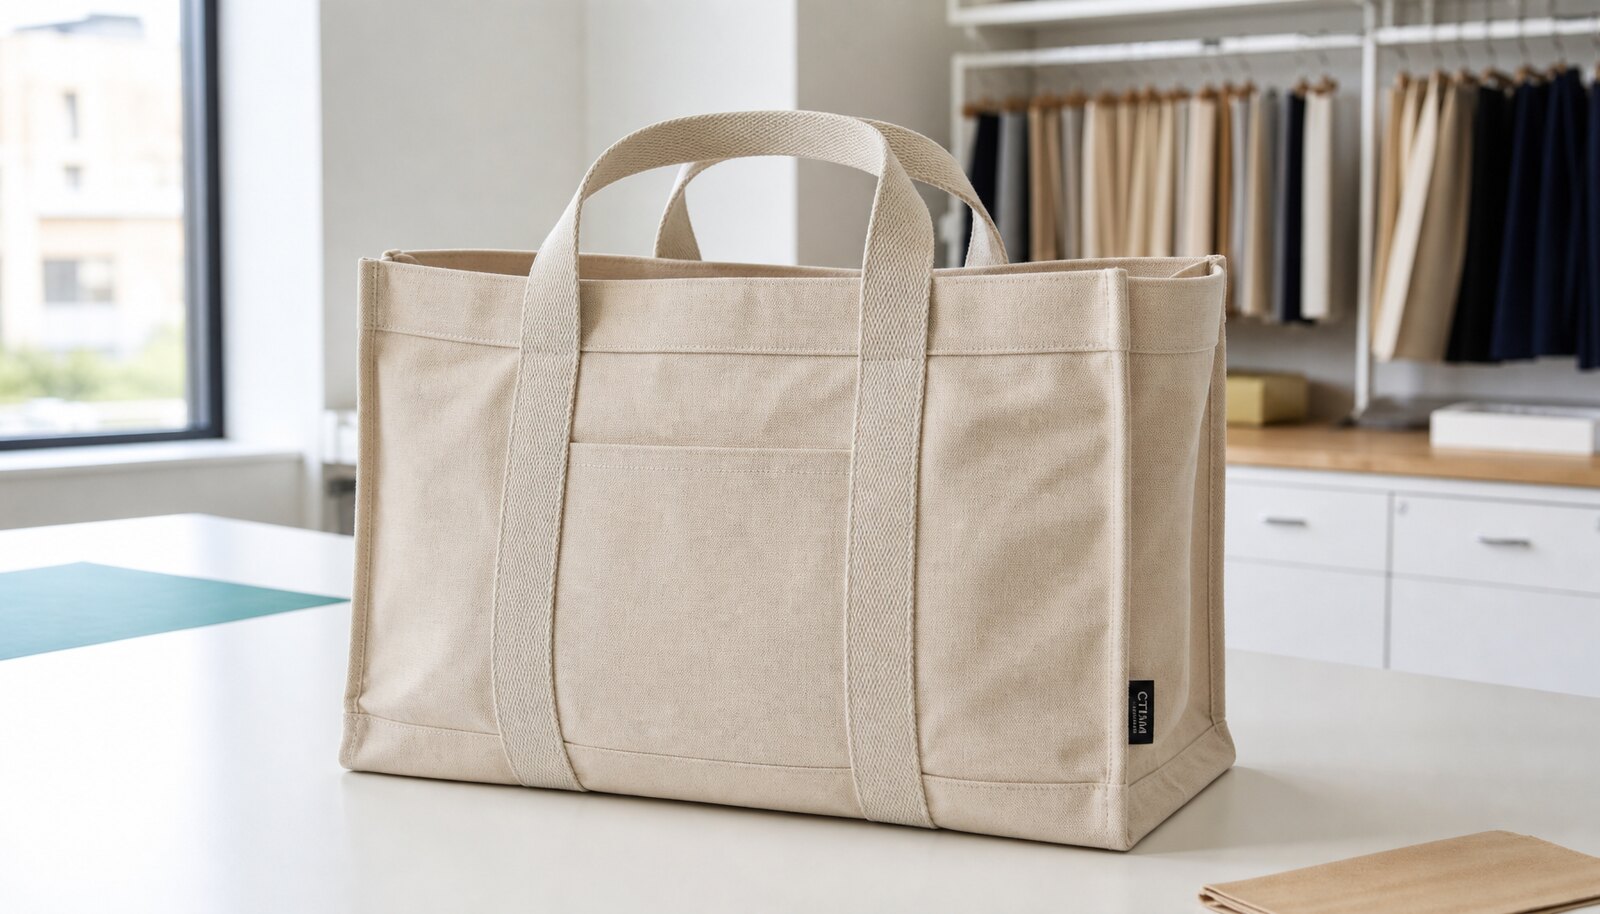
For canvas conference bags for corporate events, the fabric spec often determines whether the item feels like a useful reusable tote or just another giveaway that gets left on a chair after registration. Procurement teams frequently start with logo approval because that is the visible brand element, but the real supplier differences usually show up in canvas weight, weave stability, handle reinforcement, and how the bag behaves once it is filled with brochures, a notebook, and sponsor materials.
That matters commercially. A bag that sags, wrinkles, or twists after filling can make the print look distorted even when the artwork itself is approved. A bag that is too stiff or too heavy can also create avoidable cost in freight, handling, and attendee comfort. In practice, buyers need to balance appearance, cost, and utility rather than chase the most premium build on the sample table.
A better buying question is not 'How can we make it look nice?' but 'What construction will survive event packing, on-site distribution, and reasonable reuse at the lowest acceptable total cost?' That framing helps teams avoid over-specifying lining, closures, or heavy fabric where the event does not need them.
Use the event scenario to set the floor for the spec. A one-day conference giveaway can usually be built more simply than a VIP delegate kit or a tote intended for retail resale after the event. The more clearly the supplier understands the use case, the more accurate the quote and the lower the risk of surprise add-ons later.
- If the bag only holds a brochure set and a pen, you can usually keep the structure simple.
- If the bag must also carry a bottle, catalog, charger, or samples, reinforce the handles and base.
- If the bag will be reused after the event, prioritize finish, seam quality, and print durability over the lowest possible unit price.
Choose canvas weight by load, structure, and freight tolerance
For procurement, canvas weight is one of the most important line items because it affects feel, durability, print flatness, sewing behavior, and freight weight. The correct answer is rarely 'the heaviest available.' Instead, define the expected contents and ask the supplier to quote the lightest construction that still meets the load and presentation need.
A 10 oz canvas can be perfectly adequate for a light event handout, especially if the contents are flat and the bag is not expected to stand upright on its own. However, that same spec can look weak when a bottle or sample box is inserted. The face panel can bow outward, the handles can pull the top opening out of square, and the bag can appear underbuilt even before it leaves the venue. At the other extreme, 16 oz canvas may feel durable but can become bulky, more expensive to sew, and less efficient to pack if the event is distributing thousands of units.
A practical buyer approach is to link weight to use case rather than a generic quality tier. Ask for actual oz or GSM, verify whether the mill quote is pre- or post-finishing weight, and require the supplier to note if the fabric is measured before or after washing. That detail matters because some mills quote weight differently, which can distort apples-to-apples comparison.
Also consider the print surface. Heavier canvas tends to give a more substantial feel and better structure, but if the weave is very coarse, fine-line artwork may look less crisp. For a logo-heavy corporate bag, a 12 oz to 14 oz canvas is often the best commercial balance.
- 10 oz canvas: suitable for lower-load giveaways and the most price-sensitive programs.
- 12 oz canvas: often the most balanced choice for standard conference totes.
- 14 oz to 16 oz canvas: better for premium reuse, heavier content, or a more structured retail-style appearance.
- Always clarify whether quoted weight is before or after washing, because mills may describe it differently.
Fiber content and finish: the hidden variables that change sourcing results
Canvas is not just a weight number. Yarn quality, weave tightness, and finishing methods change how the bag cuts, sews, prints, and holds shape. Buyers who only ask for 'cotton canvas' can receive very different results from different mills, especially if one supplier uses a tighter weave and another uses a looser, more rustic cloth.
Pure cotton is still the default for many conference totes because it has a natural look, accepts print well, and is easy to position as a reusable promotional item. That said, the finish matters as much as the fiber. Pre-shrunk, bio-washed, or enzyme-washed canvas usually feels softer, creates less lint, and reduces the chance that the bag dimensions shift after packing or customer use. Unfinished canvas may be acceptable for a rougher event brief, but it often looks stiffer and more variable from lot to lot.
If color consistency matters, do not rely on the phrase 'natural color' alone. Natural canvas can vary from creamy beige to a slightly grey or yellow tone depending on fiber source, finishing, and lot age. For corporate branding, that variation can be visible next to printed logos or colored trims. If the buyer cares about visual consistency across a large run, request a lab dip or shade reference and ask the supplier to confirm lot control.
The finish also affects decoration. A softer washed canvas often lies flatter under screen print and feels better in hand, but it can cost a little more and may require a longer lead time if the factory does not stock it. The right decision depends on whether the bag is a short-life event handout or a premium reusable item that should feel polished out of the carton.
- Pre-shrunk canvas reduces the chance of size movement after production.
- Bio-washed or enzyme-washed fabric generally improves hand feel and lowers lint.
- Request shade control if the bag will be compared across multiple event batches or business units.
- Ask whether the fabric is woven and finished in-house or sourced from a mill, because supply-chain length affects lead time and traceability.
Set construction details only where they solve a real event problem
Many conference bag quotes become expensive not because the base tote is complex, but because the buyer adds features without tying them to an actual need. Lining, pockets, gussets, zip closures, and reinforced bottoms all improve function in the right context, but each one affects labor, QC, and on-time delivery.
An unlined open-top tote is usually the cleanest specification for mass distribution. It is faster to sew, easier to pack, and more forgiving if the order needs speed. This is often the right answer for delegate registration bags, event handouts, and sponsor giveaways that are expected to be used during the event and then taken home as a casual reusable bag.
Lining becomes more justified when the contents have sharp edges, when the bag should look more retail-like, or when the inner seams need to be concealed for a premium presentation. A lining is not automatically better, though. Poor lining tension can cause puckering at the opening, and if the outer shell and lining are cut inconsistently, the bag can twist at the top seam.
Gussets and base reinforcement are worth specifying when the bag needs to stand open, carry heavier contents, or protect bottled products. The tradeoff is that those features change sewing complexity and can increase dimensional drift if the supplier is not experienced with your pattern. For a procurement team, the best rule is simple: every added feature should have a content-based justification and a measurable acceptance criterion.
- Open top: lowest complexity, fastest production, easiest pack-out.
- Bottom gusset: useful when the bag must hold boxed kits or stand up on registration tables.
- Lining: improves interior finish, but only specify it when the use case supports the extra labor.
- Internal pocket: useful for access cards or tickets, but can distort the front panel if placed without a proper pattern balance.
Select handles, closures, and reinforcement by load risk, not by appearance
Handles are one of the first parts to fail in bulk event use, so they deserve more attention than their small size suggests. A handle that looks acceptable on a sample can still pull loose if the bag is stuffed repeatedly or carried by attendees with heavier materials inside. For that reason, buyers should specify not only handle length, but also webbing width, attachment method, and reinforcement style.
A woven webbing handle in the 25 mm to 38 mm range is often a better procurement choice than an unreinforced self-fabric handle when the bag needs to carry a real load. Webbing tends to distribute force more evenly and is easier to inspect. Self-fabric handles can look more integrated, but they require careful stitching and may stretch more if the canvas is softer. Cross-box stitching is common for a reason: it is visible, inspectable, and effective when executed correctly. Bartacks can also work well if the factory has tight machine control.
For closures, the best choice is the simplest one that meets the content risk. Open top is still the most efficient for standard conference distribution. Zippers are useful for premium kits, travel bags, or orders where loose items should not fall out, but they increase sewing alignment risk and can create lead-time friction if the supplier is not set up for zipper insertion at scale. Snaps can work for very light contents, though they usually do not add enough security to justify the additional components unless the brand is specifically aiming for that look.
The procurement implication is important: when a closure is added, the bag is no longer a simple tote in supplier terms. That means the quote should be broken out into shell, handle, closure, and decoration so you can see exactly where the cost and risk are coming from.
- Choose 25-38 mm webbing when the bag will carry heavier kits or multiple inserts.
- Specify cross-box stitching or dense bartacks and ask for a visual reference in the sample.
- Keep open-top construction for fast handout programs unless there is a specific content-security need.
- If using a zipper, ask how the factory controls zipper alignment and end-stop consistency.
Match the print method to artwork complexity, quantity, and expected wear
Print is often the most visible part of the bag spec, but it should still follow the production logic of the material. For simple logos and stable artwork, screen print is usually the most cost-effective decoration method on canvas. It handles large solid shapes well, often gives strong opacity on natural fabric, and is familiar to most bag factories. For standard conference runs, it is usually the first method procurement should ask the factory to quote.
That changes when the artwork is more complex. If the logo has gradients, fine lines, variable data, or multiple color transitions, the buyer may need heat transfer or digital decoration. These methods can support shorter runs and more art changes, but the tradeoff is that adhesion, edge lift, and long-term wear become more important to test. A method that looks excellent in a photo can still fail after repeated folding if the application process is not well controlled.
Embroidery is a different category entirely. It creates a premium tactile effect and can look strong on small logos, but it is not automatically a better choice for all conference bags. Heavy embroidery on lighter canvas can cause puckering, and large embroidered areas can feel stiff or expensive for a mass giveaway. It is best used selectively when the brand truly wants a premium mark and is willing to pay for it.
For RFQ purposes, the supplier should be asked to quote blank, one-color print, multi-color print, and embroidery separately. That makes it possible to compare decoration choices on the same bag body and prevents hidden pricing from getting buried in a single lump sum.
- Screen print: usually best value for bold logos and larger quantities.
- Heat transfer or digital: better for short runs, gradients, or variable data, but test adhesion.
- Embroidery: premium look for smaller marks, but watch for puckering and higher cost.
- Ask for a strike-off on the actual fabric, not just on a substitute swatch.
Compare supplier routes before comparing unit price
The same tote can be sourced from very different supplier types, and each route has a different value proposition. A direct factory generally offers the best control over canvas selection, sewing methods, and packaging if you are ordering repeat quantities or need specific customization. A trading company can help when the program includes mixed products, multiple delivery points, or several business units that need coordination. A local decorator can be useful for urgent smaller runs, especially when the order is mostly blank stock plus a light decoration step.
The mistake procurement teams often make is to compare quotes without confirming that the supply route is actually quoting the same build. A factory quote may include the exact fabric and handle spec while a trading quote assumes a lighter canvas or different reinforcement. Likewise, a local decorator may be faster but may not control the mill source or the sewing line, which limits consistency on larger programs.
A useful sourcing rule is to align supplier route with program complexity. If the order is a repeat corporate event style, go direct where possible and use a tightly defined spec sheet. If the event requires multiple accessory items, multiple artwork variations, or last-minute coordination, a trading partner may add value despite a higher margin. If the order is small and urgent, prioritize speed and local turnaround, but accept that the customization depth may be limited.
Procurement should also ask who owns QC in the route. If the supplier subcontracts sewing, printing, or packing, the buyer should know where the actual inspection is taking place and whether the final carton contents are checked by the same company that quoted the bag.
- Direct factory: best for repeat orders, fabric control, and clearer cost breakdowns.
- Trading company: useful for bundled programs, but ask who actually sews and inspects the goods.
- Local decorator: best for small or urgent jobs, but usually less suitable for deep customization.
- Always confirm whether the quote is from the manufacturer or a sourcing intermediary.
Use samples and acceptance criteria that reflect final production, not showroom intent
A sample is only useful if it matches the production route. In canvas bag sourcing, the safest approval sequence is usually fabric confirmation, print strike-off, then pre-production sample made from actual bulk material. If any of those steps are skipped, the buyer can end up approving a bag that looks right but cannot be reproduced at scale.
The most common failure pattern is a sample made from one canvas and bulk production made from another. Another is a print sample approved under warm indoor lighting that looks different when compared with the bulk run in daylight. Buyers should therefore require measurable acceptance criteria, not just verbal approval. That means dimensions, print position, handle length, and reinforcement style should be written on the spec sheet and checked against the sample before bulk release.
A good sample review should also include practical testing. Load the bag with the actual event contents or a close equivalent and inspect whether the base sags, handles bite into the hand, or seams distort. If the event bag is expected to stand on a registration table, fill it and check whether it still looks presentable. If the event team cares about foldability, test the pack method and see whether it leaves visible creases on the print face.
Keep one sealed golden sample signed by both sides. That sample should include the approved material, print placement, and any agreed deviations. If there is a dispute later, a golden sample is far more useful than an email thread describing what 'looked fine' during approval.
- Approve the final fabric before print layout is locked.
- Require a print strike-off for any sensitive logo, Pantone match, or multi-color artwork.
- Measure bag dimensions after light pressing on a flat surface.
- Keep a sealed golden sample for lot comparison during bulk inspection.
Specify packing and carton design to protect appearance and reduce claims
Packing can make a good bag arrive looking poor. Canvas folds can hold deep creases, and if the carton is too tight, handles can deform or print areas can crack along the fold line. Buyers often underestimate this because the product itself seems rugged, but canvas with decoration behaves more like a presentation item than a raw textile once it is printed and packed.
The packing method should match the end use. For direct venue distribution, bulk carton packing may be enough and keeps freight and labor down. For retail-ready or long-storage programs, individual polybagging can protect the print and reduce scuffing, though it adds cost and material use. Tissue paper or a light insert board can help preserve shape when the bag must look premium on arrival, but these additions should be justified by the risk and the distribution path.
Carton design matters too. Ask for the supplier’s recommended case pack, carton dimensions, and folding method before approval. A slightly smaller case pack can protect shape, but if it raises carton count too much, freight cost may increase more than the quality benefit. Procurement should review this as part of landed cost, not as a separate afterthought.
A practical packing check is to open one master carton and inspect whether the first and last bag in the carton look equally presentable. If the top bag is pristine but the bottom bag has compressed corners or scuffed print, the packing method needs to be revised before shipment.
- Bulk carton pack: cheapest and often enough for direct event use.
- Individual polybag: better for storage, retail, or more careful distribution.
- Insert board: useful when fold memory or print scuffing is a concern.
- Ask the supplier to specify folding orientation and carton fill rate before bulk approval.
Plan lead time around fabric availability, approval loops, and rework risk
Lead time for canvas conference bags is usually not lost in sewing alone. The bigger risks are fabric sourcing, color approval, strike-off revisions, and late sample changes. Buyers who treat the bag as a simple commodity often underestimate how much time is consumed before the factory can cut production.
Standard natural canvas programs move faster because the fabric is easier to source and does not require a custom dye run. Once the brief adds special color matching, lining, zippers, or multiple decoration locations, the approval chain becomes more complex. If the event date is fixed, procurement should build a schedule that includes at least one revision buffer. That buffer is often the difference between on-time delivery and a rushed air freight recovery.
It also helps to separate sample lead time from mass production lead time in the RFQ. A supplier may be able to produce quickly once the order is approved, but if the sample stage takes longer than expected, the calendar still slips. The best suppliers are transparent about where the delays usually occur. If they tell you that fabric reservation and artwork approval are the critical path, that is useful. If they only quote a short production time without explaining the approval sequence, be cautious.
For event-critical orders, ask whether the factory can reserve fabric and set a hard approval cut-off date. That forces the buyer and the supplier to treat artwork sign-off and sample approval as schedule-driving tasks rather than optional administrative steps.
- Natural canvas and simple print move faster than custom-dyed or fully lined programs.
- Separate sample lead time from production lead time in the quote.
- Build a buffer for strike-off changes and final approval delays.
- Ask whether the factory can reserve fabric before the final PO if the event date is fixed.
Specification comparison for buyers
| Spec decision | Recommended option | When it fits | Buyer risk to check | Typical cost / supplier impact |
|---|---|---|---|---|
| Canvas weight | 12 oz to 14 oz cotton canvas | Standard corporate events with brochures, notebook, pen set, and one bottle | Too light can sag, warp print panels, and stress handles; too heavy raises freight and sewing difficulty | 10 oz usually lowers unit cost but may increase defect risk; 14 oz often adds modest cost for better structure |
| Fabric finish | Pre-shrunk, bio-washed, or enzyme-washed canvas | Programs where hand feel, size stability, or cleaner print edges matter | Unfinished canvas may shrink, lint, or vary more after pressing and packing | Washed fabrics usually cost more and can extend sourcing time if the mill has limited stock |
| Lining | Unlined for giveaways; cotton poplin or 210D lining for premium kits | When you need cleaner interior, concealed seams, or better shape retention | Lining adds labor and can create puckering if tension is inconsistent | Expect higher sewing cost, more inspection points, and a slightly higher reject rate if the line is not set up for lined bags |
| Handle construction | 25-38 mm woven webbing handles with cross-box stitching or dense bartacks | When bags carry heavier event kits or will be reused after the event | Weak reinforcement is a common failure point; handles can tear before the body fails | Minimal cost increase for reinforcement, but large savings in claim risk and returns |
| Closure | Open top for fast handout; zipper for premium or travel use; snap only for light contents | Choose based on content security and brand positioning | Closures complicate sewing and can slow throughput; loose zipper tape can cause misalignment | Zippers and snaps increase both unit price and lead-time risk |
| Print method | Screen print for one to three solid colors; heat transfer or digital for short runs and gradients; embroidery for small premium marks | When logo complexity and quantity align with the process | Poor artwork resolution, color drift, or print placement errors drive rework | Screen print is usually the best value at volume; embroidery is typically the highest-cost decoration per bag |
| Supplier route | Direct factory for repeat programs; trading company for mixed-item sourcing; local decorator for urgent small runs | When buyer needs differ by MOQ, lead time, and customization depth | Hidden markups, unclear ownership of QC, and inconsistent fabric lots can undermine landed cost | Factories often offer better fabric control; trading companies may bundle services but reduce transparency |
| Packing method | Bulk carton pack for event distribution; individual polybag with carton for retail or long storage | Match pack method to warehouse handling and distribution path | Overpacking drives freight cost; underpacking creates creases, scuffs, and crushed handles | Tighter pack efficiency reduces freight, but protective inserts can raise carton volume |
| Sampling route | Fabric approval, print strike-off, then pre-production sample from actual bulk material | For corporate events with fixed brand standards and launch dates | Skipping one step often creates color mismatch, placement disputes, or late rework | More sample steps add time and sample cost, but materially reduce event-day failure risk |
Buyer checklist before sampling
- Confirm the use case first: conference handout, VIP kit, retail resale, delegate welcome pack, or reusable post-event carry bag.
- Set the minimum fabric weight in oz or GSM and state whether the bag must stand upright when filled with the intended contents.
- Specify the actual load items, such as A4 brochure bundle, notebook, water bottle, charger, or sample packs, instead of using a generic load label.
- Provide vector artwork, Pantone targets, print area dimensions, and minimum edge clearances so the printer can align the logo correctly.
- Define body dimensions, gusset depth, handle length, and whether bottom or side gussets are required.
- Choose lining, pocketing, zipper, snap, or magnetic closure only if they solve a real content, security, or brand requirement.
- Ask for a sample from the final fabric, not a substitute fabric, and require a print strike-off before cutting bulk quantity.
- Request a pre-production sample, a sealed golden sample, and written sign-off on measurement and decoration placement.
- Confirm packing format, case pack, carton dimensions, carton count per pallet if relevant, and the ship-to destination.
- Ask the supplier how they inspect measurements, stitching, print adhesion, and carton quality before shipment.
Factory quote questions to send
- What exact canvas construction are you quoting: fiber content, weave construction, oz or GSM, width, and whether the fabric is pre-shrunk, bio-washed, or enzyme-washed?
- Is the quoted price for the full bag build or only the shell, and are handle reinforcement, lining, pocketing, zipper, and print setup included separately?
- What is your MOQ by fabric color, decoration method, and artwork version, and do you allow mixed sizes or mixed artworks within one production run?
- Can you quote blank, one-color screen print, multi-color print, and embroidery separately so we can compare true landed cost?
- What is the sample path and timeline for a fabric sample, a print strike-off, and a pre-production sample using the final bulk material?
- What are your standard carton dimensions, case pack quantity, and preferred folding method to protect the bag shape during transit?
- What production lead time should we plan for after sample approval, and which steps most often create delays on your line?
- Which QC checks are included before shipment: measurement, seam strength, stitch density, print adhesion, needle-metal control if applicable, and carton drop or compression check?
- What defect level do you pack to, and how do you handle over-tolerance seam drift, print misplacement, or color variation between lots?
- If the order is event-critical, can you reserve fabric in advance and confirm whether there is a cut-off date for artwork approval?
Quality-control points to confirm
- Fabric weight tolerance should be stated in the PO or spec sheet, typically within plus or minus 5% unless the buyer agrees otherwise.
- Check fabric hand feel, weave consistency, and visible slubs on the approved sample; excessive variation often signals lot inconsistency.
- Measure bag width, height, and gusset depth on a flat table after pressing or light steaming; define acceptable dimensional tolerance before production starts.
- Inspect handle length consistency and reinforcement symmetry; cross-box stitches should not cross the tape edge or crowd the seam allowance.
- Load test the bag with the actual event contents or a realistic equivalent, not only a static hang weight.
- Check top-edge alignment, side seam straightness, gusset corners, and zipper track if applicable; puckering at these points often predicts early wear.
- Print should be centered against the approved spec and compared under daylight or standardized white light, not only under factory lighting.
- Verify print opacity on natural canvas, especially on darker ink colors, so the logo does not appear patchy or washed out.
- Ask for ink cure validation or adhesion testing appropriate to the print method; rub resistance matters more than a showroom appearance.
- Trim loose threads before final pack-out and inspect for skipped stitches near handles, corners, and pocket openings.