Why canvas conference bag prices vary so much for boutique orders
For boutique buyers, a canvas conference bag is not just a tote. It can be a branded retail item, a paid event add-on, or a giveaway that still has to look sellable at first glance. That means the quote has to cover more than the shell of the bag. Fabric weight, reinforcement, print method, packing, and freight all move the total number. Two suppliers can quote the same size and still land far apart because they are pricing different constructions, different labor content, or different assumptions about packaging and quality control.
The first mistake is comparing unit price before the spec is locked. The second mistake is assuming that a low ex-factory quote will stay low once setup, sample revisions, packing, and freight are added. A better bulk pricing plan starts by defining what the bag must do: hold weight, look polished on a shelf, survive repeated use, and arrive in a condition that does not need repacking. Once those requirements are clear, procurement can compare like for like and decide where to spend and where to simplify.
For a boutique program, the bag has to fit the selling model. If the bag is a checkout upsell, the buyer may want a lower-cost 10 oz or 12 oz construction with a one-color logo. If it is a gift-with-purchase item or a premium event accessory, the team may need heavier fabric, cleaner print registration, and a more retail-ready finish. That difference should be visible in the RFQ, because it changes the factory’s labor content and the acceptable defect rate.
A useful rule is to compare only after matching four variables: fabric weight, structure, print method, and packing. If those four are not aligned, the cheapest quote can be misleading. The bag may use lighter cloth, a thinner handle attachment, or a looser packing method that pushes quality risk to the buyer after delivery. Procurement should treat the quote as a controlled manufacturing offer, not a retail shelf tag.
- Compare only after matching fabric weight, structure, print method, and packing.
- Ask suppliers to quote on the same finished dimensions and same logo placement.
- Treat sample development, setup, and freight as part of the commercial plan, not side costs.
Build the spec first: fabric, structure, and finish
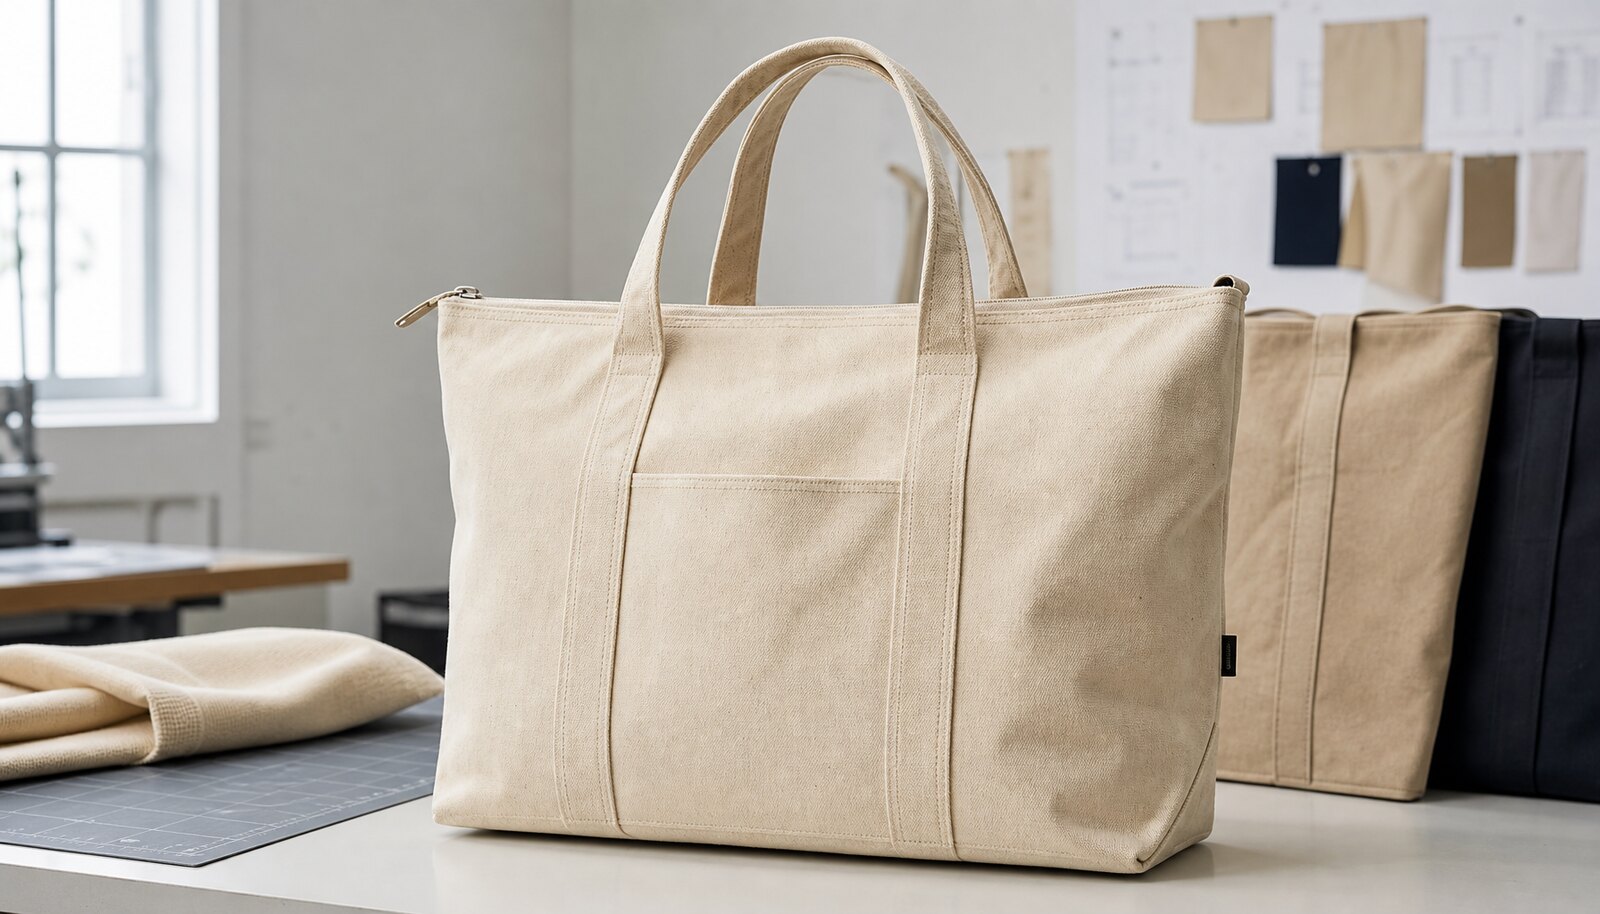
For most boutique programs, 12 oz canvas is the most practical starting point because it balances weight, drape, and perceived quality. It usually feels sturdy enough for customer-facing use without making the bag too heavy or too expensive to ship. If the bag will carry books, boxed gifts, or heavier event kits, a 14 oz build with reinforced handles is safer. If the bag is only for lightweight handouts, 10 oz can work, but it is easier to see seam distortion and print rippling on lighter cloth.
Structure changes the commercial result as much as fabric weight does. A flat tote is cheaper and easier to produce, but it will not stand upright or protect contents as well. A gusset adds capacity and improves shelf presence. A lining, zipper, or base board adds another layer of labor and revision risk, so it should be specified only when it changes the customer experience or the product's functional value. Boutique buyers should decide early whether they are buying a utility bag, a retail bag, or a premium gift bag, because the spec should match the use case.
Finish details matter because they influence both appearance and production complexity. Washed canvas looks softer and can feel more premium, but the process may slightly change finished dimensions and shade. Coated or laminated canvas can improve wipeability, but the supplier should confirm whether the coating affects print adhesion. Pre-shrunk fabric can reduce post-production movement, yet it may add cost and should be measured against the actual shrink target. If the bag includes metal hardware, a zipper, or an internal pocket, ask the factory how those elements affect sewing flow and final inspection.
Buyers should write the bag spec as a production document, not a marketing description. The factory needs finished measurements, seam style, reinforcement points, and label locations. If the spec says only “good quality canvas conference tote,” the supplier will fill in the gaps with its own standard. That is where quote variation begins. A clear spec gives the buyer leverage if a supplier later claims the bag was priced without a zipper pull, without lining allowance, or without a handle reinforcement patch.
- 10 oz: good for lightweight programs where softness and low cost matter more than structure.
- 12 oz: best default for boutique conference bags, retail resale, and branded gifting.
- 14 oz or higher: better for heavier loads, premium positioning, or bags that must hold shape.
Use a pricing model, not a single quote number
A useful bulk pricing plan breaks the bag into cost drivers. Start with the shell: fabric, cutting, stitching, and thread. Then add the value items: print, zipper or snap, label, base board, and any washing or coating step. After that, add packing and freight. When a supplier presents one all-in number, ask them to separate one-time and recurring charges so you can see the real cost of the next reorder.
The most useful commercial split is: base bag cost, option cost, and logistics cost. Base bag cost should change only when the fabric or size changes. Option cost should cover print colors, lining, hardware, or custom labels. Logistics should cover cartons, carton count, gross weight, and freight term. This structure makes it easy to see whether a quote is expensive because the bag itself is well made, or because avoidable extras were bundled into the price.
One-time costs are where many quote comparisons go wrong. Screen setup, color matching, artwork plates, sample development, and label tooling can be spread over a long run or become a material burden on a short one. A supplier quoting 500 pieces may look expensive on a per-unit basis because the setup charges are not diluted. At 3,000 pieces, the same setup may become barely noticeable. Procurement should calculate both the first-order cost and the reorder cost before deciding which vendor is truly competitive.
If the order is likely to repeat, ask the factory to price the first run and the reorder separately. That reveals whether the supplier is trying to recover one-time development expense in the unit price. For boutiques, this matters because the initial pilot order often tests the product in stores, while the second order is where margin discipline becomes important. A supplier with clean reorder pricing is often easier to work with than one that uses the first quote to hide future cost increases.
- Separate recurring cost from one-time setup charges.
- Track option pricing per accessory so you can simplify if margins tighten.
- Require carton and freight data before comparing quotes across suppliers.
Use the comparison table to make sourcing decisions, not just preferences
The table below is most useful when it drives a decision, not just a preference. The right question is not whether a 14 oz bag is better than a 12 oz bag in the abstract. The real question is whether the premium is justified by handling needs, shelf appearance, and price point. If the bag is going into a boutique assortment with a healthy resale margin, the heavier build may protect the brand. If the bag is a promo accessory with a tight target price, the lighter build may be the only workable option.
Use the same logic for print and packing. Screen printing is the cleanest choice for simple logos and repeat runs because setup is predictable and coverage is strong. Heat transfer or digital print can help with smaller quantities or changing artwork, but they often cost more per piece and require closer durability checks. Packing follows the same pattern: bulk pack is cheapest, while individual polybags or barcode labels are only worth paying for when the retail workflow needs them.
A practical decision rule is to compare the landed cost per sellable unit. That means the bag must arrive in a state that can actually be sold or distributed without rework. If a lower quote requires repacking, relabeling, or additional inspection at the warehouse, those costs need to be added back in. For procurement, the table is not about finding the cheapest line item. It is about finding the lowest-risk offer that still meets the selling plan.
The useful habit is to build a threshold before you review quotes. For example, if the landed cost goes above your target band, the first simplification should be packing, then accessory count, then print complexity. That sequence protects the product from being over-cut while keeping the commercial response disciplined. In other words, do not downgrade fabric first if the bag needs body; simplify the features that do not change function.
- Choose the spec that supports the price point you intend to sell or distribute at.
- Do not pay for structure or presentation that the end customer will not value.
- Make the supplier justify every premium item with a functional reason.
Set decision thresholds before you request quotes
Procurement becomes easier when the team agrees on decision thresholds before suppliers respond. For example, if the bag will be sold at retail, the buyer may decide that any quote above a certain landed-cost band must include better fabric, reinforced handles, or a retail-ready finish. If the order is a promotional handout, the threshold may be lower and the buyer may accept a simpler body with a one-color print. These thresholds keep the RFQ from drifting into endless optioning.
A good threshold framework has three parts. First, define the acceptable spec floor, such as minimum fabric weight, minimum stitch reinforcement, and maximum allowed shade variance. Second, define the commercial ceiling, such as your target ex-factory band or landed-cost band. Third, define the escalation rule: if the quote exceeds the ceiling, the buyer can either drop an accessory, simplify the print, or reduce packing complexity. That gives the team a clean way to keep the project on budget without reopening the entire brief.
For boutique buyers, it helps to set a target range rather than a single number. A hard ceiling is useful for internal approval, but a range allows you to see where the market clears. If three suppliers cluster around the same landed cost, the number is probably real. If one quote is far below the others, the buyer should ask what was omitted. That can surface missing freight, lighter fabric, thinner handles, or packing assumptions that were never stated.
Thresholds should also cover reorder planning. A supplier may be competitive on the first run but expensive on repeat. If the bag is likely to be restocked, ask for the cost at 500, 1,000, and 3,000 pieces. This makes the comparison more useful for seasonal buying, because boutiques often test in small batches and then scale the winners. The best quote is not the one that only works at one quantity; it is the one that stays commercially sensible across the expected buying range.
- Set a minimum acceptable fabric weight and structure before the RFQ goes out.
- Define a target landed-cost range, not just a target unit price.
- Pre-approve one simplification path if the first quote comes in too high.
Landed cost is where the real comparison happens
The quote on the page is rarely the final cost. Landed cost is the useful number because it includes the items that move once the order ships: carton count, freight volume, customs handling, and local receiving. Heavier canvas increases freight cost. Retail-ready packing increases labor and carton volume. Extra inserts or overpacking can push a shipment into a less efficient carton count. For boutique buyers, these hidden increases can erase the savings from a lower unit quote.
A simple landed-cost worksheet should include unit price, setup charges, sample fee, packing materials, carton dimensions, gross weight, inland trucking, main freight, duty or tax if applicable, and warehouse receiving. If the supplier cannot provide carton data, the quote is incomplete. As a rule, the cheapest-looking bag is often not the cheapest to land if it uses more fabric, thicker hardware, or more protective packing. That is why procurement should compare landed cost per sellable unit, not just factory cost per bag.
Here is a simple example. Suppose Supplier A quotes 1,000 canvas conference bags at $2.05 each, bulk packed, with a $120 setup fee and cartons that total 1.2 cubic meters. Supplier B quotes $1.88 each, but the bag is heavier, uses a zipper, and ships in individual polybags that push the total to 1.7 cubic meters. If freight and handling add $180 more to Supplier B’s shipment, the lower factory price can disappear quickly. On a 1,000-piece order, a difference of $0.17 per bag is only $170. One extra carton tier, more handling, or more repacking can easily absorb that advantage.
The same logic applies to samples. A sample fee of $35 versus $85 does not matter much if the bulk order is stable, but it matters if multiple revisions are needed. Ask whether the sample fee is credited back on bulk, whether strike-offs are charged separately, and whether the factory charges for each revision. Those details can shift a short run by several points. For boutiques, the best comparison is not “cheapest sample” or “cheapest tote”; it is the lowest total cost to an approved, deliverable, sellable bag.
- Include carton dimensions and gross weight in every quote review.
- Separate freight from production so you can see how fabric weight affects logistics.
- Compare landed cost per sellable unit, not just the factory number.
Choose the right supplier route for the order type
Direct factory sourcing is usually the strongest option when the order needs repeatability. It gives buyers better visibility into fabric sourcing, stitch discipline, and production timing. It also makes it easier to enforce a single approved sample across reorders. Trading companies can still be useful when the order mixes product types or when the buyer needs one contact point for multiple factories, but they add another margin layer and can slow down technical clarification. A local converter can be the easiest route for communication and finishing, but the price is often higher because the value chain is longer.
The right route depends on order complexity. A simple, repeatable boutique bag with one print and one color often belongs with a direct factory. A campaign with multiple SKUs, mixed accessory packs, or unusual packaging may justify a trading partner if the buyer values coordination more than the lowest possible cost. Whatever route you choose, verify who actually cuts, prints, sews, and packs the bags. If the source is unclear, QC and change control become harder later.
Country and region matter because they change the sourcing equation. China typically offers the deepest ecosystem for canvas tote production, accessory sourcing, and print options, which helps when the brief needs multiple components or fast sample iteration. India can be a good fit when the buyer values canvas know-how, natural fiber positioning, or broader textile sourcing, but lead times and finishing consistency should be checked carefully. Southeast Asia can work well for some programs, especially when buyers want alternative capacity or tariff diversification, but the supplier’s canvas specialization and export documentation should be verified. Nearby regional suppliers or domestic converters may shorten communication and shipping time, but unit cost is often higher. The right answer depends on whether the buyer is optimizing for cost, speed, proximity, or oversight.
Whatever country you choose, ask the factory to explain its export experience, packing discipline, and documentation process. The buyer should know who is responsible for carton markings, HS-code support, packing list accuracy, and sample retention. A lower-cost factory is only attractive if it can ship consistently and document the order correctly. For procurement teams, the better supplier is the one that can reproduce the approved sample with the least ambiguity and the fewest exceptions.
- Direct factory: best for repeat orders, tighter spec control, and better cost transparency.
- Trading company: useful when the order is broad, but verify the real production site.
- Local converter: easier to manage, but usually less competitive on landed cost.
What to ask in the quote so you can compare apples to apples
A quote only works if it is detailed enough to remove ambiguity. Ask the supplier to identify the fabric source, the exact print method, the number of colors, the bag structure, and the packing method. Then ask for a line on sample cost, setup charges, and any option cost that would change if the design were altered. If the supplier gives you only a single per-unit figure, they are forcing you to guess which parts are fixed and which parts will change after sample approval.
The most useful questions are the ones that expose cost behavior. Ask how the price changes if the order moves from one color to two colors, from flat to gusseted, or from bulk pack to polybag. Ask what portion of the quote is one-time and what portion repeats on the reorder. Ask what assumptions were made about fabric stock, accessory sourcing, and carton size. This is the information that tells you whether the quote is genuinely competitive or merely incomplete.
A strong validation step is to ask the factory to quote two versions side by side: the requested spec and one simplified spec. For example, ask for the same bag with and without a base board, or with one print color versus two. If the price delta is unusually small, the factory may be padding the simplified version or ignoring actual labor. If the delta is unusually large, the buyer can judge whether the extra feature is really worth it. This is a practical way to test whether the supplier understands the bill of materials rather than just sending a generic price.
When a quote arrives, cross-check three numbers: fabric consumption, sewing minutes, and packing assumptions. Those are where errors show up first. If the supplier says the bag uses 0.28 kg of canvas but the spec clearly calls for a heavier body, the quote may be based on the wrong material. If the handle bar-tack or lining cost is missing, the factory may be assuming a simpler construction. Validation is not about distrust; it is about making sure the factory is pricing the same article you intend to buy.
- Ask for separate lines for fabric, sewing, print, hardware, packing, and freight assumptions.
- Ask how the quote changes when color count, size, or packing changes.
- Ask whether sample fees, screens, or label tooling are refundable or credited back.
Run sample control like a mini production audit
The sample is not just a look-and-feel check. It is the reference object the factory must reproduce. Before approving it, measure the finished bag, test the handle comfort, check the load behavior, and inspect the print at normal viewing distance. If the bag uses a zipper, snap, or label patch, check alignment against the seam lines. If the buyer plans to wash or pre-finish the bag, inspect the sample after that process, because final dimensions and shade can shift.
A strong sample control process uses a simple approval sheet. Record the approved fabric weight, finished dimensions, handle length, handle drop, print method, color reference, accessory details, and packing format. Include photos or annotated drawings where necessary. If a supplier later changes the stitch pattern or print placement, that change should be visible against the approved record. The goal is not more paperwork. The goal is to reduce interpretation errors before bulk cutting begins.
For boutique orders, a practical sample flow is often three steps: material confirmation, pre-production sample, and production reference sample. First confirm the canvas hand feel and shade. Then approve a full bag sample with the actual artwork and hardware. Finally, keep one signed reference sample with the factory and one with the buyer. If the order is sensitive to brand presentation, this extra step is worth the time because it reduces disputes over color depth, logo position, and seam neatness.
Do not approve a sample on visuals alone if the bag will carry weight or be sold as a premium product. Load test the handles with a real item or weight equivalent. Check whether the seam stretches, whether the bag sags unevenly, and whether the gusset stays square. If the bag feels good empty but warps under load, the buyer is approving a marketing object rather than a usable product.
- Approve the sample only after a real load test, not just a visual check.
- Record the approved spec in writing and attach images or drawings.
- Recheck dimensions after any wash, coating, or pressing step.
QC acceptance limits should be defined before production starts
Quality control is most effective when the acceptance limits are agreed in advance. For canvas conference bags, the common failure points are seam strength, handle reinforcement, print registration, shade consistency, hardware alignment, and carton quality. A buyer should define which issues are critical failures and which are acceptable minor defects. If this is not written down, every inspection becomes a negotiation.
Good acceptance criteria are practical, not theoretical. For example, define a dimension tolerance band, define whether small thread ends are acceptable if trimmed, and define how far print placement can shift before it is rejected. If the order is large enough, ask for an AQL-based inspection or a similar sampling plan. Also require the factory to keep a reference pre-production sample at the line, because bulk operators need a visible standard during sewing and packing. That reduces variation and gives the inspector something concrete to compare against.
A useful defect framework for procurement looks like this: critical defects are safety or use failures, such as broken handles, missing hardware, or a zipper that does not function. Major defects are appearance or function problems that would cause a return or a customer complaint, such as misaligned print, open seams, or a badly distorted gusset. Minor defects are small cosmetic issues such as loose thread ends or slight shade differences that do not change use. Put those definitions in the PO or inspection brief, not in an email after production starts.
For a boutique program, the practical threshold should be tied to the product’s selling context. A low-price giveaway can tolerate a slightly broader cosmetic band than a premium retail bag. But even a low-price bag should not ship with broken reinforcement or a poor carton structure. Buyers should also ask the factory to show what rework is allowed and who pays if the bulk lot misses the approved sample. That is where QC becomes commercial discipline, not just inspection language.
- Write critical, major, and minor defect rules before the PO is issued.
- Use a dimensional tolerance band and a print-placement tolerance band.
- Require a bulk reference sample at the line so operators and inspectors use the same standard.
Specification comparison for buyers
| Spec decision | Typical unit cost band | MOQ / setup behavior | Freight and sample impact | Buyer decision rule |
|---|---|---|---|---|
| 10 oz flat canvas tote | about $1.20–$2.10 ex-factory at 1,000–5,000 pcs | Lowest sewing time and fabric usage; lower MOQs are easier, often around 500–1,000 pcs if artwork is simple | Lighter carton weight helps freight; sample-to-bulk delta is usually small unless the print is changed | Use only for light handouts or promo kits where structure is not part of the value proposition |
| 12 oz gusseted tote with reinforced handles | about $1.80–$3.40 ex-factory at 1,000–5,000 pcs | Common MOQ band is 500–1,000 pcs per color; setup cost is easiest to absorb at 1,000+ pcs | Freight rises modestly from added fabric and stitching; sample-to-bulk delta is often $25–$80 per design for swatches and proto samples | Default choice for boutique resale, gifting, and conference kits when the bag must look substantial without overspending |
| 14 oz structured tote with base or board | about $2.80–$5.20 ex-factory at 1,000–5,000 pcs | Often needs 1,000 pcs or more to keep the quote efficient; lower MOQs can add 10–25% to unit price | Heavier cartons raise ocean or air freight; sample revisions can cost more because structure and fit need extra rounds | Choose when the bag must carry heavier contents, stand upright, or support premium positioning |
| Screen print, 1 spot color | setup $35–$120 plus low variable cost at scale | Best absorbed at 1,000+ pcs; on 300–500 pcs the setup can add $0.12–$0.40 per bag | Sample print proof may add $20–$60, especially if color matching is required | Use when artwork is stable, the logo is simple, and repeat runs are expected |
| Screen print, 2 to 3 spot colors | setup $90–$240 plus moderate variable cost | Each added color raises setup and approval risk; small orders can see $0.20–$0.70 added per bag | Multiple color approvals can require extra strike-offs or proofing; freight is unchanged but delay risk rises | Use only if brand color fidelity matters enough to justify the complexity |
| Heat transfer or digital print | setup $20–$80 with higher per-piece cost | Can support 100–500 pcs, but cost per unit often jumps above screen print at 1,000 pcs | Sample-to-bulk delta is usually higher because durability must be tested on the actual cloth | Use for short runs, variable artwork, or fine detail that screen print cannot handle cleanly |
| Bulk carton pack | packing cost typically $0.03–$0.10 per bag | Lowest labor and material cost; easiest for factory throughput | Reduces carton volume and weight, which helps freight | Choose for wholesale, warehouse distribution, and cost-sensitive programs |
| Individual polybag plus barcode sticker | packing cost typically $0.08–$0.22 per bag | Adds labor and can trigger minimums for bag size, sticker type, or inserts | Raises carton volume and may increase air freight or dimensional weight | Choose only when retail presentation or scan-based receiving is required |
| Direct factory production | usually lowest controllable landed cost on repeat programs | More transparent MOQs and reorder pricing; sample charges are easier to validate | Better control of carton weights, materials, and freight assumptions | Preferred for repeat boutique programs and tighter QC ownership |
Buyer checklist before sampling
- Write the spec in finished measurements, not approximate size: width, height, gusset, handle length, handle drop, and acceptable tolerance.
- Lock fabric weight in oz or GSM and state whether the canvas is raw, dyed, washed, coated, pre-shrunk, or enzyme-washed.
- Define construction clearly: flat body, gusset, lining, zipper, snap, piping, base board, reinforcement patches, and label placement.
- State print requirements: method, number of colors, exact placement, Pantone references, print size, and whether the logo appears on one side or both sides.
- Set the commercial plan before quoting: target MOQ, first order quantity, reorder quantity, and whether multiple colors or sizes are allowed.
- Ask for a landed-cost quote that separates unit price, setup charges, accessories, packing, cartons, inland handling, and freight.
- Require a pre-production sample and a signed approval sheet for fabric shade, stitch quality, print registration, hardware alignment, and dimensions.
- Confirm packing counts per carton, carton dimensions, gross weight, and shipping marks before production starts.
- Agree on QC sampling rules, defect thresholds, and what happens if the bulk lot misses the approved sample.
- Ask for lead times separately for sample, bulk production, inspection, and export booking so the schedule is realistic.
Factory quote questions to send
- What is the exact finished fabric weight after dyeing, washing, coating, or pre-shrinking, and what tolerance do you allow per lot?
- Is the quote based on your own fabric stock, a mill purchase, or customer-provided fabric?
- Which print method is included, how many colors are covered, and what are the setup charges per color or screen?
- What is the MOQ by bag size, by color, and by print layout, and how does price change if we split the order?
- Which accessories are included in the unit price: zipper, snap, base board, lining, woven label, hangtag, or barcode sticker?
- What packing assumptions are built into the quote: bulk pack, polybag, insert card, carton count, and carton markings?
- What is the sample fee, and is it credited back against bulk if the order is placed?
- How many days are needed for sample making, bulk cutting, sewing, printing, final inspection, and carton packing?
- What QC standard do you use for seam strength, print alignment, shade variation, dimension tolerance, and carton drop risk?
- What freight term is quoted, and what cost items are excluded from your number so I can calculate landed cost accurately?
Quality-control points to confirm
- Measure the finished bag after pressing or washing, not only before finishing.
- Check fabric weight on finished material and verify that the lot matches the approved sample and target spec.
- Inspect handle attachments for bar-tacks, X-box reinforcement, thread trimming, and stitch consistency at high-stress points.
- Review print registration, ink coverage, edge crispness, and color match under consistent light; reject smearing or ghosting visible at normal retail distance.
- Open and close zippers or snaps repeatedly on the sample and on inspection lots to check alignment and smooth operation.
- Confirm that internal seams are neat, with no loose threads, skipped stitches, or puckering that affects appearance or strength.
- Verify carton count, carton dimensions, gross weight, shipping marks, and pallet or stack limits before dispatch.
- Use an AQL or equivalent sampling rule in the PO, and define which defects are critical, major, and minor before bulk starts.
- Require a random bulk pull to match the approved pre-production sample for shade, print location, hand feel, and construction details.