Start with the actual job the bag must do
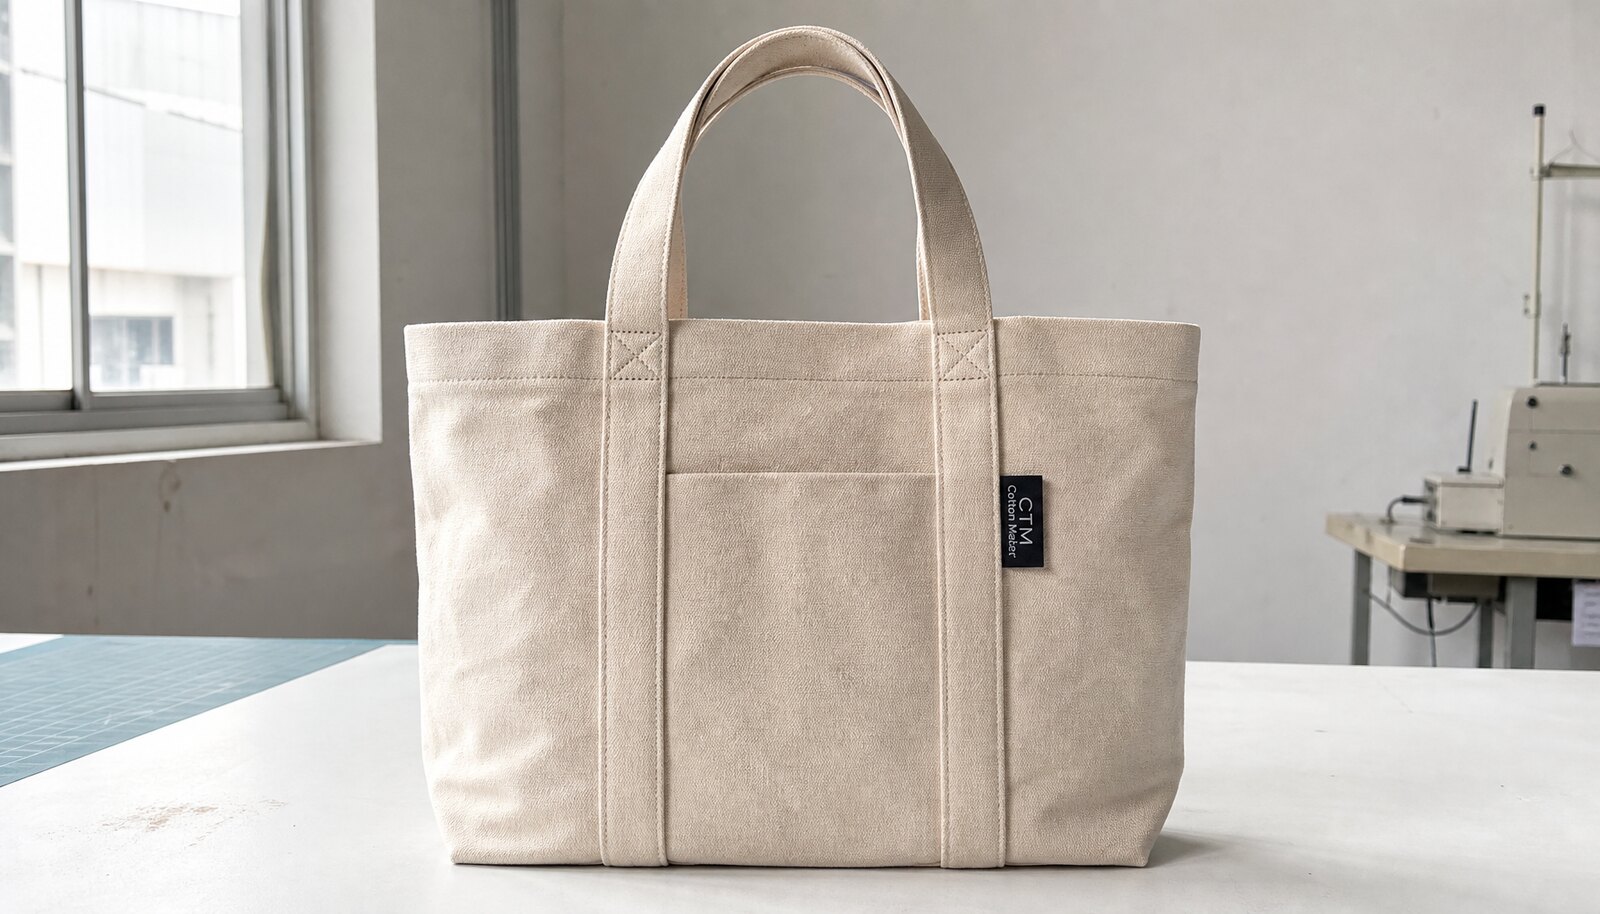
A canvas conference bag for an apparel brand is not just a tote with a logo. It is part of the brand handoff. In practice, it may carry lookbooks, line sheets, sample garments, swatches, pens, and launch materials into appointments, showroom visits, trade fairs, or wholesale meetings. That means the procurement question is not "what tote is cheapest?" It is "what bag survives the use case while still presenting the brand cleanly?"
The bag spec should start with the load and the audience. A press kit bag that carries brochures is a different build from a sales sample bag that holds folded garments and a binder. If you skip that distinction, buyers tend to overpay for fabric weight in one area and under-spec reinforcement in another. The useful result is a bag that looks fine in a render but fails when the first order is packed.
- Write the intended load into the spec, not just the product name.
- Define whether the bag is for one-time conference use or repeated showroom use.
- Match the build to the contents: flat literature, garment samples, or mixed kits.
- Treat handle strength and packing behavior as product requirements, not secondary details.
Lock the build spec before you compare price
Most price confusion starts with vague fabric language. "Heavy canvas" can mean very different things depending on the mill, finishing, and whether the supplier is quoting greige cloth, dyed cloth, or a pre-shrunk finished fabric. For procurement, the safer spec is the finished weight after finishing, plus the weave type and the finished dimensions. That combination gives you a realistic picture of hand feel, structure, and freight volume.
For apparel-brand conference bags, 12oz to 14oz is usually the practical middle ground when the bag needs to hold its shape without becoming unnecessarily heavy. Move heavier only when the bag is expected to be reused often or the brand explicitly wants a more substantial feel. The mistake is choosing weight in isolation. A dense weave with poor finishing can still shrink, skew, or print poorly, while a lighter but stable fabric can outperform a heavier one in actual use.
- Use finished GSM or ounce weight after finishing, not a vague fabric descriptor.
- Specify whether the fabric is dyed, enzyme-washed, pre-shrunk, or taken from stock.
- Define finished width, height, and gusset depth with a tolerance range.
- Set the handle width and handle drop in the spec so the bag sits correctly when loaded.
- Ask the supplier to confirm whether the canvas will soften, shrink, or skew after washing.
Compare supplier routes by control, not by headline price
A low unit price is not useful if the supplier route hides critical work. A direct factory usually gives the best visibility into fabric, sewing, print, and packing, which matters when the same bag must be repeated across seasons. The tradeoff is that the buyer needs a tighter spec sheet and a cleaner approval process. If the factory is real but the quote is sloppy, the buyer will still pay for the ambiguity later.
Trading companies, local decorators, and stock importers can all be valid routes. The issue is control. If a trading company is coordinating several vendors, the quote has to make clear who owns quality when the print is off, who approves the carton standard, and who pays for rework. If the order is a short-run pilot, a stock route may be fine. If the bag is part of a recurring apparel program, the route should support repeatability, not just speed.
- Direct factory: best for repeatability and full spec control.
- Trading company: workable if the factory identity, QC owner, and margin layers are transparent.
- Local decorator: useful for fast runs, but check blank quality and export packing.
- Stock importer: acceptable for pilot orders, but reorder consistency is the weak point.
- Dual-source programs need one master sample and identical inspection rules for both factories.
Treat logo production as a sourcing decision
The logo is usually the most visible quality signal on the bag, so the decoration method affects both cost and failure rate. Screen print is the common default for simple art because it gives strong coverage, clean edges, and predictable repeatability on canvas. Embroidery or a sewn patch can feel more premium, but the design must tolerate fabric texture, needle pull, and placement variation. A woven label can be a good choice when the bag needs subtle branding and the front panel must stay visually calm.
The quote should not just say "logo included." It should say how the logo is applied, where it is placed, what size it will be, how many colors are included, and how the color will be checked. That is the difference between a quote that can be compared and a quote that hides risk. If the supplier cannot name the process, they usually cannot control the process.
- For simple logos, screen print is usually the most controllable default.
- For premium branding, embroidery or a woven patch can work if the artwork is suitable.
- Specify logo size and placement in millimeters or centimeters, not "centered".
- Request a strike-off or sample print before bulk approval.
- Ask what curing, drying, or setting method is used and how it is verified.
Set enforceable QC rules, not vague inspection language
This is the section that matters most for procurement. If the QC rules are vague, the buyer cannot enforce them. A workable starting point is AQL 0 for critical defects, AQL 2.5 for major defects, and AQL 4.0 for minor defects at General Inspection Level II. If your brand standard is stricter, use that. What matters is that the rule is written before production and is visible to the factory, the merchandiser, and the inspector.
Critical defects should cover any failure that affects safety, function, or brand use: broken handles, open load-bearing seams, missing logos, or severe misprints that make the bag unsellable. Major defects cover clear visual or functional issues that would trigger buyer rejection in normal commercial use: crooked logo placement outside tolerance, visibly mismatched panels, broken bar-tacks, or serious stains. Minor defects are cosmetic issues that do not impair function, such as a few loose thread ends or very small fold marks, if your brand allows them.
- Critical: open seams, failed handles, missing or unreadable logo, severe panel damage.
- Major: logo outside placement tolerance, broken bar-tacks, visible stains, wrong size outside tolerance.
- Minor: loose threads, light fold creases, tiny print specks that do not affect appearance from normal viewing distance.
- Write the permitted tolerance in the PO so the factory can self-check before packing.
- Keep the golden sample beside the written spec and compare bulk goods against both.
Use measurement tolerances the factory can actually inspect
A buyer-friendly spec is measurable. For most canvas conference bags, finished width, height, and gusset tolerance can sit at +/-0.5 cm for smaller formats and +/-1.0 cm for larger formats, while handle drop should usually stay within +/-0.5 cm. Print placement is best controlled within +/-0.5 cm unless the artwork is intentionally loose or oversized. These numbers are not magic, but they are practical enough for a factory to inspect without guessing.
There is also a difference between a dimension that passes on paper and a dimension that works in use. A bag can hit width tolerance and still twist if the handle attachment is inconsistent or if one panel is cut off-grain. That is why a good inspection process checks both measurement and construction symmetry. If one side of the bag feels tighter, the fault may not show until the bag is loaded.
- Measure finished size on multiple pieces from different carton locations.
- Check handle length, handle drop, and handle attachment symmetry with the bag loaded.
- Confirm stitch density at the seams and bar-tacks matches the approved sample.
- Check both front and back panels for twist, skew, and panel mismatch.
- Reject any lot where the factory cannot explain how it controls measurement drift.
Test the bag like it will actually be used
Canvas conference bags fail in use, not in a catalog. The bag should be tested with a realistic load that matches the brand's contents. If the bag is meant to hold garment samples and a binder, use that load during sample approval and during pre-shipment inspection. Check whether the handles dig in, whether the seams creep, and whether the base sags enough to distort the shape. A bag that looks flat and polished when empty may be the wrong build once it is packed.
Print durability matters just as much. If the logo is screen printed, rub the sample by hand and inspect for smearing, cracking, or transfer. If the artwork is embroidery or a patch, inspect for thread pull, puckering, and edge lift. The right test does not need to be over-engineered; it needs to match the failure mode the brand is most likely to see after shipping, unpacking, and first use.
- Load-test the sample with the intended contents, not a generic weight guess.
- Check handle comfort and seam behavior while the bag is lifted and carried.
- Perform a simple rub or flex check on the logo area before bulk approval.
- Inspect for puckering, panel twist, or base sag once the bag is loaded.
- If the route includes metal trims, confirm any required chemical or corrosion standards.
Make packing, carton marks, and shipping behavior part of the product spec
A good bag can arrive looking bad if the packing is wrong. Face-to-face stacking can mark prints, over-compression can flatten embroidery, and poor folding can leave a permanent crease across the front panel. For apparel brands, the unboxing moment is part of the product experience, so packing is not just a logistics detail. It is a quality issue that should be in the PO.
The buyer should specify fold direction, whether tissue or a polybag is used, how many pieces go into each inner carton, and what the master carton marking format must include. If the route is long, humid, or transshipment-heavy, palletization can be worth the cost because it reduces compression and carton scuffing. The supplier should also confirm that the bag will not rub against unfinished edges or labels inside the carton.
- Define fold direction so the logo is not crushed against a seam or zipper.
- Use tissue or an insert when the print surface is likely to rub.
- Set the inner carton count to protect the bag shape, not just to reduce freight volume.
- Require lot code, item code, color, and quantity on outer cartons.
- Inspect cartons for compression, tears, corner crush, and label accuracy before release.
Read the quote and lead time as a process map
A real quote should let you compare suppliers on the same basis. If one supplier includes printing, packing, and cartons while another only quotes sewing, the numbers are not comparable. Break the quote into recurring unit cost and one-time setup cost. Then compare landed cost for the same destination, the same incoterms, and the same pack-out. That is the only way to see whether the apparent savings are real.
Lead time deserves the same discipline. The critical path is usually not sewing. It is sample approval, artwork alignment, fabric availability, and packaging confirmation. If a supplier gives a short lead time but cannot explain when the golden sample is approved, when artwork is frozen, and when final inspection occurs, the schedule is probably optimistic. For event-driven apparel programs, a late correction is expensive because it can miss the season entirely.
- Separate base bag cost, print or embroidery setup, packaging, sample cost, and freight.
- Ask whether plates, screens, digitizing, or carton printing are one-time or recurring.
- Confirm the exact incoterm and destination used in every quote.
- Freeze artwork and packing before bulk release.
- Reserve time for final inspection and rework, not just production.
Control the order with simple approval gates
The most reliable procurement flow is not complex. It is disciplined. The buyer should move from spec sheet to sample to golden sample to bulk approval, then to pre-shipment inspection and shipment release. Each stage should have one owner and one sign-off. If the factory changes fabric, print process, or packing after sample approval, that change should be re-approved, not quietly absorbed into production.
This matters because canvas conference bags are simple enough that factories often assume the buyer will not notice drift. The buyer usually notices only after the order arrives, when the handle length is different or the logo has shifted half a centimeter. A short approval gate at the right moment is cheaper than a dispute after shipping.
- Keep the final signed sample with the order file and the factory file.
- Do not accept unapproved changes to fabric, trim, print process, or carton spec.
- Request production photos at cutting, printing, sewing, and packing if the order is time sensitive.
- Use a pre-shipment inspection that checks both measurement and appearance.
- Hold shipment if the lot deviates from the golden sample or the written tolerance.
Specification comparison for buyers
| Supplier route | Best fit | Sample timing | Setup cost / print cost | Tests and compliance to ask for |
|---|---|---|---|---|
| Direct factory | Repeat programs with a controlled spec and a need to lock fabric, sewing, print, and packing at the source | First sample often 5-10 days if fabric and artwork are ready; longer if dyeing or custom trims are needed | Usually the clearest breakdown; ask whether logo setup, plates, or embroidery digitizing are one-time or recurring | Ask for fabric weight proof, seam check, print rub check, and any destination-market chemical paperwork such as REACH, UK REACH, CPSIA, or buyer RSL if applicable |
| Trading company | Programs where one contact needs to coordinate bag, print, cartons, and accessories across several vendors | Sample speed depends on the factory behind the trade company, so confirm the real source before you commit | Often includes margin layers that are hidden inside the unit price; ask for line-item separation | Request the factory name, test history, and who signs off on pre-shipment inspection |
| Local decorator / print shop | Fast domestic turns, event launches, or short-run test campaigns with simple branding | Usually the fastest route for artwork proofing and sample turnaround | Setup can be low for simple print, but fabric options are usually limited to available blanks | Confirm blank bag origin, print durability, and whether packing protects the logo during transit |
| Stock importer with logo application | Urgent launches when size and color options can stay fixed | Sample timing is short because the base bag already exists | Low setup if the logo is applied to stock; color matching and special pack-outs may add cost | Check stock age, lot consistency, and print adhesion on the actual inventory lot |
| In-house print / embroidery factory | Premium branding when the buyer wants fewer handoffs and better control over logo quality | Sample timing is moderate if the decorator has the right base bag in hand | Setup can be meaningful for embroidery digitizing or multi-color screens, but the result is usually more repeatable | Ask for stitch density, backing method, and a wash or rub check on the logo area |
| Dual-source program | Seasonal apparel programs that need a backup factory and a locked reference standard | Sampling takes longer because the second supplier must match the master sample | Setup is usually duplicated; the buyer should expect to pay for alignment work on both sides | Keep one master sample, one spec sheet, and identical inspection criteria for both suppliers |
| Overseas warehouse replenishment | Regular conference or showroom use when the buyer needs short dispatch time after the first build | Sample timing is not the issue; inventory validation is | Logo setup may be amortized into earlier runs, but storage and lot mixing need to be priced | Ask for storage conditions, carton labels, and FIFO controls |
| Apparel supplier add-on program | When the brand already buys garments from the same mill or factory network and wants freight consolidation | Can be efficient if the textile supply chain is already established | Setup can be attractive if fabric and logistics are shared, but do not assume bag QC is equivalent to garment QC | Demand the same QC evidence you would require for a standalone bag order |
| Low-MOQ pilot with a standard base bag | Market testing, distributor samples, or an early sales kit when speed matters more than perfect customization | Fastest if the bag is a stock base with logo application only | Setup is usually lowest, but the spec must clearly separate stock components from custom work | Confirm what is fixed stock and what is custom so reorders do not surprise the buyer |
Buyer checklist before sampling
- The PO states finished width, height, gusset depth, handle length, and the allowed tolerance for each dimension.
- The fabric spec names finished GSM or ounce weight after finishing, not just "canvas" or "heavy canvas".
- The logo method, artwork size, placement, Pantone target, and curing or setting method are locked before bulk.
- A signed golden sample, a measured spec sheet, and the approved artwork file are attached to the order record.
- The quotation separates unit price, sample cost, setup or plate cost, packaging, carton printing, and freight assumptions.
- The inspection plan defines critical, major, and minor defects before production starts, including the AQL level.
- Seam reinforcement, bar-tack locations, and stitch density at load-bearing points are written into the spec.
- Packing instructions define fold direction, tissue or polybag use, inner carton count, and master carton marks.
- The supplier confirms whether any print, embroidery, or packing work is subcontracted.
- Incoterms, destination, and currency assumptions are the same across all supplier quotes.
Factory quote questions to send
- What is the finished fabric weight after washing or finishing, and how is it measured?
- Is the base cloth dyed, greige, pre-shrunk, enzyme-washed, or taken from stock inventory?
- What are the exact finished dimensions, gusset depth, handle length, and handle drop with tolerance?
- Which print or decoration method will you use, and is that process in-house or subcontracted?
- How many logo colors are included, and what one-time setup, plate, or digitizing fees apply?
- What is the MOQ by size, fabric color, and print position?
- What sample stages are included before bulk, and will you keep one signed golden sample on file?
- What is the stitch density on seams and bar-tacks, and where is reinforcement added?
- Which defects are critical, major, and minor in your internal QC standard, and what AQL do you inspect to?
- What packing method is included per piece, inner carton, and master carton, and who approves carton marks?
Quality-control points to confirm
- Use AQL 0 for critical defects, AQL 2.5 for major defects, and AQL 4.0 for minor defects at General Inspection Level II, unless your buyer standard is stricter.
- Finished dimensions should stay within +/-0.5 cm for smaller bags and +/-1.0 cm for larger bags; handle drop should stay within +/-0.5 cm.
- Logo placement should stay within +/-0.5 cm of the approved position unless the artwork requires a tighter tolerance.
- No open seams, missing stitches at load-bearing points, or failed bar-tacks are allowed.
- No stain, oil mark, needle hole damage, fabric pull, or visible weave break should appear on exposed panels.
- Print should be centered, fully opaque, and aligned to the approved strike-off, with no visible cracking, peeling, or severe rub-off after a simple flex or rub check.
- Thread ends, small fold creases, or minor tonal variation are only acceptable if they do not affect function, branding, or pack-out presentation.
- A loaded bag should hold the intended weight without handle slippage, seam creep, or panel distortion.
- Carton count, lot code, and outer marks should match the packing list exactly.
- Any deviation from the golden sample should be recorded and signed off before bulk shipment.